Home > Customized

Looking to Create Beachy Waves. Find the Best Curling Wand Here

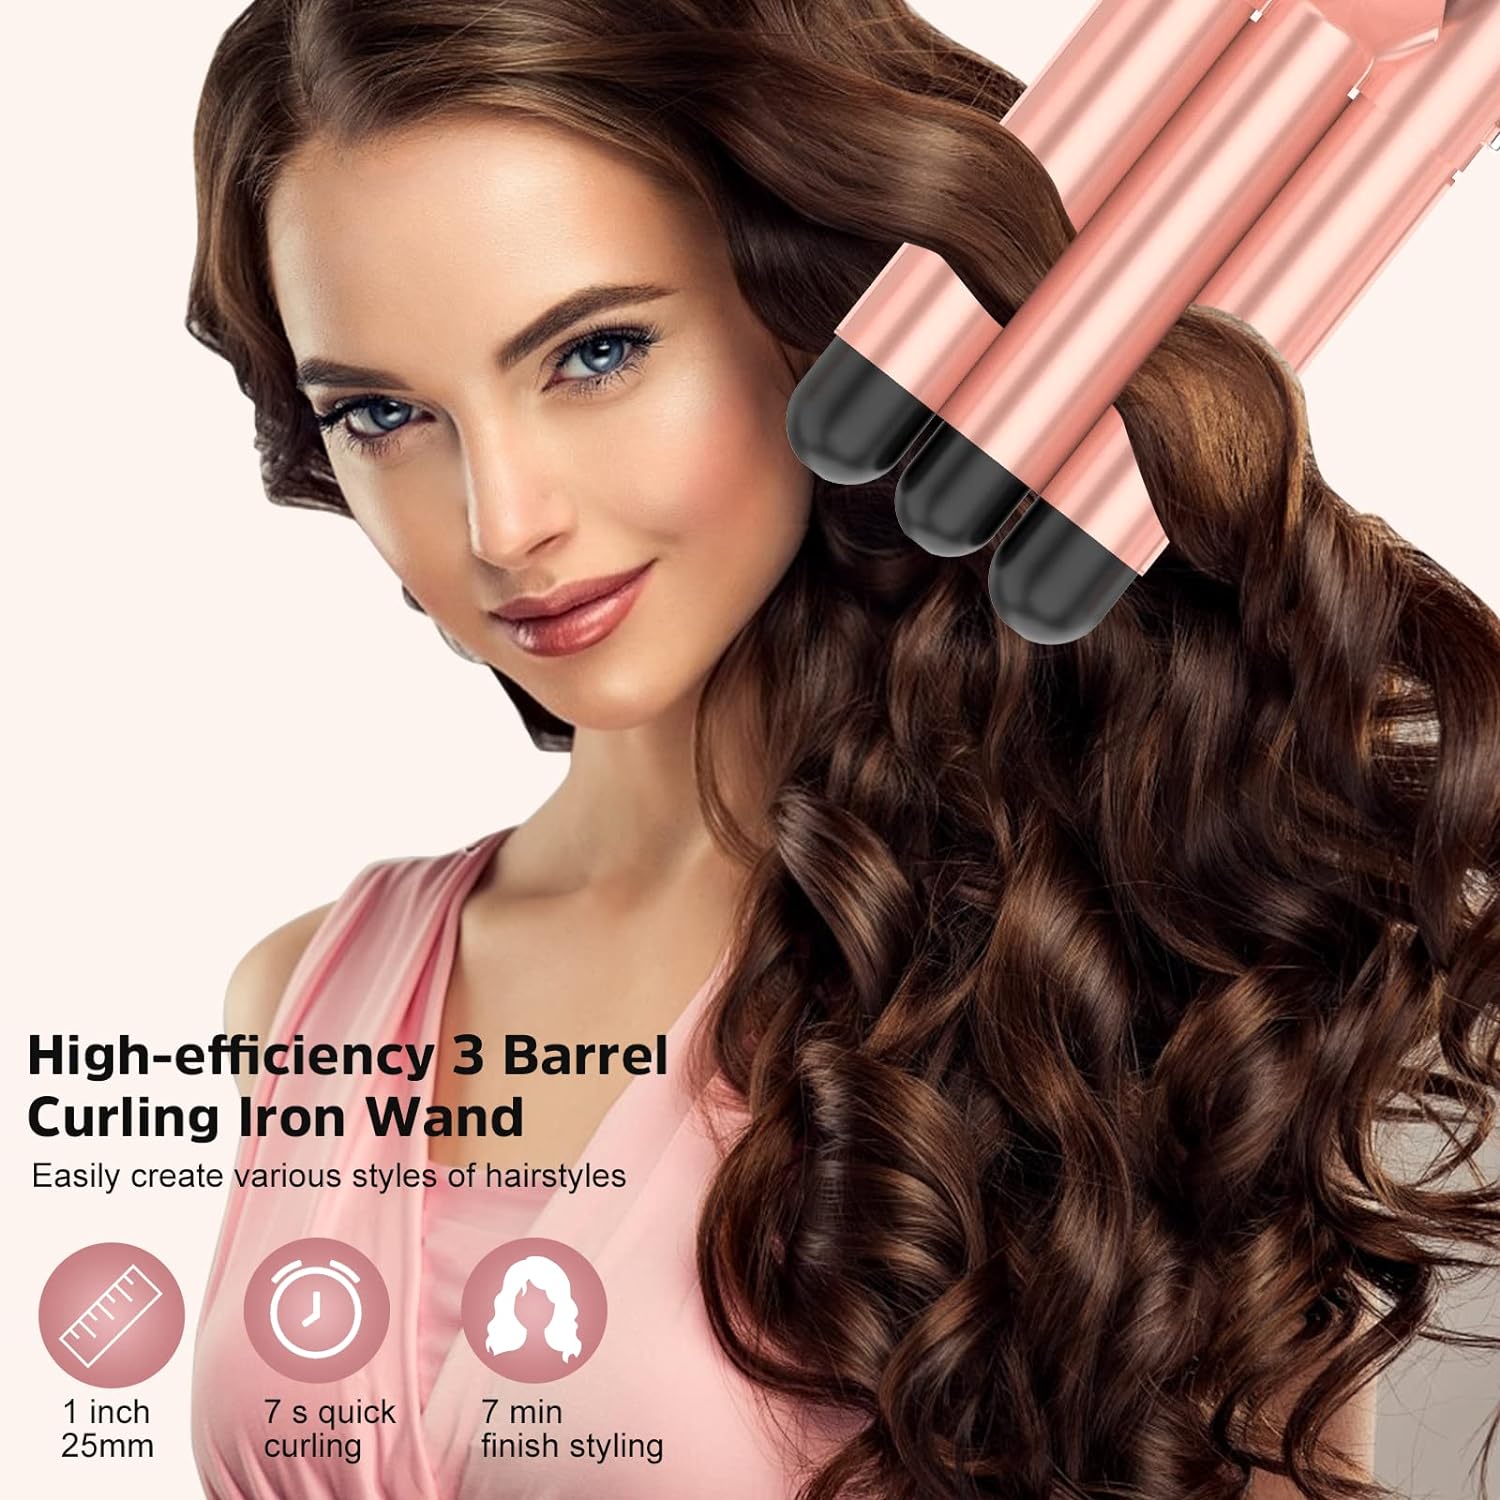
What is an Ondule Curling Wand and Why Use It?

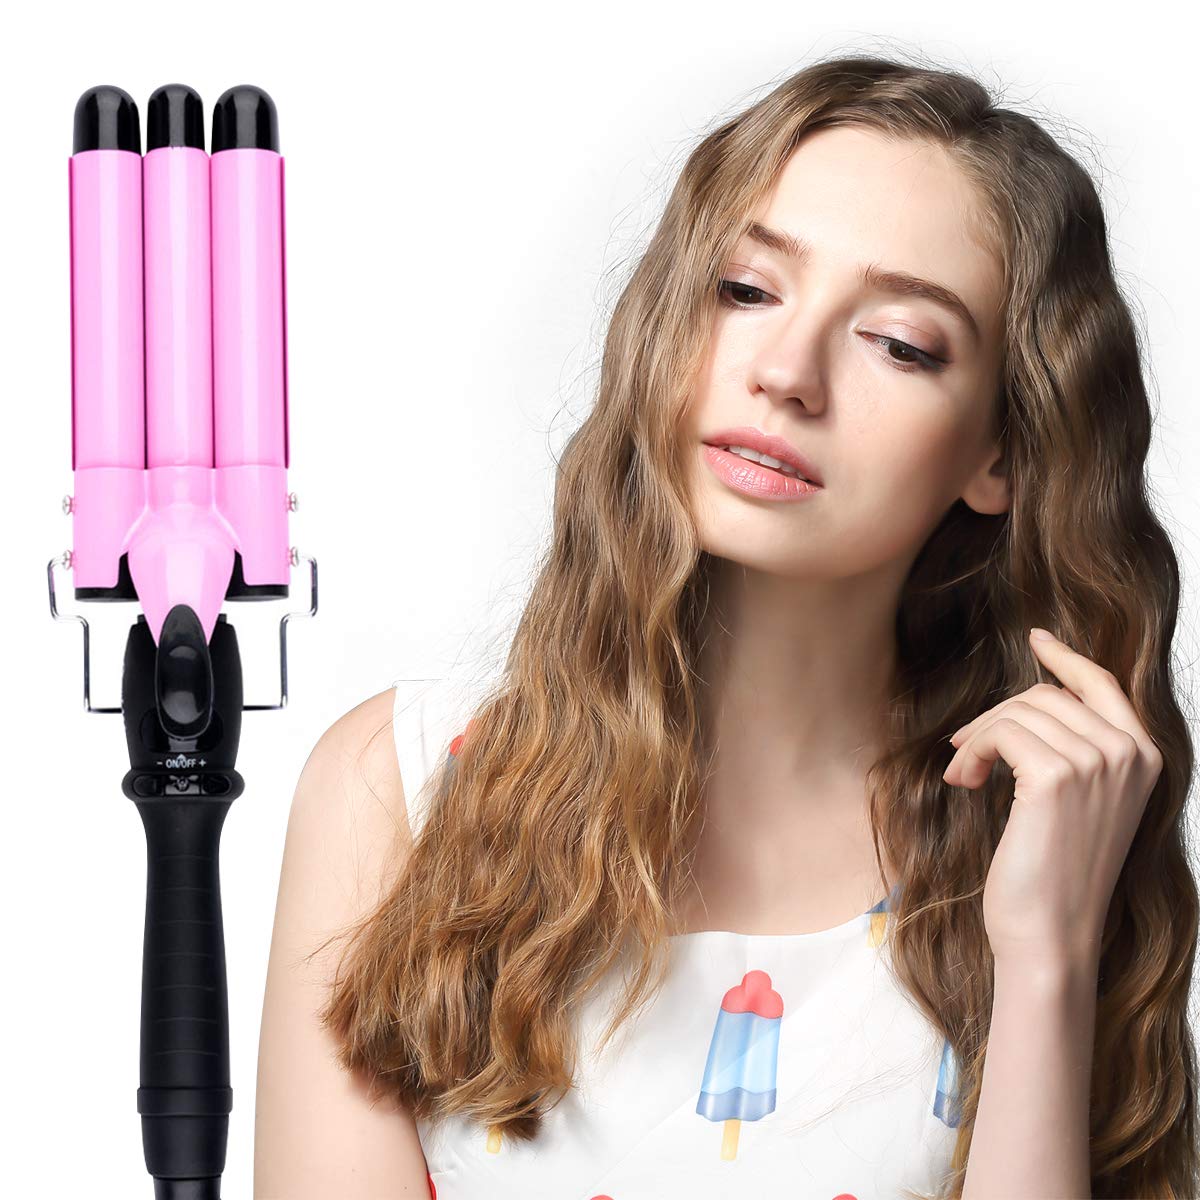
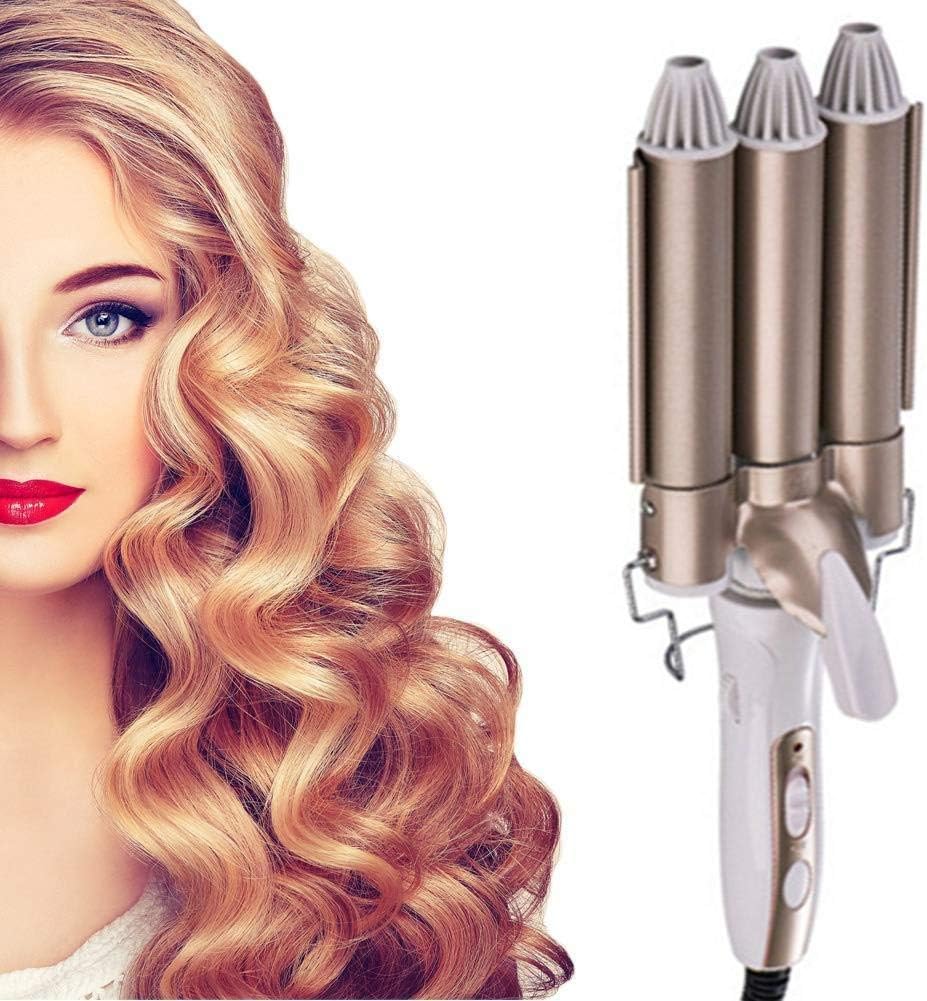
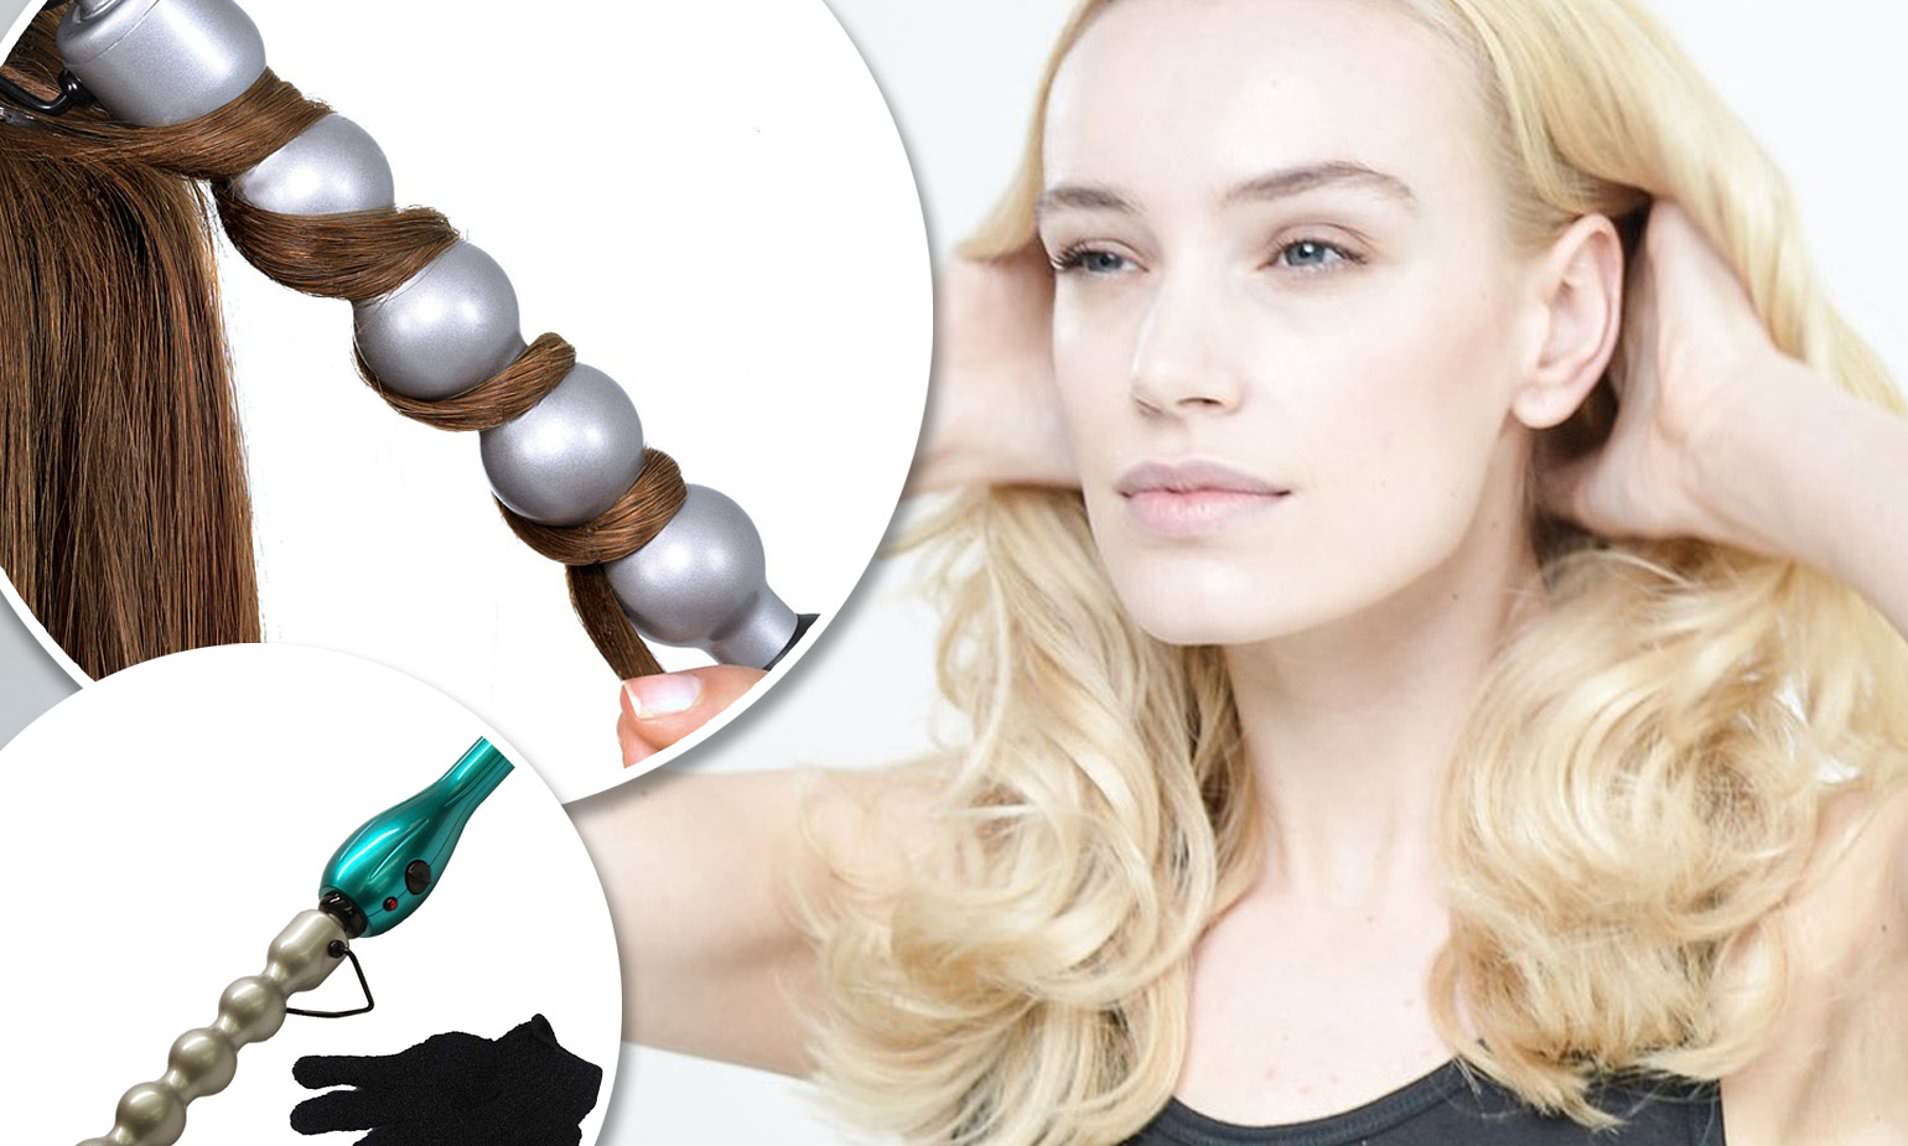
An ondule curling wand is a specific type of curling iron that creates beachy, textured waves and curls. The barrel of an ondule curling wand has a grooved or ribbed surface rather than being smooth. This unique design is what gives the waves their undone, imperfect look.

Ondule curling wands have become a popular styling tool for creating effortlessly tousled hair. The ribs on the barrel grab and hold the hair as it’s wrapped around, resulting in textured, crimped curls rather than smooth, spiraled ones. The waves have much more body and movement compared to curls from a traditional curling iron.

There are several benefits to using an ondule curling wand:

  • Creates beachy, imperfect waves – The ribbed barrel gives hair a natural, wavy texture.
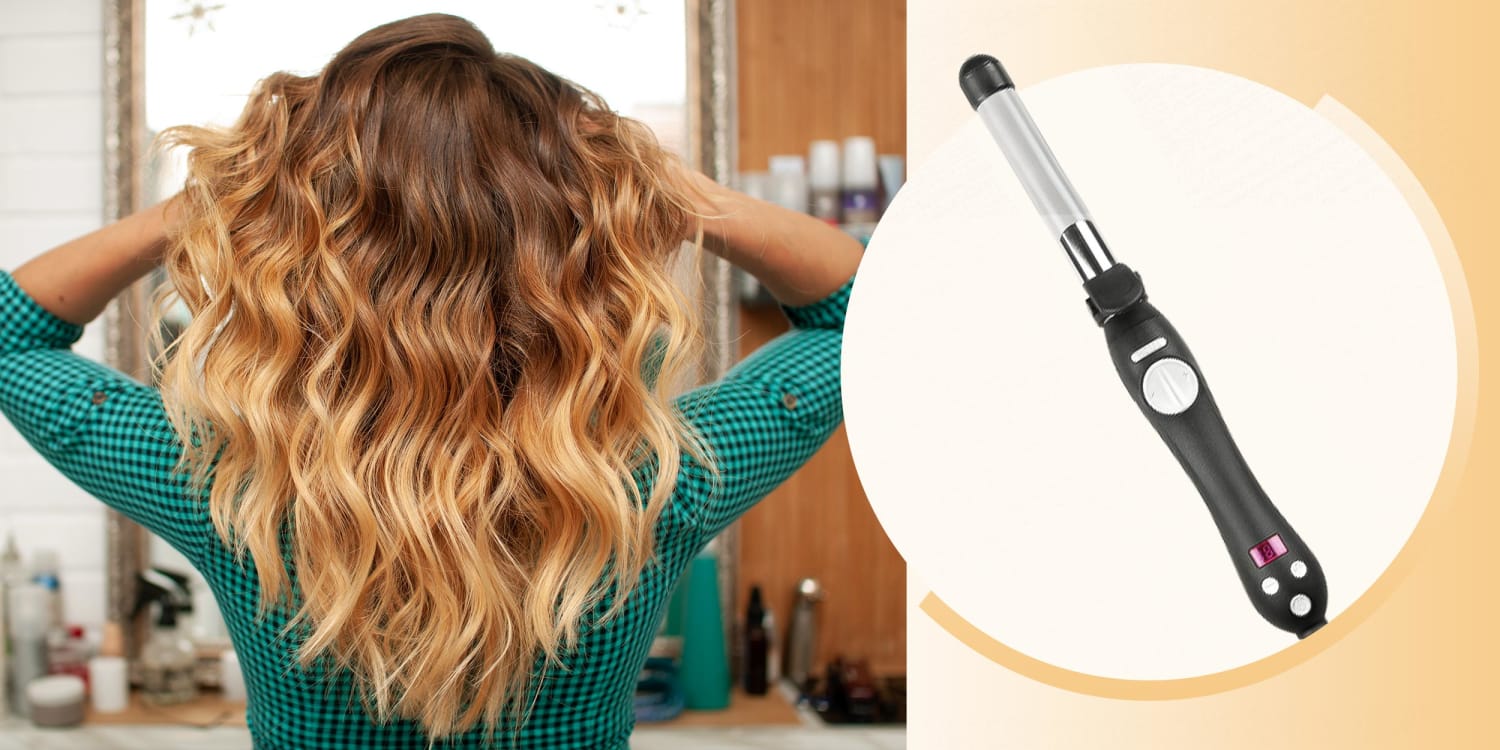
  • Long-lasting curls – The crimped curls hold their shape longer than smooth curls.
  • Volume and body – The textured waves have more fullness and bounce.
  • Quick and easy styling – Ondule wands are fast for curling large sections of hair.
  • Less damage – The grooves produce curls with less heat damage than traditional curling irons.

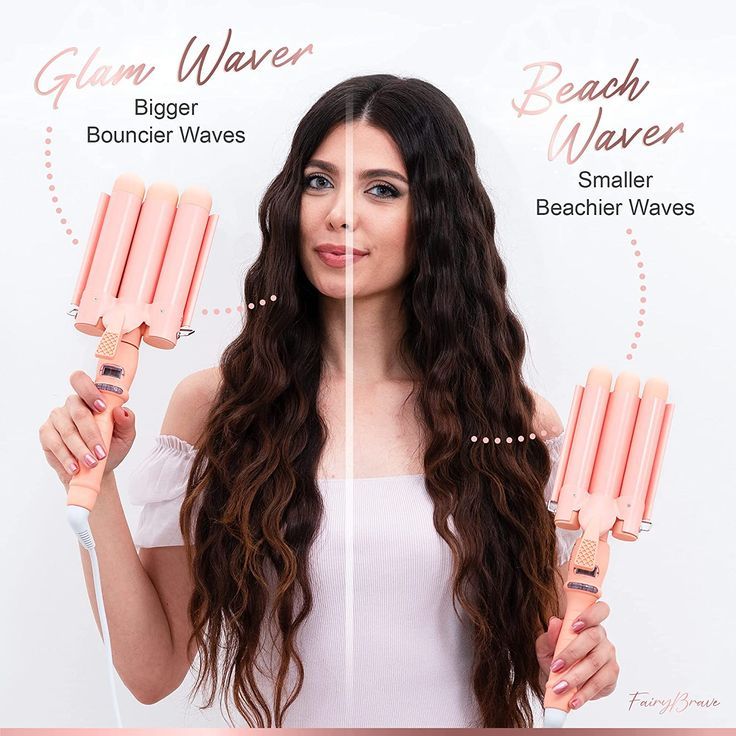
The ondulated waves generated by these curling wands have an effortlessly chic, relaxed vibe perfect for a beach vacation or summer festival. The textured curls also give hair lots of volume and body for fuller, bouncier locks. Many ondule wands have large barrels over 1 inch wide that can curl large sections of hair quickly.

How to Use an Ondule Curling Wand

Looking to Create Beachy Waves. Find the Best Curling Wand Here

Using an ondule curling wand is simple once you get the technique down. Follow these steps:

  1. Start with clean, dry hair. Apply a heat protectant spray to help prevent damage and boost shine.
  2. Section hair out starting at the bottom. Take 1-2 inch wide sections for the most defined waves.
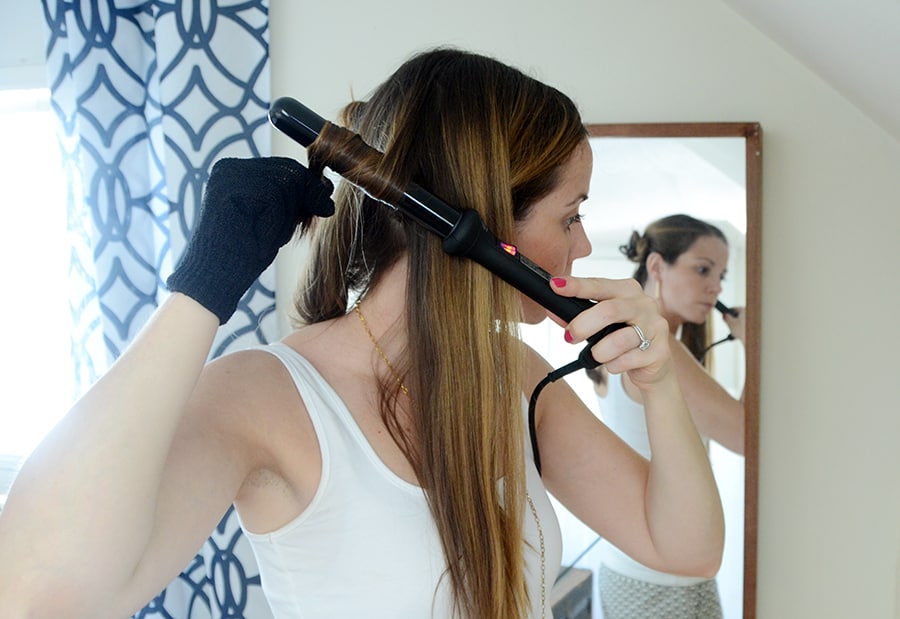
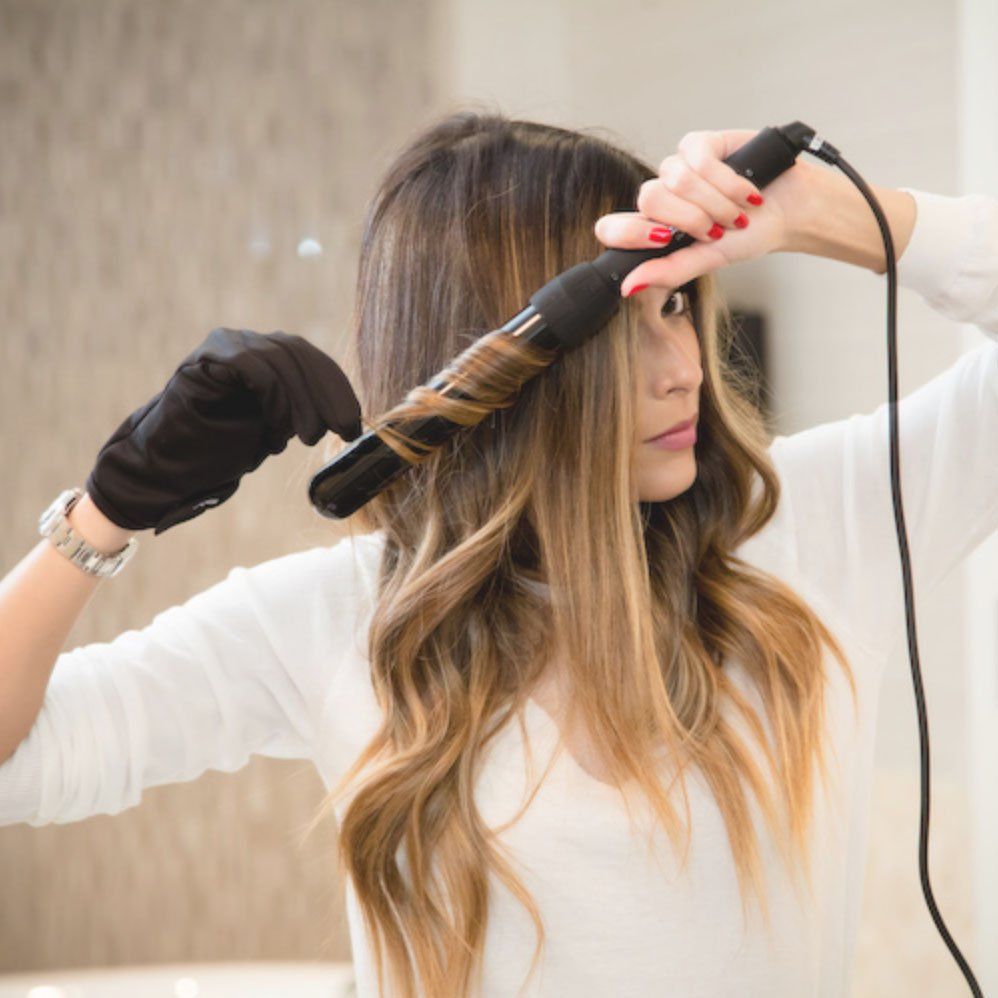
  3. Clamp the section at the base of the wand with the ribs facing out. This creates the grooved texture.
  4. In a spiral motion, wrap hair around the barrel toward your head.
  5. Hold for 5-10 seconds then gently slide off the wand. The section should have deep crimps from the barrel ribs.
  6. Let the curl cool completely before releasing or pinning it in place. This sets the textured shape.
  7. Work your way up each section until all hair is waved. Finish with a texture spray for extra hold.

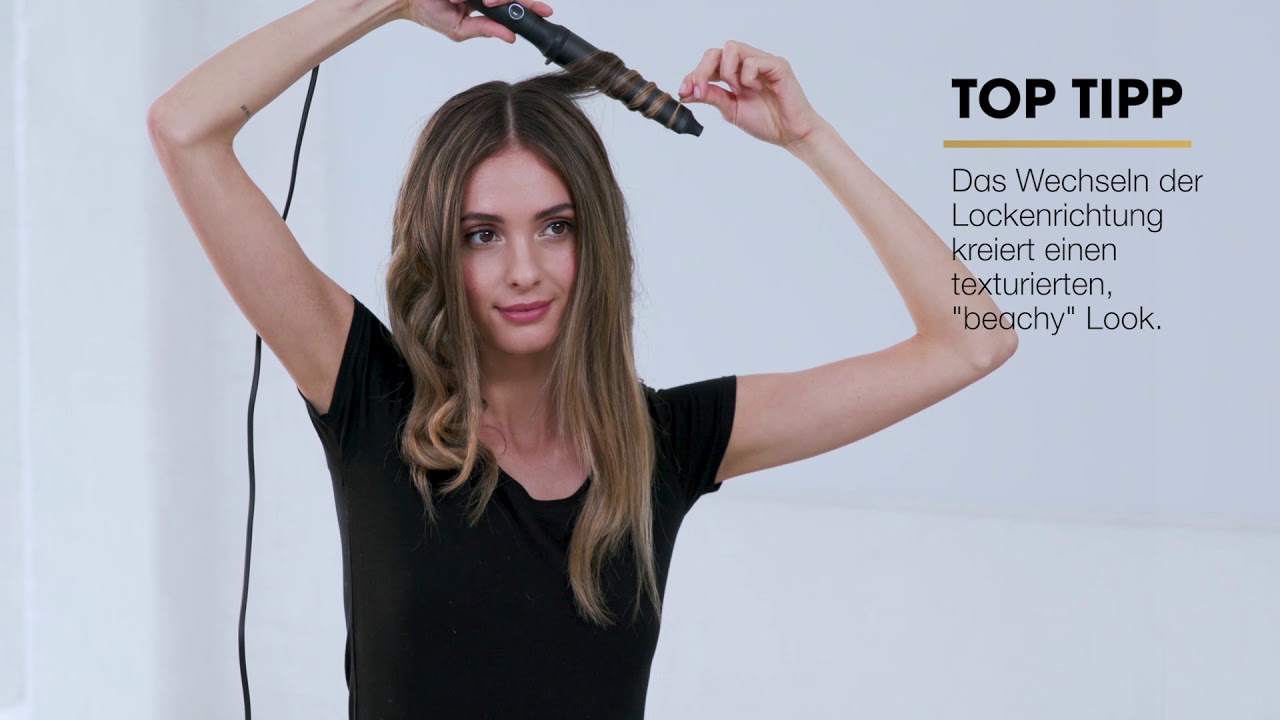
When curling, alternate the wand direction from left to right and right to left as you work around the head. This will give you multidimensional waves rather than all going the same way. Always wrap hair around the wand away from your face so the crimped section curves back rather than falling forward.

Be very careful not to wrap any strands around the clip, as this can cause tangling and breakage. The wand clip is only meant to section off hair at the base, not wrap around the barrel. Also be cautious of the ridges getting tangled in delicate or fine hair. For extra protection, use a thermal glove and apply argan oil before styling.

Choosing the Best Ondule Curling Wand

Looking to Create Beachy Waves. Find the Best Curling Wand Here

When shopping for the best ondule curling wand, keep these features in mind:

  • Barrel size – A 1 to 1 1/4 inch barrel will create loose, beachy waves in medium to long hair. Go smaller for tighter curls or larger for looser waves.
  • Temperature settings – Look for multiple heat settings up to at least 400°F. This allows you to customize the curl hold and reduce damage on fine hair.
  • Barrel material – Tourmaline ceramic and titanium barrels distribute even heat and cause less damage.
  • Rotating cord – A wand with a rotating power cord prevents tangling as you curl different sections.
  • Auto shut-off – This safety feature turns the wand off after a period of inactivity to prevent fires.

High-end ondule curling wands from brand names like Lange and Bio Ionic can run $100 and up. But you can find more affordable options between $20 to $60 from Remington, Conair, Revlon, and other drugstore brands. Look for ones with multiple heat settings, a rotating power cord, and at least a 1-inch tourmaline ceramic barrel.

The Lange ondule curling wand is a top rated option that generates beautiful beachy waves. The 1.25 inch barrel has deep ridges that infuse texture and volume into hair. With 8 heat settings up to 410°F, you can customize the amount of curl while reducing damage on fragile hair. Reviewers love how quickly it styles while leaving hair soft and shiny.

Looking to Create Beachy Waves? Find the Best Curling Wand Here:

Summer is all about effortless, beach-inspired waves. The right curling wand makes it easy to get that fresh-from-the-ocean look wherever you are. After lots of testing, I’ve rounded up the top 3 curling wands for creating perfect beachy waves at home.

I looked at factors like the barrel size and material, heat settings, ease of use, price and customer reviews to pick ones that won’t damage hair. These top-rated curling wands give you beautiful, natural-looking waves that actually last!

1. Bed Head A-Wave-We-Go – Best for Loose Waves

The Bed Head A-Wave-We-Go wand is designed specifically for loose, beachy waves. The extra large 1.75 inch tourmaline ceramic barrel adds volume and shine as it gently curls large sections of hair.

It heats up to 400°F with multiple settings to customize the wave size and reduce damage on fine hair. The cool tip and auto-shut off provide protection from burns and fires. Reviewers say it’s their holy grail for relaxed, effortless waves!

2. Hot Tools Professional – Best for Long Hair

Looking to Create Beachy Waves. Find the Best Curling Wand Here

The extra long barrel on this Hot Tools curling wand makes quick work of long, thick hair. The 1 inch tourmaline ceramic barrel hydrates and nourishes hair while creating frizz-free waves.

An 8ft swivel cord rotates to prevent tangling and burns. Plus it reheats in seconds to maintain a constant temperature as you style. Even with the fast heat-up, the cool tip prevents frustrating burns which is a problem many testers had with other wands. Perfect results in half the time!

3. Remington Curling Wand – Most Affordable

For beautiful beach waves on a budget, Remington’s 1″ curling wand is tough to beat. The anti-static pearlescent barrel glides smoothly through hair while preventing frizz. And the 410°F high heat and 30-second fast heat-up deliver long-lasting curls quickly.

The wand features a cool safety tip, auto shut-off and salon-length power cord. Reviewers are blown away by the shine and bounce their waves have with no crispy ends or burn marks. At under $20, it’s the perfect way to get beach hair without spending a ton.

Headed on a tropical getaway or just want to rock beach waves everyday? Try one of these top-rated curling wands for flawless results. Your new favorite styling tool is just a few clicks away!

Top Benefits of Using an Ondule Curling Iron

Looking to Create Beachy Waves. Find the Best Curling Wand Here

An ondule curling iron is designed with ridges or grooves on the barrel to create textured, beachy looking waves. This innovative tool is becoming a must-have for fashionistas wanting to emulate effortless, coastal hair styles.

But why choose an ondule curling iron over a traditional smooth barrel curling wand? Here are the top reasons to make the switch:

Natural-Looking Waves

The ribbed barrel of an ondule curling iron produces waves more akin to natural curls and beachy textures. Rather than spiraled curls, you get textured, crimped strands creating an imperfect, wavy pattern.

These tousled waves have movement and flow that mimic ocean hair or air-dried locks. The ribs grab and curl the hair rather than smoothly wrapping it, resulting in a relaxed, beach-inspired style.

Added Volume

The crimped texture generated by an ondule curling iron also boosts volume and body. Each wave has more fullness and lift compared to polished curls from a traditional iron.

The ribbed barrel essentially crimps and shapes the hair while adding bulk. So you get luscious waves with extra oomph and bounce. No more flat, limp hair when you use an ondule curling wand!

Longer Lasting Waves

Another perk of using an ondule curling wand is extended curl longevity. The textured crimps grip the hair and hold the shape better compared to smooth curls.

Rather than falling flat, your beachy waves will maintain their body and definition for days. The ribbed texture provides lasting support for bouncy, carefree locks that look like you just stepped off the beach.

Minimized Hair Damage

While any hot tool can damage hair if used improperly, ondule curling irons tend to cause less breakage and frizz. The ribs minimize contact between the hair strands and the hot surface.

This decreases exposure to high heat over extended time periods. The result is textured waves with less drying, cracking or other thermal damage. Always use a heat protectant spray for extra protection and shine.

Quick Styling of Large Sections

Ondule curling irons with a large barrel width can curl big sections of hair at once. This enables faster styling compared to wrapping narrow segments of hair around a traditional skinny curling wand.

Wands with a barrel over 1 inch in diameter are ideal for quickly waving large portions of long, thick hair. Wide barrels get the job done fast while creating loose, beachy textures.

Fun Beach Hair Anywhere

Looking to Create Beachy Waves. Find the Best Curling Wand Here

One of the best benefits of ondule curling wands is the ability to create beachy hair anywhere. You can emulate the look of oceanfront waves whether you’re in the city or the suburbs.

These tools make it easy to get playful, carefree styles full of texture and volume without compromising the health of your hair. Bring the relaxed vibe of the coastline with you wherever you go!

If a breezy, beach-inspired mane is your goal, an ondule curling iron is a must-have. The innovative grooved barrels generate natural-looking waves, volume and shine with less potential for heat damage. Get ready to wow with gorgeous coastal locks all year long!

Looking to Create Beachy Waves? Find the Best Curling Wand Here:

Summer is all about effortless, beach-inspired waves. The right curling wand makes it easy to get that fresh-from-the-ocean look wherever you are. After lots of testing, I’ve rounded up the top 3 curling wands for creating perfect beachy waves at home.

I looked at factors like the barrel size and material, heat settings, ease of use, price and customer reviews to pick ones that won’t damage hair. These top-rated curling wands give you beautiful, natural-looking waves that actually last!

1. Bed Head A-Wave-We-Go – Best for Loose Waves

Looking to Create Beachy Waves. Find the Best Curling Wand Here

The Bed Head A-Wave-We-Go wand is designed specifically for loose, beachy waves. The extra large 1.75 inch tourmaline ceramic barrel adds volume and shine as it gently curls large sections of hair.

It heats up to 400°F with multiple settings to customize the wave size and reduce damage on fine hair. The cool tip and auto-shut off provide protection from burns and fires. Reviewers say it’s their holy grail for relaxed, effortless waves!

2. Hot Tools Professional – Best for Long Hair

The extra long barrel on this Hot Tools curling wand makes quick work of long, thick hair. The 1 inch tourmaline ceramic barrel hydrates and nourishes hair while creating frizz-free waves.

An 8ft swivel cord rotates to prevent tangling and burns. Plus it reheats in seconds to maintain a constant temperature as you style. Even with the fast heat-up, the cool tip prevents frustrating burns which is a problem many testers had with other wands. Perfect results in half the time!

3. Remington Curling Wand – Most Affordable

For beautiful beach waves on a budget, Remington’s 1″ curling wand is tough to beat. The anti-static pearlescent barrel glides smoothly through hair while preventing frizz. And the 410°F high heat and 30-second fast heat-up deliver long-lasting curls quickly.

The wand features a cool safety tip, auto shut-off and salon-length power cord. Reviewers are blown away by the shine and bounce their waves have with no crispy ends or burn marks. At under $20, it’s the perfect way to get beach hair without spending a ton.

Headed on a tropical getaway or just want to rock beach waves everyday? Try one of these top-rated curling wands for flawless results. Your new favorite styling tool is just a few clicks away!

How Does an Ondule Wand Create That Perfect Beach Wave?

Gorgeous, tousled beach waves are the epitome of cool, relaxed hair. But you don’t have to live seaside to get the look. Ondule curling wands are specially designed to create textured, beachy curls no matter where you are.

So how does an ondule curling wand impart that breezy, coastal texture into your locks? It comes down to the unique ridged or grooved barrel.

The Ribbed Barrel is Key

Looking to Create Beachy Waves. Find the Best Curling Wand Here

Unlike traditional curling irons with a smooth barrel, an ondule wand has ridges or grooves running across the surface. These ribs are the secret to perfect beach waves.

As you wrap a section of hair around the ondule barrel, the ridges produce kinks and curves rather than spiraled curls. This imparts a textured, crimped pattern into the strand for loose, imperfect waves.

The ribbed grip essentially “crinkles” the hair into natural, wavy shapes rather than smoothly curling it. The result is beautiful definition and movement with tons of volume.

It Grabs and Holds Hair

Another benefit of the ridged ondule barrel is that it grabs and holds hair in place as it curls. The grooves act like little fingers that cling to tresses and set the wave.

This allows the hair to really take on the wavy shape rather than just sliding off a smooth surface. The ribs give curls staying power for bounce that lasts days rather than falling flat.

Minimizes Hair Damage

Looking to Create Beachy Waves. Find the Best Curling Wand Here

Surprisingly, the ribbed barrel also minimizes exposure to high heat. The ridges reduce surface contact between the hot barrel and hair strands.

This decreases the risk of heat damage from prolonged direct contact. Hair glides over the grooves rather than being pressed against a hot solid wand. You get beautiful texture with less drying and breakage.

The Wider the Barrel, the Beachier the Wave

An ondule wand with a wide barrel over 1 inch creates the ultimate beachy waves. The large barrel evenly distributes heat and curls big sections of hair quickly.

This makes styling faster while minimizing passes and damage. The larger the barrel diameter, the looser and more relaxed the waves will be. Wider barrels yield that perfect just-out-of-the-ocean look.

Alternate Wrapping Directions

When curling with an ondule iron, be sure to alternate the wrapping direction – away from your face on one side and towards your face on the other.

This creates multidimensional, beachy texture rather than uniform curls all going the same way. Mix it up for depth and natural movement.

Enhance Waves with Sea Salt Spray

After using an ondule curling wand, enhance your beachy waves with sea salt spray. This texturizing product builds grit and volume like ocean surf for super sexy, windswept locks.

Mist midshaft to ends on dry, curled hair and scrunch up the waves. Let air dry or diffuse for maximum texture and bounce. Hello shoreline goddess!

With the right techniques, an ondule curling iron makes salon-worthy beach waves easy and fast. The ribbed barrel does all the work to imprint natural texture, body and flow – no ocean required!

Looking to Create Beachy Waves? Find the Best Curling Wand Here:

Summer is all about effortless, beach-inspired waves. The right curling wand makes it easy to get that fresh-from-the-ocean look wherever you are. After lots of testing, I’ve rounded up the top 3 curling wands for creating perfect beachy waves at home.

I looked at factors like the barrel size and material, heat settings, ease of use, price and customer reviews to pick ones that won’t damage hair. These top-rated curling wands give you beautiful, natural-looking waves that actually last!

1. Bed Head A-Wave-We-Go – Best for Loose Waves

Looking to Create Beachy Waves. Find the Best Curling Wand Here

The Bed Head A-Wave-We-Go wand is designed specifically for loose, beachy waves. The extra large 1.75 inch tourmaline ceramic barrel adds volume and shine as it gently curls large sections of hair.

It heats up to 400°F with multiple settings to customize the wave size and reduce damage on fine hair. The cool tip and auto-shut off provide protection from burns and fires. Reviewers say it’s their holy grail for relaxed, effortless waves!

2. Hot Tools Professional – Best for Long Hair

The extra long barrel on this Hot Tools curling wand makes quick work of long, thick hair. The 1 inch tourmaline ceramic barrel hydrates and nourishes hair while creating frizz-free waves.

An 8ft swivel cord rotates to prevent tangling and burns. Plus it reheats in seconds to maintain a constant temperature as you style. Even with the fast heat-up, the cool tip prevents frustrating burns which is a problem many testers had with other wands. Perfect results in half the time!

3. Remington Curling Wand – Most Affordable

Looking to Create Beachy Waves. Find the Best Curling Wand Here

For beautiful beach waves on a budget, Remington’s 1″ curling wand is tough to beat. The anti-static pearlescent barrel glides smoothly through hair while preventing frizz. And the 410°F high heat and 30-second fast heat-up deliver long-lasting curls quickly.

The wand features a cool safety tip, auto shut-off and salon-length power cord. Reviewers are blown away by the shine and bounce their waves have with no crispy ends or burn marks. At under $20, it’s the perfect way to get beach hair without spending a ton.

Headed on a tropical getaway or just want to rock beach waves everyday? Try one of these top-rated curling wands for flawless results. Your new favorite styling tool is just a few clicks away!

What is the Lange Ondule Curling Wand?

The Lange ondule curling wand is a top-rated styling tool designed to create gorgeous, beach-inspired waves. This innovative curling iron features a ribbed barrel that imparts natural texture and volume for carefree, wavy locks.

Keep reading to learn all about the features and benefits of the Lange ondule curling wand!

The Grooved Barrel

The signature characteristic of the Lange ondule curling wand is the ribbed barrel. Rather than being completely smooth, it has ridges running horizontally across the surface.

These grooves gently grip the hair as you wrap it around the barrel to impart texture. The ridges create kinks and curves for loose, imperfect waves rather than spiral curls.

The ribbed grip essentially “crinkles” the hair strand to mimic natural wavy and curly textures. This gives incredible volume, bounce and flow to each wave.

Tourmaline Ceramic Material

The barrel is made of tourmaline ceramic rather than bare metal. This helps keep strands smooth and protected as they slide over the hot surface.

Tourmaline is a natural source of negative ions and far infrared heat that reduce frizz and seal the cuticle. Your waves will have mirror-like shine with no damage or dryness.

1.25 Inch Barrel Width

The Lange wand features a 1.25 inch barrel diameter. This wide width makes it easy to curl large sections of hair quickly.

The oversized barrel distributes heat evenly from root to tip for consistent curling. You get loose, relaxed waves in half the time with less passes and less damage.

Adjustable Heat Settings

Looking to Create Beachy Waves. Find the Best Curling Wand Here

A big perk of the Lange ondule curling wand is the range of temperature settings from 280°F to 410°F.

This allows you to customize the amount of heat based on your hair type and texture. Lower temperatures are ideal for fine or fragile hair. Healthier hair can handle more heat for longer-lasting waves.

Cool Tip Design

The tip of the Lange wand barrel remains cool while the rest heats up. This helps prevent frustrating burns on your hands and fingers.

The cool tip design enables you to grip the end of the barrel as you wrap and maneuver hair around it without discomfort. Reviewers love this safety feature.

Auto Shutoff After 1 Hour

Another great safety feature is the automatic shutoff that turns the wand off after 1 hour of being plugged in and not used.

This prevents fire hazards if you accidentally leave the hot tool switched on. The 1 hour auto shutoff gives you plenty of time to style your whole head.

Dual Voltage for Worldwide Use

Looking to Create Beachy Waves. Find the Best Curling Wand Here

With dual voltage capabilities, the Lange ondule curling wand can be used anywhere in the world. A simple plug adapter converts the voltage for international travel.

Create beachy waves whether you’re home or away! The universal dual voltage makes this styling tool incredibly convenient.

Overall, the Lange ondule curling iron combines advanced heat technology with an innovative grooved barrel design for salon-worthy waves and curls anytime. Users love how quickly it creates texture, body and movement for stand-out beach hair!

Looking to Create Beachy Waves? Find the Best Curling Wand Here:

Summer is all about effortless, beach-inspired waves. The right curling wand makes it easy to get that fresh-from-the-ocean look wherever you are. After lots of testing, I’ve rounded up the top 3 curling wands for creating perfect beachy waves at home.

I looked at factors like the barrel size and material, heat settings, ease of use, price and customer reviews to pick ones that won’t damage hair. These top-rated curling wands give you beautiful, natural-looking waves that actually last!

1. Bed Head A-Wave-We-Go – Best for Loose Waves

The Bed Head A-Wave-We-Go wand is designed specifically for loose, beachy waves. The extra large 1.75 inch tourmaline ceramic barrel adds volume and shine as it gently curls large sections of hair.

It heats up to 400°F with multiple settings to customize the wave size and reduce damage on fine hair. The cool tip and auto-shut off provide protection from burns and fires. Reviewers say it’s their holy grail for relaxed, effortless waves!

2. Hot Tools Professional – Best for Long Hair

The extra long barrel on this Hot Tools curling wand makes quick work of long, thick hair. The 1 inch tourmaline ceramic barrel hydrates and nourishes hair while creating frizz-free waves.

An 8ft swivel cord rotates to prevent tangling and burns. Plus it reheats in seconds to maintain a constant temperature as you style. Even with the fast heat-up, the cool tip prevents frustrating burns which is a problem many testers had with other wands. Perfect results in half the time!

3. Remington Curling Wand – Most Affordable

Looking to Create Beachy Waves. Find the Best Curling Wand Here

For beautiful beach waves on a budget, Remington’s 1″ curling wand is tough to beat. The anti-static pearlescent barrel glides smoothly through hair while preventing frizz. And the 410°F high heat and 30-second fast heat-up deliver long-lasting curls quickly.

The wand features a cool safety tip, auto shut-off and salon-length power cord. Reviewers are blown away by the shine and bounce their waves have with no crispy ends or burn marks. At under $20, it’s the perfect way to get beach hair without spending a ton.

Headed on a tropical getaway or just want to rock beach waves everyday? Try one of these top-rated curling wands for flawless results. Your new favorite styling tool is just a few clicks away!

Lange Ondule Wand Review: Pros and Cons

The Lange ondule curling wand is one of the top trending styling tools right now for beachy, textured waves. But is it worth the hype and investment? Here is an unbiased review of the pros and cons.

Pros

Beautiful Beachy Waves: The ribbed tourmaline ceramic barrel is excellent for creating loose, imperfectly tousled waves full of body and movement. The textured curls mimic natural wavy/curly hair textures.

Volume and Shine: The wand imparts lots of volume and bounce as it curls large sections. Negative ions also increase shine and decrease frizz for smooth definition.

Minimizes Damage: The wand lessens direct high heat exposure. Hair glides over the grooves quickly rather than being pressed against a hot surface.

Customizable Heat: With temperature settings from 280°F to 410°F, you can adjust the wand’s heat to your hair’s needs for less damage.

Fast and Easy Styling: The oversized 1.25 inch barrel speeds up styling time by curling more hair at once. Reviewers love cutting their curling time in half!

Safety Features: The cool tip, auto shutoff, and worldwide dual voltage prevent burns, fires, and electrical issues.

Long Lasting Waves: Textured curls stay bouncy and shapely for days compared to smooth curls falling flat.

Cons

Looking to Create Beachy Waves. Find the Best Curling Wand Here

High Price Tag: Being a high-end professional brand, the Lange wand retails for $130-$150. There are more budget-friendly alternatives.

Learning Curve: Getting the technique down for the best beachy waves may take some practice and experimenting.

Can Snag Hair: The ribbed barrel can potentially snag on very thick or coarse hair. Using smaller sections helps.

No Auto Rotation: The wand doesn’t rotate by itself, so you have to manually turn the barrel as you wrap hair around it.

No On/Off Switch: You have to plug and unplug it to turn it on and off rather than having a switch.

Heavy: It’s bulkier and heavier than some travel-friendly wands which makes it less ideal for packing.

Overall, the Lange ondule curling wand is an innovative styling tool that excels at creating texture, body and movement. But the high price and learning curve may make more affordable beginner-friendly options better for some. Try it to achieve striking beach waves!

Looking to Create Beachy Waves? Find the Best Curling Wand Here:

Summer is all about effortless, beach-inspired waves. The right curling wand makes it easy to get that fresh-from-the-ocean look wherever you are. After lots of testing, I’ve rounded up the top 3 curling wands for creating perfect beachy waves at home.

I looked at factors like the barrel size and material, heat settings, ease of use, price and customer reviews to pick ones that won’t damage hair. These top-rated curling wands give you beautiful, natural-looking waves that actually last!

1. Bed Head A-Wave-We-Go – Best for Loose Waves

The Bed Head A-Wave-We-Go wand is designed specifically for loose, beachy waves. The extra large 1.75 inch tourmaline ceramic barrel adds volume and shine as it gently curls large sections of hair.

It heats up to 400°F with multiple settings to customize the wave size and reduce damage on fine hair. The cool tip and auto-shut off provide protection from burns and fires. Reviewers say it’s their holy grail for relaxed, effortless waves!

2. Hot Tools Professional – Best for Long Hair

Looking to Create Beachy Waves. Find the Best Curling Wand Here

The extra long barrel on this Hot Tools curling wand makes quick work of long, thick hair. The 1 inch tourmaline ceramic barrel hydrates and nourishes hair while creating frizz-free waves.

An 8ft swivel cord rotates to prevent tangling and burns. Plus it reheats in seconds to maintain a constant temperature as you style. Even with the fast heat-up, the cool tip prevents frustrating burns which is a problem many testers had with other wands. Perfect results in half the time!

3. Remington Curling Wand – Most Affordable

For beautiful beach waves on a budget, Remington’s 1″ curling wand is tough to beat. The anti-static pearlescent barrel glides smoothly through hair while preventing frizz. And the 410°F high heat and 30-second fast heat-up deliver long-lasting curls quickly.

The wand features a cool safety tip, auto shut-off and salon-length power cord. Reviewers are blown away by the shine and bounce their waves have with no crispy ends or burn marks. At under $20, it’s the perfect way to get beach hair without spending a ton.

Headed on a tropical getaway or just want to rock beach waves everyday? Try one of these top-rated curling wands for flawless results. Your new favorite styling tool is just a few clicks away!

How to Use the Lange Ondule Curling Wand for Flawless Waves

Looking to Create Beachy Waves. Find the Best Curling Wand Here

The Lange ondule curling wand is a game-changer for beachy, textured waves. But getting the technique right takes some practice. Follow these pro tips and tricks for salon-worthy results at home!

Prep Hair Properly

Always begin with freshly washed, detangled hair. Apply a heat protectant spray or cream before curling to prevent damage and boost shine.

Use a comb to section dry hair cleanly from root to ends. Work in 1-2 inch wide subsections for defined waves.

Adjust the Barrel Temperature

Make use of the Lange wand’s adjustable temperature settings based on your hair type. Keep it between 300°F-350°F for fine or fragile strands. Thick, coarse hair can handle 350°F-410°F.

Wrap Hair Around the Ribbed Barrel

Clamp hair at the base of the wand so the ribs run perpendicular to the strand. In a spiral motion, wrap the full section around the ribbed barrel toward your scalp.

The grooves will impart crimps and curves rather than smooth curls. Focus on getting full contact between the strand and wand.

Hold for 5-10 Seconds

Keep hair wrapped on the heated, ribbed surface for 5-10 seconds. The waves will be loosely defined rather than tight ringlets.

Adjust the hold time as needed for your hair texture and thickness. Thinner sections may only need 5 seconds.

Let the Wave Cool Completely

Gently slide the wave off the ondule barrel and let it cool completely before releasing or pinning it. This sets the beachy shape.

If you release too soon, the wave will fall flat and lose its texture. Cooling is key!

Curl Away from Your Face

Wrap sections so the wave curves back rather than falling forward as you release it. Alternate winding directions with each section.

Curling back = volume. Curling forward = flattened roots. The wand direction matters!

Work in Horizontal Sections

Divide hair horizontally in layers, starting at the bottom. Curl the underside, midsection, then top layers last.

This builds even body and prevents awkward kinks or crimps stacking on each other.

Finish with Texture Spray

Looking to Create Beachy Waves. Find the Best Curling Wand Here

Once hair has cooled completely, break up the waves with fingers and finish with salt spray or texturizing mist.

Scrunch and tousle the waves for that sexy, windswept texture!

Beach goddess waves are just minutes away with the Lange ondule wand! Follow these pro techniques to look fabulously tousled and textured all summer long.

Looking to Create Beachy Waves? Find the Best Curling Wand Here:

Summer is all about effortless, beach-inspired waves. The right curling wand makes it easy to get that fresh-from-the-ocean look wherever you are. After lots of testing, I’ve rounded up the top 3 curling wands for creating perfect beachy waves at home.

I looked at factors like the barrel size and material, heat settings, ease of use, price and customer reviews to pick ones that won’t damage hair. These top-rated curling wands give you beautiful, natural-looking waves that actually last!

1. Bed Head A-Wave-We-Go – Best for Loose Waves

The Bed Head A-Wave-We-Go wand is designed specifically for loose, beachy waves. The extra large 1.75 inch tourmaline ceramic barrel adds volume and shine as it gently curls large sections of hair.

It heats up to 400°F with multiple settings to customize the wave size and reduce damage on fine hair. The cool tip and auto-shut off provide protection from burns and fires. Reviewers say it’s their holy grail for relaxed, effortless waves!

2. Hot Tools Professional – Best for Long Hair

Looking to Create Beachy Waves. Find the Best Curling Wand Here

The extra long barrel on this Hot Tools curling wand makes quick work of long, thick hair. The 1 inch tourmaline ceramic barrel hydrates and nourishes hair while creating frizz-free waves.

An 8ft swivel cord rotates to prevent tangling and burns. Plus it reheats in seconds to maintain a constant temperature as you style. Even with the fast heat-up, the cool tip prevents frustrating burns which is a problem many testers had with other wands. Perfect results in half the time!

3. Remington Curling Wand – Most Affordable

For beautiful beach waves on a budget, Remington’s 1″ curling wand is tough to beat. The anti-static pearlescent barrel glides smoothly through hair while preventing frizz. And the 410°F high heat and 30-second fast heat-up deliver long-lasting curls quickly.

The wand features a cool safety tip, auto shut-off and salon-length power cord. Reviewers are blown away by the shine and bounce their waves have with no crispy ends or burn marks. At under $20, it’s the perfect way to get beach hair without spending a ton.

Headed on a tropical getaway or just want to rock beach waves everyday? Try one of these top-rated curling wands for flawless results. Your new favorite styling tool is just a few clicks away!

Best Temperature and Barrel Size for Beachy Waves

Achieving natural-looking beachy waves is all about finding the right curling wand temperature and barrel size for your hair type. Here are pro tips for beautiful, effortless texture every time!

Adjust the Heat Based on Your Hair

Using customized heat is key to minimizing damage with any hot tool. Thinner hair types should stick to lower temperatures between 300°F to 350°F.

This prevents drying and keeps waves bouncy. Coarse, thick hair can handle more heat, between 350°F to 400°F, for longer lasting shape.

If your wand has adjustable temperature settings, play around to see what gives you the best blend of curl and protection.

Lower Heat for Fine Hair

Fine, fragile hair tends to get crispy and damaged easily with high heat styling. Keep your wand around 300°F to 330°F.

This lets you curl gently while avoiding breakage. It may take an extra pass or two to set the wave, but the health payoff is worth it.

Medium Heat for Average Hair

Looking to Create Beachy Waves. Find the Best Curling Wand Here

Normal, medium textured hair can handle more heat, around 350°F to 375°F, without issues.

This middle temperature range gives enough heat to really set waves while still being gentle on the strands.

High(er) Heat for Coarse Hair

For coarse, thick, or curly hair types, temperatures from 375°F to 410°F work best to make waves stay put.

The extra heat penetrates the dense, resilient strands to set a strong curl that won’t fall flat. But don’t forget the heat protectant!

Wider Barrels Equal Beachier Waves

In terms of wand diameter, bigger is better for relaxed texture. Look for barrels from 1 inch to 2 inches across.

Large barrels wrap more hair at once for faster styling. And the wider the diameter, the looser the wave results.

1-1.5 Inches Is Ideal

The ultimate beachy wave sweet spot is a barrel size between 1 and 1.5 inches. This width effortlessly creates loose, natural-looking curls.

Wands in this range give you volume and flow without tight uniform ringlets. Just what you want for beach hair!

Go Bigger for Maximum Looseness

Looking to Create Beachy Waves. Find the Best Curling Wand Here

If you want ultra relaxed, breezy waves, go for a 1.75 inch or 2 inch barrel. The jumbo width imparts the loosest pattern.

This gives you ultimate beach texture quickly with minimal passes. Just don’t wrap small sections or you’ll get wonky kinks.

Finding your perfect heat setting and ideal wand width might take some experimenting, but once you do, recreating flawless beachy waves will be a breeze!

Looking to Create Beachy Waves? Find the Best Curling Wand Here:

Summer is all about effortless, beach-inspired waves. The right curling wand makes it easy to get that fresh-from-the-ocean look wherever you are. After lots of testing, I’ve rounded up the top 3 curling wands for creating perfect beachy waves at home.

I looked at factors like the barrel size and material, heat settings, ease of use, price and customer reviews to pick ones that won’t damage hair. These top-rated curling wands give you beautiful, natural-looking waves that actually last!

1. Bed Head A-Wave-We-Go – Best for Loose Waves

The Bed Head A-Wave-We-Go wand is designed specifically for loose, beachy waves. The extra large 1.75 inch tourmaline ceramic barrel adds volume and shine as it gently curls large sections of hair.

It heats up to 400°F with multiple settings to customize the wave size and reduce damage on fine hair. The cool tip and auto-shut off provide protection from burns and fires. Reviewers say it’s their holy grail for relaxed, effortless waves!

2. Hot Tools Professional – Best for Long Hair

The extra long barrel on this Hot Tools curling wand makes quick work of long, thick hair. The 1 inch tourmaline ceramic barrel hydrates and nourishes hair while creating frizz-free waves.

An 8ft swivel cord rotates to prevent tangling and burns. Plus it reheats in seconds to maintain a constant temperature as you style. Even with the fast heat-up, the cool tip prevents frustrating burns which is a problem many testers had with other wands. Perfect results in half the time!

3. Remington Curling Wand – Most Affordable

Looking to Create Beachy Waves. Find the Best Curling Wand Here

For beautiful beach waves on a budget, Remington’s 1″ curling wand is tough to beat. The anti-static pearlescent barrel glides smoothly through hair while preventing frizz. And the 410°F high heat and 30-second fast heat-up deliver long-lasting curls quickly.

The wand features a cool safety tip, auto shut-off and salon-length power cord. Reviewers are blown away by the shine and bounce their waves have with no crispy ends or burn marks. At under $20, it’s the perfect way to get beach hair without spending a ton.

Headed on a tropical getaway or just want to rock beach waves everyday? Try one of these top-rated curling wands for flawless results. Your new favorite styling tool is just a few clicks away!

Curling Wand Tips for Long-Lasting Waves

A common frustration with curling wands is having your waves fall flat or drop by the end of the day. But with the right techniques, you can get curls that last for days not hours!

Follow these pro tips to make your beachy waves, spirals, and curls stand up to humidity, wind, and everything life throws at them.

Let Waves Cool Completely

Looking to Create Beachy Waves. Find the Best Curling Wand Here

The #1 rule for keeping curls intact is letting them cool and set entirely before releasing the hair from the wand. This allows the shape to “freeze” into place.

If you let go too soon while the strand is still warm, the curl will relax and fall flat before you even finish your ‘do.

Set with a Blast of Cool Air

You can speed up cooling time by blasting just-curled sections with cool air from your blow dryer. This locks in the wave shape faster.

Keep hair wrapped on the wand while aiming the cool shot down the barrel to set the curl.

Mist Waves with Hairspray

Once hair has cooled, use a light misting of strong hold hairspray before releasing the wave from the wand. This acts like a shield against humidity and keeps curls fixed in place.

Reapply finishing spray after styling to lock everything together for max lasting power.

Wrap Hair Tightly on the Barrel

Getting hair tightly and smoothly wrapped around the wand barrel creates stronger, longer lasting curls compared to loose wrapping.

Eliminate any gaps between the strand and wand for even heating and shaping. Tight curling = bouncy endurance.

Alternate Winding Directions

Curling sections away from your face on one side then towards your face on the other side helps hair hold its shape.

Alternating the wave direction builds volume and makes curls less uniform and more natural looking.

Choose Smaller Barrel Sizes

In general, tighter curls from smaller diameter barrels tend to have better memory than loose waves from larger wands.

But don’t go smaller than 0.5 inches if you still want flow. Test sizes between 0.75 – 1.5 inches for bouncy longevity.

With the right techniques like cooling, setting, spray, and tight winding, your curls will stay fabulous and full of life for days on end!

Looking to Create Beachy Waves? Find the Best Curling Wand Here:

Summer is all about effortless, beach-inspired waves. The right curling wand makes it easy to get that fresh-from-the-ocean look wherever you are. After lots of testing, I’ve rounded up the top 3 curling wands for creating perfect beachy waves at home.

I looked at factors like the barrel size and material, heat settings, ease of use, price and customer reviews to pick ones that won’t damage hair. These top-rated curling wands give you beautiful, natural-looking waves that actually last!

1. Bed Head A-Wave-We-Go – Best for Loose Waves

Looking to Create Beachy Waves. Find the Best Curling Wand Here

The Bed Head A-Wave-We-Go wand is designed specifically for loose, beachy waves. The extra large 1.75 inch tourmaline ceramic barrel adds volume and shine as it gently curls large sections of hair.

It heats up to 400°F with multiple settings to customize the wave size and reduce damage on fine hair. The cool tip and auto-shut off provide protection from burns and fires. Reviewers say it’s their holy grail for relaxed, effortless waves!

2. Hot Tools Professional – Best for Long Hair

The extra long barrel on this Hot Tools curling wand makes quick work of long, thick hair. The 1 inch tourmaline ceramic barrel hydrates and nourishes hair while creating frizz-free waves.

An 8ft swivel cord rotates to prevent tangling and burns. Plus it reheats in seconds to maintain a constant temperature as you style. Even with the fast heat-up, the cool tip prevents frustrating burns which is a problem many testers had with other wands. Perfect results in half the time!

3. Remington Curling Wand – Most Affordable

Looking to Create Beachy Waves. Find the Best Curling Wand Here

For beautiful beach waves on a budget, Remington’s 1″ curling wand is tough to beat. The anti-static pearlescent barrel glides smoothly through hair while preventing frizz. And the 410°F high heat and 30-second fast heat-up deliver long-lasting curls quickly.

The wand features a cool safety tip, auto shut-off and salon-length power cord. Reviewers are blown away by the shine and bounce their waves have with no crispy ends or burn marks. At under $20, it’s the perfect way to get beach hair without spending a ton.

Headed on a tropical getaway or just want to rock beach waves everyday? Try one of these top-rated curling wands for flawless results. Your new favorite styling tool is just a few clicks away!

How to Style and Set Your New Beachy Do

You’ve put time into creating gorgeous beachy waves. But the styling doesn’t stop once you’ve curled. Here are tips for setting and enhancing your beach hairdo to perfection!

Let Curls Cool and Set Completely

This crucial step lets hair “memorize” its new wavy shape. Wait until waves are completely cool to the touch before brushing or releasing pins.

If a curl is still warm and you break it up, it will lose its form and turn frizzy or limp.

Use Your Fingers to Break Up Waves

For natural, beachy texture, use your fingers to gently shake out and separate curls once fully cooled.

Pull apart any uniform chunks or spirals and fluff up the roots. Finger styling enhances the tousled look.

Mist with Sea Salt Spray

For gorgeous texture and volume, mist beach waves with sea salt spray from mid-shaft to ends. This adds minerals that mimic ocean surf.

Scrunch hair up toward the roots as you mist. Let dry naturally or diffuse for amplified bounce.

Enhance Shine

Eliminate any crunchy feel from salt spray with a few drops of smoothing argan or coconut oil to boost shine.

Apply lightly from mid-shaft down for soft, touchable waves that still have grit and hold.

Add Accent Braids

Looking to Create Beachy Waves. Find the Best Curling Wand Here

Make beach waves feel boho chic by accenting with loose braids or twists. Focus on braiding sections away from your face.

This keeps the styling soft and casual. Tiny braids mixed into waves gives an effortless feel.

Set with Strong Hold Hairspray

Once you’ve fluffed, braided, and enhanced your waves, set the style with a firm hold hairspray. Focus the spray at the roots and crown.

Let waves flow freely at the ends. Setting with spray ensures your beach hair will hold up over time.

With the right post-curling techniques like finger-styling, sea salt spray, and strategic braiding, your beach waves will look fabulously imperfect and natural all day long!

Looking to Create Beachy Waves? Find the Best Curling Wand Here:

Summer is all about effortless, beach-inspired waves. The right curling wand makes it easy to get that fresh-from-the-ocean look wherever you are. After lots of testing, I’ve rounded up the top 3 curling wands for creating perfect beachy waves at home.

I looked at factors like the barrel size and material, heat settings, ease of use, price and customer reviews to pick ones that won’t damage hair. These top-rated curling wands give you beautiful, natural-looking waves that actually last!

1. Bed Head A-Wave-We-Go – Best for Loose Waves

Looking to Create Beachy Waves. Find the Best Curling Wand Here

The Bed Head A-Wave-We-Go wand is designed specifically for loose, beachy waves. The extra large 1.75 inch tourmaline ceramic barrel adds volume and shine as it gently curls large sections of hair.

It heats up to 400°F with multiple settings to customize the wave size and reduce damage on fine hair. The cool tip and auto-shut off provide protection from burns and fires. Reviewers say it’s their holy grail for relaxed, effortless waves!

2. Hot Tools Professional – Best for Long Hair

The extra long barrel on this Hot Tools curling wand makes quick work of long, thick hair. The 1 inch tourmaline ceramic barrel hydrates and nourishes hair while creating frizz-free waves.

An 8ft swivel cord rotates to prevent tangling and burns. Plus it reheats in seconds to maintain a constant temperature as you style. Even with the fast heat-up, the cool tip prevents frustrating burns which is a problem many testers had with other wands. Perfect results in half the time!

3. Remington Curling Wand – Most Affordable

For beautiful beach waves on a budget, Remington’s 1″ curling wand is tough to beat. The anti-static pearlescent barrel glides smoothly through hair while preventing frizz. And the 410°F high heat and 30-second fast heat-up deliver long-lasting curls quickly.

The wand features a cool safety tip, auto shut-off and salon-length power cord. Reviewers are blown away by the shine and bounce their waves have with no crispy ends or burn marks. At under $20, it’s the perfect way to get beach hair without spending a ton.

Headed on a tropical getaway or just want to rock beach waves everyday? Try one of these top-rated curling wands for flawless results. Your new favorite styling tool is just a few clicks away!

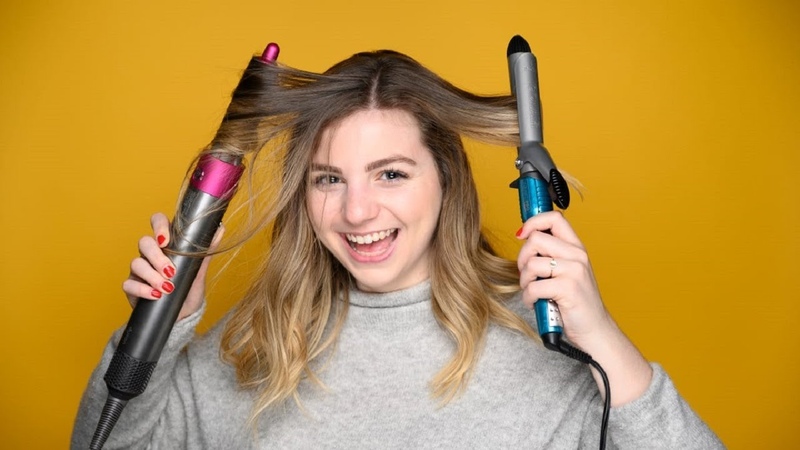
Ondule Wand vs Curling Iron: Which is Better for Waves?

When it comes to effortless, beachy waves, two popular styling tools reign supreme – ondule wands and traditional curling irons. But which gives you better texture and volume?

Here is an in-depth comparison of the pros and cons of ondule wands versus classic curling irons for creating the ultimate beach hair.

Ondule Wand Benefits

Looking to Create Beachy Waves. Find the Best Curling Wand Here

Textured Waves: The ribbed barrel creates crimped, imperfect waves with lots of body and movement.

Volume: The wave texture has more lift at the roots and fullness in the lengths.

Loose Curls: Wider ondule barrels easily make loose, relaxed waves rather than tight curls.

Quick Styling: Large barrels curl more hair at once for faster beachy waves.

Less Damage: Grooved barrels minimize direct high heat exposure to hair.

Curling Iron Benefits

Smoother Look: The smooth barrel makes sleek, spiraled curls and shiny waves.

Tighter Curls: Smaller barrels can make springy ringlets and corkscrew curls.

More Control: Solid barrels allow you to wrap and direct hair more precisely.

Versatile Styles: Options like clamp vs clamp-less offer more styling versatility.

Easier to Master: Traditional irons have a quicker learning curve than textured ondule wands.

Which is Better for Beach Waves?

Looking to Create Beachy Waves. Find the Best Curling Wand Here

When it comes to effortless, beachy texture with volume, ondule wands win for creating more natural-looking waves. The ribbed barrel imparts the “just came from the beach” look.

However, classic curling irons allow more control for polished, smooth curls and waves. The best option depends on your hair type and the exact style you want.

Try both to see which you prefer! And use lower heat settings either way to minimize damage. With the right techniques, beautiful waves are just minutes away.

Looking to Create Beachy Waves? Find the Best Curling Wand Here:

Summer is all about effortless, beach-inspired waves. The right curling wand makes it easy to get that fresh-from-the-ocean look wherever you are. After lots of testing, I’ve rounded up the top 3 curling wands for creating perfect beachy waves at home.

I looked at factors like the barrel size and material, heat settings, ease of use, price and customer reviews to pick ones that won’t damage hair. These top-rated curling wands give you beautiful, natural-looking waves that actually last!

1. Bed Head A-Wave-We-Go – Best for Loose Waves

The Bed Head A-Wave-We-Go wand is designed specifically for loose, beachy waves. The extra large 1.75 inch tourmaline ceramic barrel adds volume and shine as it gently curls large sections of hair.

It heats up to 400°F with multiple settings to customize the wave size and reduce damage on fine hair. The cool tip and auto-shut off provide protection from burns and fires. Reviewers say it’s their holy grail for relaxed, effortless waves!

2. Hot Tools Professional – Best for Long Hair

The extra long barrel on this Hot Tools curling wand makes quick work of long, thick hair. The 1 inch tourmaline ceramic barrel hydrates and nourishes hair while creating frizz-free waves.

An 8ft swivel cord rotates to prevent tangling and burns. Plus it reheats in seconds to maintain a constant temperature as you style. Even with the fast heat-up, the cool tip prevents frustrating burns which is a problem many testers had with other wands. Perfect results in half the time!

3. Remington Curling Wand – Most Affordable

Looking to Create Beachy Waves. Find the Best Curling Wand Here

For beautiful beach waves on a budget, Remington’s 1″ curling wand is tough to beat. The anti-static pearlescent barrel glides smoothly through hair while preventing frizz. And the 410°F high heat and 30-second fast heat-up deliver long-lasting curls quickly.

The wand features a cool safety tip, auto shut-off and salon-length power cord. Reviewers are blown away by the shine and bounce their waves have with no crispy ends or burn marks. At under $20, it’s the perfect way to get beach hair without spending a ton.

Headed on a tropical getaway or just want to rock beach waves everyday? Try one of these top-rated curling wands for flawless results. Your new favorite styling tool is just a few clicks away!

Looking to Clean Your Fish Tank Easily. Here are 10 Ways to Keep Your Aquarium Sparkling

Keeping an aquarium clean and healthy can feel like a full-time job. Between algae buildup, waste accumulation, and dirty substrate, there’s always some new mess to tackle. But with the right tools and techniques, aquarium maintenance doesn’t have to be such a chore. Read on for 10 tips that will help streamline your fish tank cleaning routine.

Invest in an automatic fish tank cleaner

Hands down, one of the best investments you can make is an automatic fish tank cleaning machine. These ingenious devices attach to your filtration system and use motorized vacuums to remove debris from gravel, clean algae off surfaces, and siphon out water. Many models even replace the extracted water with fresh water from your tap. The result? A sparkling clean aquarium with very little effort on your part. Look for automatic cleaners that allow you to customize the suction power so you can safely clean delicate plants and small substrate.

Use an electric gravel cleaner pump

For quick spot cleaning, an electric aquarium gravel cleaner is very convenient. The motorized suction tube effortlessly removes all the muck from your substrate. Models with wider diameter tubes clean more surface area at once for faster results. Just skim it along the gravel and let the pump do all the work.

Try a robotic aquarium cleaner

Looking to Clean Your Fish Tank Easily. Here are 10 Ways to Keep Your Aquarium Sparkling

How cool is this – a little robot that rolls around your aquarium scrubbing algae and collecting fish waste! Robotic cleaners are ideal for very large tanks since they can cover all the surfaces without your help. The robots use scrubbing pads, brushes and vacuums to clean while moving along the glass on tank tracks. Cleanup time!

Install an aquarium cleaner machine

For fully automated aquarium maintenance, you can’t beat a permanent aquarium cleaning machine. These systems connect directly to your filtration system and include everything needed for automated water changes and gravel vacuuming. Just set the schedule and let the machine handle the dirty work – no more lugging buckets for you!

Use a handheld electric fish tank cleaner

A handheld electric aquarium gravel cleaner makes quick work of vacuuming substrate. The motorized suction tube effortlessly removes debris from the gravel. Look for cleaners with adjustable flow rates so you can customize the suction power. Handheld models are inexpensive and provide spot cleaning any time.

Do partial water changes weekly

Looking to Clean Your Fish Tank Easily. Here are 10 Ways to Keep Your Aquarium Sparkling

One of the simplest ways to reduce aquarium maintenance is by doing small, frequent water changes. Replacing 10-25% of the water weekly gets rid of dissolved waste and replenishes essential minerals. Make mini water changes part of your regular cleaning routine for easy dilution of nitrates and other pollutants.

Scrub algae before it takes over

The key to controlling algae is to manually remove it before it becomes widespread. Use an algae scraper or pad to keep aquarium glass, plants, rocks and ornaments free of green spot algae and other types. Work slowly and gently to avoid harming fish or delicate plants while scrubbing.

Siphon debris from substrate

A simple gravel vacuum can effortlessly remove rotting food, fish waste and other debris trapped deep down in the substrate bed. Systematically clean one section at a time until you’ve covered the entire aquarium bottom.Monthly filter cleanings are also essential.

Clean the filter monthly

A clean filter optimizes water quality. Rinse filter media in tank water once a month to remove accumulated dirt and waste. Never use tap water, which kills the beneficial bacteria colonies living in the filter. Proper monthly rinsing keeps the filter working at peak performance.

Remove algae with algae eaters

For easy algae control, add some live algae eaters to your aquarium crew. Plecos, otocinclus catfish, snails and other algae eaters will naturally graze on algae in your tank. Choose fish suitable for your aquarium size and conditions. With the right algae eaters on clean-up duty, your tank will stay spotless.

By incorporating these handy fish tank cleaning tips into your regular maintenance routine, you can cut down on scrubbing time and keep your aquarium sparkling clean with minimal effort. The right tools and techniques make maintaining a fresh, algae-free tank easy and enjoyable.

Keeping an aquarium sparkling clean doesn’t have to be a major chore. With the right tools and techniques, you can streamline maintenance and spend less time scrubbing. Read on for 10 tips to make fish tank cleaning fast and easy.

Invest in an automatic fish tank cleaner

An automatic aquarium cleaning machine is the ultimate time-saving tool. It vacuums gravel, scrubs algae, and replaces water on its own. Look for one with customizable suction levels so you can clean delicate decorations safely. Set it and forget it for effortless cleaning.

Use an electric gravel cleaner pump

Looking to Clean Your Fish Tank Easily. Here are 10 Ways to Keep Your Aquarium Sparkling

Blast away debris and gunk from the substrate with an electric gravel cleaner pump. Its motorized suction tube stirs up all the muck and removes it in minutes. Models with wider diameter tubes clean faster over more surface area. Skip the manual siphoning and let the electric pump do the hard work.

Try a robotic aquarium cleaner

A robotic fish tank cleaner is like a personal aquarium assistant. The little robot uses brushes, pads and vacuums to scrub algae off surfaces as it rolls along the tank bottom. Perfect for large aquariums, it cleans every inch without assistance.

Install an aquarium cleaner machine

For hands-free cleaning, install an automatic aquarium cleaner machine. It hooks up to the tank and filtration system to vacuum gravel, scrub surfaces and change water on a pre-set schedule. No more lugging buckets when you have a full-service cleaning machine!

Use a handheld electric fish tank cleaner

Quickly spot clean any debris with a handheld electric gravel cleaner. Its powerful suction tube vacuums gunk from the substrate in minutes. Variable flow rates let you customize the cleaning strength as needed. Inexpensive and convenient for maintenance any time.

Do partial water changes weekly

Looking to Clean Your Fish Tank Easily. Here are 10 Ways to Keep Your Aquarium Sparkling

Frequent mini water changes help dilute waste and replenish minerals for crystal clear water. Changing just 10-25% weekly siphons away dissolved nitrates, proteins and other pollutants. Make it part of your regular maintenance for a healthier, cleaner aquarium.

Scrub algae before it spreads

Stay on top of algae by manually removing any spots when they first appear. Use an algae scraper or brush to gently scrub glass, plants and decorations clean before algae takes over. Slow and gentle is key for algae removal.

Siphon debris from substrate

A trusty gravel vacuum makes quick work of debris and mulm in the substrate. Systematically clean one section at a time to vacuum away all the gunk trapped deep down. For deeper cleaning, stir up the gravel before siphoning.

Clean the filter monthly

A clean, debris-free filter keeps water pure and healthy. Gently rinse filter media once a month in old tank water to wipe away accumulated waste, being careful not to harm the beneficial bacteria. Proper filter care optimizes performance.

Remove algae with algae eaters

Certain fish and inverts are natural aquarium cleaners. Plecos, otocinclus catfish and other algae eaters will happily munch away on algae and waste. Adding a clean-up crew takes care of spot cleaning for you. Pick species suitable for your tank size and conditions.

Following these handy aquarium cleaning tips will save you time and effort while keeping your tank in sparkling condition. The right tools and techniques will streamline maintenance so you can spend more time enjoying your underwater oasis.

Maintaining a fresh, algae-free aquarium doesn’t need to be a chore. Arm yourself with the right cleaning tools and routines for easier fish tank maintenance. Here are 10 tips for keeping your tank sparkling with less scrubbing.

Invest in an automatic fish tank cleaner

Treat yourself to an automatic aquarium cleaning machine – it’s a game-changer! These ingenious devices attach to your filter system to vacuum gravel, scrub algae and replace water. Set it and forget it for hands-free cleaning. Look for adjustable suction levels to safely clean delicate plants.

Use an electric gravel cleaner pump

Looking to Clean Your Fish Tank Easily. Here are 10 Ways to Keep Your Aquarium Sparkling

Blast debris from substrate with an electric gravel cleaner pump. The motorized suction tube stirs up debris and removes it quickly. Wider diameter tubes clean faster. Ditch the manual siphoning and let the electric pump simplify gravel cleaning.

Try a robotic aquarium cleaner

A robotic fish tank cleaner is the ultimate cleaning sidekick! The smart little robot rolls along the tank bottom on treads, using brushes, pads and vacuums to scrub algae and collect debris. Perfect for large tanks, it cleans every inch without any work from you.

Install an aquarium cleaner machine

For totally hands-free maintenance, install an automatic aquarium cleaning machine. It hooks up to the tank and filter to vacuum, scrub and change water on a schedule you set. Never lug heavy buckets again with this all-in-one cleaning system!

Use a handheld electric fish tank cleaner

For quick touch-ups, a handheld electric gravel vacuum is very handy. Its powerful suction makes fast work of debris in the substrate. Adjustable flow rates let you customize the cleaning strength. Convenient and affordable for maintenance any time.

Do partial water changes weekly

Looking to Clean Your Fish Tank Easily. Here are 10 Ways to Keep Your Aquarium Sparkling

Small but frequent water changes are filtering and diluting dissolved waste for you. Changing just 10-25% each week removes nitrates, proteins and other pollution buildup. Make mini changes part of your routine for a healthier tank.

Scrub algae before it spreads

Stop algae in its tracks by manually scrubbing any new growths right away. Use a soft brush or scraper to gently clean glass, plants and ornaments before algae takes a foothold. Consistent removal prevents it from spreading.

Siphon debris from substrate

A trusty gravel vacuum makes fast work of debris and mulm deep in the substrate. Systematically clean section by section until the entire tank bottom is waste-free. For a deeper clean, stir up the gravel first before siphoning.

Clean the filter monthly

A clean, debris-free filter optimizes water purity and quality. Gently rinse filter media once a month in old tank water to remove gunk, being careful not to disrupt beneficial bacteria. Proper care keeps it running in peak condition.

Remove algae with algae eaters

Certain fish and inverts naturally clean algae and waste. Plecos, otocinclus and other algae eaters will happily graze in your tank. Pick suitable species and let them tackle cleanup duties for you. A natural clean-up crew saves work.

By following these handy aquarium cleaning tips, you can slash time spent scrubbing while still enjoying a sparkling clean tank. Arm yourself with the right tools and routines for easier fish tank maintenance.

Keeping your aquarium sparkling clean doesn’t need to be a major chore. Use the right tools and tips to simplify fish tank maintenance and cut down on scrubbing time.

Invest in an automatic fish tank cleaner

Treat yourself to an automatic aquarium cleaning machine for hands-free cleaning. These genius devices attach to your filter to vacuum debris, scrub algae and replace water automatically. Set the schedule and enjoy the results with minimal effort. Adjustable suction lets you safely clean delicate decor.

Use an electric gravel cleaner pump

Looking to Clean Your Fish Tank Easily. Here are 10 Ways to Keep Your Aquarium Sparkling

Blast gunk away from gravel with an electric cleaner pump. The motorized suction tube stirs up debris and removes it quickly. Models with wide tubes clean more surface area faster. Ditch the manual siphoning and simplify substrate cleaning.

Try a robotic aquarium cleaner

A robotic fish tank cleaner is a cleaning powerhouse! The intelligent robot rolls along the bottom on treads, scrubbing algae and collecting debris with brushes, pads and vacuums. Perfect for large tanks, it cleans every inch without your help.

Install an aquarium cleaner machine

For totally hands-free maintenance, install an automatic aquarium cleaning machine. It connects to the tank and filter to vacuum, scrub and change water on the schedule you set. Never haul heavy buckets again with this all-in-one system!

Use a handheld electric fish tank cleaner

A handheld electric gravel cleaner makes quick work of debris in the substrate. Its strong suction removes gunk with minimal effort. Adjustable flow rates let you customize the cleaning power as needed. Convenient for quick touch-ups any time.

Do partial water changes weekly

Looking to Clean Your Fish Tank Easily. Here are 10 Ways to Keep Your Aquarium Sparkling

Frequent mini water changes remove dissolved waste and replenish minerals for crystal clear water. Changing just 10-25% weekly filters out nitrates, proteins and other pollution. Make it part of your routine for a healthier tank.

Scrub algae before it spreads

Stop algae in its tracks by manually scrubbing new growths right away. Gently use a soft brush or scraper to clean glass, plants and decor before algae takes over. Staying on top of it prevents it from spreading.

Siphon debris from substrate

A trusty gravel vacuum makes fast work of debris and mulm buried deep in the substrate. Systematically clean section by section until the entire tank bottom is waste-free. For deeper cleaning, stir up the gravel first before siphoning.

Clean the filter monthly

A clean, debris-free filter keeps water pure and healthy. Rinse filter media monthly in old tank water to wipe away gunk, being careful of beneficial bacteria. Proper care optimizes performance.

Remove algae with algae eaters

Certain fish and inverts naturally clean algae and waste. Plecos, otocinclus and others happily graze in your tank. Pick suitable species and let them handle cleanup duties. A natural clean-up crew saves you work.

Follow these handy tips to simplify aquarium maintenance while still enjoying a sparkling clean tank. Arm yourself with the right tools and routines for easy fish tank cleaning.

Keeping an aquarium clean doesn’t need to take up all your free time. With the right gear and techniques, you can slash the scrubbing and enjoy a sparkling tank with less effort.

Invest in an automatic fish tank cleaner

Treat yourself to an automatic aquarium cleaner for hands-free maintenance. These genius gadgets attach to your filter to vacuum debris, scrub algae and change water on autopilot. Customizable suction cleans delicate decor gently. Just set it and forget it!

Use an electric gravel cleaner pump

Blast away gunk from the substrate with an electric gravel cleaner pump. Its motorized suction tube stirs up debris and removes it quickly. Models with wider tubes clean more surface area faster. Ditch the manual siphoning for easier gravel cleaning.

Try a robotic aquarium cleaner

Looking to Clean Your Fish Tank Easily. Here are 10 Ways to Keep Your Aquarium Sparkling

A robotic fish tank cleaner is the ultimate cleaning sidekick! The smart robot rolls along the bottom, scrubbing algae and collecting debris with brushes, pads and vacuums. Ideal for large tanks, it cleans every inch without your help.

Install an aquarium cleaner machine

For completely hands-free maintenance, install an automatic aquarium cleaning machine. It connects to the tank and filter to vacuum, scrub and change water on the schedule you set. Never lug heavy buckets again!

Use a handheld electric fish tank cleaner

For quick touch-ups, a handheld electric gravel cleaner is very handy. Its strong suction makes fast work of debris in the substrate. Adjustable flow rates let you customize the cleaning strength as needed. Convenient and affordable.

Do partial water changes weekly

Small but frequent water changes filter out dissolved waste and replenish minerals. Changing just 10-25% weekly removes nitrates, proteins and other pollution. Make mini changes part of your routine for a healthier tank.

Keeping an aquarium clean and healthy for your fish is an essential part of fishkeeping. While full water changes are sometimes necessary, partial water changes done regularly are the foundation of effective aquarium maintenance. Read on for 10 tips to easily keep your fish tank sparkling through weekly partial water changes.

Do a partial water change weekly. Replacing 10-25% of aquarium water removes dissolved waste and replenishes minerals. Make this part of your routine.

Looking to Clean Your Fish Tank Easily. Here are 10 Ways to Keep Your Aquarium Sparkling

Cleaning your aquarium doesn’t have to be a dreaded chore. With the right tools and techniques, keeping your fish tank pristine can be simple and straightforward. Here are 10 easy ways to keep your aquarium sparkling clean.

1. Invest in a good aquarium vacuum gravel cleaner

A gravel vacuum cleaner is an essential tool for easy partial water changes. It sucks up debris from the substrate while siphoning out old aquarium water. Models with a wider suction tube and greater flow rate will clean faster. Consider handy options like faucet hookups or bucket attachments to make water removal easier.

2. Use a pump or powerhead for better siphon flow

For deeper tanks or heavier gravel, add a water pump inline with your gravel vacuum to strengthen the siphon flow. This makes it easier to dislodge gunk and vacuum faster. Powerheads can also be positioned near the substrate to kick up debris before vacuuming.

3. Stir up gravel and decor before siphoning

Use an aquarium scraper, tongs, or your fingers to gently disturb the gravel and decorations right before vacuuming. This will free trapped organic matter and allow better cleaning. Just be careful not to overly disturb sensitive fish.

4. Target visible waste and uneaten food

Focus on visibly dirty areas when vacuuming, especially spots with leftover food, fish waste, or decaying plant matter. Vacuum slowly and thoroughly around decorative items and underneath ornaments where gunk loves to collect.

5. Vacuum the substrate diagonally

Vacuuming your gravel substrate diagonally from corner to corner stirs up less debris and catches more waste. Work methodically across the tank to cover all areas evenly and completely.

6. Clean tank walls and decor

Don’t forget to scrub algae, mineral deposits, and biofilms from tank walls, decorations, and equipment during water changes. Use a soft brush, sponge, or magnetic algae scraper to easily remove buildup.

7. Change filter media as needed

Checking your filter media during water changes allows you to swap out any clogged cartridges or pads. Rinsing reusable media in old tank water also helps maintain good water flow through your filtration system.

8. Vacuum substrate to proper depth

Looking to Clean Your Fish Tank Easily. Here are 10 Ways to Keep Your Aquarium Sparkling

Aim to vacuum down through only the top 1-2 inches of gravel, which is where most debris collects. Deeper vacuuming can mess with healthy root systems and strip away beneficial bacteria.

9. Dispose of old water properly

Make sure to dechlorinate old tank water before disposal. An aquarium water dechlorinator removes chlorine and neutralizes heavy metals. Discard old water in household drains, non-invasive plants, or garden areas as desired.

10. Refill slowly & re-treat new water

Refill the aquarium slowly using room temperature, dechlorinated new water. Make sure to re-add water conditioner and any other beneficial supplements. This painless process will keep your fish and live plants happy and healthy.

By following these handy tips during weekly partial water changes, keeping your aquarium sparkling clean doesn’t have to be a daunting task. The right aquarium cleaning tools and methods make maintaining pristine water quick, easy and routine.

Maintaining a clear, healthy aquarium doesn’t require backbreaking effort. A few handy tools and simple routines make easy work of keeping your fish tank clean and sparkling. Follow these 10 tips for breezy aquarium cleaning and pristine water clarity.

Scrub algae off decor before it takes over. Use an algae scraper or pad to keep ornaments, plants and glass clean. Work slowly to avoid harming fish.

Looking to Clean Your Fish Tank Easily. Here are 10 Ways to Keep Your Aquarium Sparkling

Algae growth can quickly get out of hand in an aquarium, covering decor, plants, and even the glass walls. Stay on top of it with these easy aquarium cleaning tips for scrubbing away algae before it becomes an eyesore.

1. Invest in magnetic aquarium scrapers

Magnets allow scrubbing algae off the outside and inside of the glass without getting your arms wet. Connected by magnets, the external scrubber directs the internal blade, making quick work of glass algae removal.

2. Use soft scrub pads on delicate areas

For acrylic tanks or sensitive spots near fish, choose a gentle aquarium scrub pad over a blade scraper. Soft scrub sponges easily remove algae without harming fish or scratching surfaces.

3. Spot clean new algae growth quickly

It’s much easier to wipe away new green dust or spot algae before it becomes an entrenched layer. Frequently check for new growth and scrub before it spreads.

4. Apply elbow grease on tough buildup

Thicker brown, green, or black algae may require firm scrubbing with a blade scraper. Take it slow to avoid damaging plants or fish. Consider removal if scraping proves ineffective.

5. Clean driftwood, rocks, and decor

Use a soft-bristle or old toothbrush to gently scrub away algae on driftwood, rocks, plastic plants and ornaments. This keeps decor looking fresh in between deep cleanings.

6. Remove plants for thorough cleaning

For badly algae-covered live plants, carefully remove from the tank to clean leaves and stems with an old toothbrush and dechlorinated water. Trim off dead sections.

7. Wipe down equipment outside tank

Keep algae growth off external filter, pumps, tubing and other equipment by periodically wiping down with a sponge or towel. This maintains proper function.

8. Scrub all glass surfaces

Use scrapers or pads to remove algae from the rear and side aquarium panels in addition to the front viewing windows. Thorough cleaning prevents future buildup.

9. Work slowly around timid fish

Looking to Clean Your Fish Tank Easily. Here are 10 Ways to Keep Your Aquarium Sparkling

Take care when scraping near easily spooked species like tetras or corydoras. Slow, gentle cleaning prevents stressing sensitive aquatic life.

10. Attack new algae before water changes

Scrubbing algae immediately before a water change removes all freed debris. The two go hand-in-hand for fresh, clear results. Then enjoy your sparkling clean tank!

Don’t let algae take over your aquascape. With the right scrubbers and some periodic elbow grease, keeping decor and glass clear of algae can become a quick, stress-free routine.

Any aquarium owner knows crystal clear water doesn’t happen on its own. But you don’t need to break your back scrubbing a pristine tank either. These 10 easy tips will have your aquarium sparkling in no time.

Siphon debris from the substrate. A simple gravel vacuum can remove uneaten food and gunk trapped in the gravel bed. Work section by section.

Over time, debris accumulates in aquarium gravel that can foul water quality. A trusty gravel vacuum makes quick work of removing this buildup through routine water changes.

1. Use a designated aquarium siphon

Looking to Clean Your Fish Tank Easily. Here are 10 Ways to Keep Your Aquarium Sparkling

A gravel vacuum designed for aquarium use has wider tubing to prevent clogs when sucking up debris. Available in hand pump or electric variations, a good aquarium siphon simplifies gravel cleaning.

2. Stir up gravel before siphoning

Use a chopstick, skewer, or gravel rake to gently disturb the substrate right before vacuuming. This will release trapped gunk from the gravel bed so it can be removed.

3. Target visible debris

Focus on siphoning areas with large visible buildup first, like uneaten food, fish waste and decaying plant matter sitting on top of the gravel.

4. Work diagonally across sections

Vacuum gravel in sections working corner to corner, rather than randomly. This organized approach ensures all areas get evenly cleaned.

5. Vacuum above plant roots

When siphoning around live plants, carefully focus on the top gravel layer only. Avoid uprooting plants by not disturbing rooted areas deeper down.

6. Watch siphon flow rate

Monitor the vacuum’s debris flow while siphoning. Move more slowly in heavy waste areas to thoroughly remove buildup. Adjust flow rate as needed.

7. Clean along hardscape edges

Pay extra attention to corners, edges, and tight spaces around hardscape items. Debris loves accumulating in these overlooked spots.

8. Let debris settle before refilling

After siphoning sections, pause before adding fresh water. This allows stirred up debris to settle so it isn’t redistributed when refilling the tank.

9. Discard waste properly

Dechlorinate old tank water before disposal. Pouring down drains or using for outdoor plants prevents environmental harm from nutrients and chemicals.

10. Avoid deep substrate vacuuming

Only siphon the top gravel layer, no more than 1-2 inches down. Deeper cleaning risks removing beneficial bacteria colonized deeper in the substrate.

With some simple siphoning techniques, keeping gravel debris-free doesn’t require hours of effort. Just tackle sections at a time during routine water changes to maintain pristine tank water.

Clean the filter monthly. Rinse filter media in tank water to remove debris. Don’t use tap water, which kills beneficial bacteria.

Looking to Clean Your Fish Tank Easily. Here are 10 Ways to Keep Your Aquarium Sparkling

Looking to Clean Your Fish Tank Easily? Here are 10 Ways to Keep Your Aquarium Sparkling

Some key points to remember when cleaning your aquarium include using an algae scraper, gravel vacuum, and old tank water to rinse decorations and equipment. Checking and rinsing filter media monthly is crucial to remove trapped gunk. Every 4-6 months, perform an intensive clean by removing everything and scrubbing down the tank. Don’t forget weekly partial water changes using a gravel vacuum to export waste. Keeping up with these basic cleaning methods will keep your fish tank looking pristine.

An additional tip is to use automated devices that can simplify cleaning. For example, automatic fish tank cleaners utilize pumps and tubing to siphon waste from the substrate. Robot cleaners will independently scrub algae off glass walls. While an investment, these items reduce manual labor during cleaning sessions. For frequent tank maintenance, consider utility cleaning pumps with attachments to vacuum gravel, scrub decor, and more with the push of a button.

Follow these fish tank cleaning best practices, and you’ll create a healthy, crystal clear environment your fish can thrive in. Consistent cleaning is essential for aesthetic appeal and aquatic life wellbeing alike. Plus, who doesn’t love getting compliments on a sparkling clean aquarium that required minimal effort on your part?

Remove algae with algae eaters. Plecos, otocinclus catfish and other algae eaters naturally clean aquarium walls and plants. Pick species suitable for your tank.

Looking to Clean Your Fish Tank Easily. Here are 10 Ways to Keep Your Aquarium Sparkling

Seeking Ways to Clean Your Aquarium with Ease? Utilize Algae Eating Species for Spotless Results

Algae grazers provide natural aquarium cleaning around the clock without any effort on your part. The right species clear the tank while contributing to the underwater community. Focus on picking fish or inverts suited to your setup. For example, a planted betta tank would do well with a few Otocinclus cats and Nerite snails. A large cichlid aquarium needs a robust Pleco to stay spotless.

Beyond selecting complementary species, give them a healthy diet including nutritious greens. Offer hides and plants for grazing territories. Limit tankmates to peaceful fish that won’t nip fins or shrimp. Test water frequently and perform partial water changes to maintain clean parameters. By providing a suitable home, algae eaters will thank you with crystal clear glass.

Ditch the scrubbers and harness the power of natural aquarium cleaners. Let algae eating crews remove the chore of wiping down the glass for you. Populate your tank today for a self-sustaining ecosystem that keeps maintenance to a minimum. Who needs elbow grease when you can let fish power do the dirty work? Say goodbye to algae woes and enjoy the clear underwater views.

Looking to Choose the Perfect Garden Kneeling Bench This Year. Here Are 10 Key Tips

Consider padded vs non-padded models – padding provides extra comfort for knees

When choosing a garden kneeling bench, one of the first decisions is whether you want a padded or non-padded model. Padding provides extra comfort and protection for your knees during long gardening sessions. The trade-off is that padded benches tend to be more expensive than basic non-padded versions.

Here are some factors to consider when deciding between padded and non-padded garden kneeling benches:

  • Comfort – Padding reduces pressure on knees and joints by cushioning them from hard surfaces. Thicker padding gives greater comfort.
  • Knee protection – Padding shields knees from rough ground and sharp rocks that could scrape or bruise them.
  • Shock absorption – Padding absorbs impact from kneeling down, reducing joint strain.
  • Longer gardening time – Padded benches allow you to kneel comfortably for longer periods before knee fatigue sets in.
  • Arthritis/injury – Padding gives needed cushioning for gardeners with arthritis, prior knee injuries or conditions that make kneeling uncomfortable.
  • Age – Older gardeners often benefit from padded benches that are easier on aging joints.
  • Portability – Non-padded benches are typically lighter weight and more portable than padded versions.
  • Affordability – Basic non-padded kneelers are generally the cheaper option.
  • Maintenance – Padding can eventually compress or wear out over time with heavy use.

Consider how much time you’ll realistically be spending kneeling while gardening. For quick tasks, a basic non-padded bench may suffice, but extensive weeding, planting or harvesting jobs will likely be more comfortable with thicker padding. Those with existing knee issues would also benefit from the extra cushioning.

Evaluate if your budget allows for a padded kneeling bench or if the price makes a non-padded model the better choice. Also factor in how easily you need to move the bench around your garden. Ultimately, choose the option delivering the right mix of padding, affordability and portability to suit your individual gardening needs.

Look for thick, stable legs for sturdiness while kneeling

Looking to Choose the Perfect Garden Kneeling Bench This Year. Here Are 10 Key Tips

When searching for a quality garden kneeling bench, it’s important to inspect the design and thickness of the legs. Sturdy, substantial leg construction is crucial for providing a stable and steady platform while kneeling to perform gardening tasks.

Here are a few key factors to look for when evaluating the legs on a potential kneeling bench purchase:

  • Thickness – Thicker legs made from solid steel or aluminum able to bear more weight without bending or buckling.
  • Width – Wide-set legs give a broader base of support making the bench more stable.
  • Number – Four legs offer optimal stability versus three-legged designs which can rock.
  • Bracing – Cross bars between rear legs boost sturdiness under body weight.
  • Attachments – Legs should be tightly welded or bolted to the main frame with no wobble.
  • Footings – Non-slip rubber tips or wide flanges prevent sliding while in use.

Avoid kneeling benches with thin, spindly legs that seem too flimsy to support solid weight. Legs should be thick enough not to noticeably flex or sway when bearing your body mass. Narrowly spaced legs can also compromise stability by reducing the kneeler’s footprint.

Check that leg attachment hardware is robust and securely fastened. Legs that are loosely bolted on risk coming loose over time. This can lead to a wobbly, unsafe kneeler.

Look for wide leg spacing and footings with grip to prevent sliding on grass or dirt while in use. Models with 4 legs offer optimal stability over tripod 3-leg designs prone to rocking if off-balance.

Premium kneeling benches from reputable brands generally offer the most robust leg construction. While more expensive, the stability and durability make them worthwhile for avid gardeners. Cheaper benches often cut corners on materials and leg supports.

Taking time to inspect leg design reduces the risk of purchasing a poorly-made kneeling bench. Sturdy legs allow you to kneel in comfort and safety while tending to gardening tasks. This small investment yields big dividends in stability and peace of mind down the line.

Seek benches with tool storage like pockets or trays

Looking to Choose the Perfect Garden Kneeling Bench This Year. Here Are 10 Key Tips

Having convenient access to tools while gardening is a huge time-saver that greatly improves efficiency. Seek out garden kneeling benches that incorporate helpful features like pockets, trays, hooks and shelves for keeping tools readily available.

Integrated storage options allow you to keep all your essential gear right at your fingertips rather than having to constantly rummage through a distant shed or garage. Having tools and supplies nearby means spending less time searching and more time productively gardening.

Here are some handy tool storage options to look for in a kneeling bench:

  • Pockets – For holding small tools, seed packets, pens, markers, etc.
  • Trays – Provide organized storage for medium-sized hand tools.
  • Hooks – Hold shears, trowels and other frequently used tools.
  • Undershelves – Allow a place to store bins and baskets beneath the seat.
  • Overhead shelves – Provide storage up top for items like gloves and spray bottles.

Quality storage features are typically made from durable, weather-resistant materials like heavy canvas, steel mesh, molded plastic and steel brackets. Zippered mesh pockets securely contain small items while hooks and trays keep essential gear orderly but accessible.

Benches with robust built-in storage allow you to arrange your most used hand tools exactly where you need them. Having the right implement always close by saves the hassle of disrupted workflow from lacking the right tool at the moment you need it.

Thoughtful tool storage design eliminates frustrating hunts for a misplaced trowel or forgotten seed packets in the middle of garden tasks. The time saved not having to run back to the shed constantly yields big dividends over a long gardening session.

Premium kneeling benches from brands like Gorilla Carts or Suncast emphasize integrated storage options like pockets, trays and caddies to maximize user convenience. While a bit more expensive, the productivity boost is often well worth the extra investment.

Choose the right size – wider is better for stability and comfort

When shopping for a garden kneeling bench, one of the most important choices is selecting the proper overall size and width.

Wider kneeling benches typically provide better stability and comfort for a few key reasons:

  • Broader platform – More room to shift knees and legs without feeling confined.
  • Increased stability – Wide stance is less prone to tipping or wobbling.
  • Leg comfort – More space reduces cramps and stiffness in knees and legs.
  • Padding – Wider models allow thicker, plusher knee pads.
  • Weight capacity – Sturdier frames and legs support more weight.

Benches less than 12 inches wide often lack adequate padding and feel precariously unsteady while kneeling. Optimal width provides stability to prevent sliding or shifting on soft garden soil or uneven ground.

For most users, a bench width between 15-20 inches offers suitable knee room without being overly bulky. Larger framed individuals may prefer an extra wide model up to 24 inches wide.

Wider benches do take up more storage space which can be a downside. But the comfort and stability gains make it worthwhile for avid gardeners. Consider your body size and storage space when choosing the ideal width.

Also inspect the size of the seat back and kneeling pads if the bench converts to a seat. These should be adequately sized with sufficient padding thickness for comfort.

Take time to try kneeling on a bench before purchasing when possible. This ensures you select a size appropriate for your dimensions and gardening needs. The right width provides secure stability and ample room to kneel comfortably.

Seek benches that fold for easy storage when not in use

Looking to Choose the Perfect Garden Kneeling Bench This Year. Here Are 10 Key Tips

For gardeners short on space, a folding kneeling bench can be a big help for compact storage versus bulkier one-piece models. Seek benches with folding designs to conserve space when not in use.

Here are some useful features to look for in a foldable garden kneeler:

  • Carrying handles – For easy lifting and transport when folded.
  • Lightweight materials – Reduce weight for portability like aluminum and plastic.
  • Safety locks – Locks keep the bench securely unfolded when in use.
  • Small footprint – Folds into a compact shape for shed or garage storage.
  • Quick release – Simple folding motions via quick-release knobs or hinges.

Quality folding mechanisms provide a stable and wobble-free kneeling platform when open, while allowing the bench to neatly collapse for storage. This saves the need for a permanent large bench taking up limited space.

Storage straps help keep the folded kneeler tightly bundled. Carrying cases add convenience for easily transporting the bench around the yard or garden.

For the smallest storage profile, look for benches that can be mounted vertically on garage walls when not needed. This gets them totally out of the way.

The main downside of folding models is that hinges and joints may loosen over time with heavy use. Higher priced folding benches typically offer greater durability and stability.

But for most homeowners with modest garden space, a quality folding kneeling bench provides the perfect compromise of ample kneeling support combined with minimal storage footprint and portability.

Pick models with handles for easy transport around the garden

Looking to Choose the Perfect Garden Kneeling Bench This Year. Here Are 10 Key Tips

For avid gardeners needing to regularly reposition their kneeling benches around the yard, built-in handles provide hugely helpful portability.

Sturdy integrated handles allow easy grabbing and lifting so you can conveniently carry and relocate a bulky kneeling bench with minimal effort.

Useful types of handles to look for include:

  • Side handles – For a two-handed grip and balanced lifting.
  • Vertical handles – Upright handle(s) for a solid one-handed hold.
  • Top handles – Easy access for grabbing from above.
  • Folding handles – Discreet handles that tuck away when not needed.

Handles should provide a secure, comfortable grip even when bearing heavy weight. Padded and wrap-around handles improve comfort and control.

Adjustable, telescoping handles accommodate different user heights for optimal ergonomics. Durable steel construction prevents bending or breaking under load.

For occasional minor repositioning, handles may not be essential. But for frequent kneeler transport around your property, quality integrated handles are a hugely helpful feature that saves endless back strain.

The trade-off is that handles slightly increase the bench’s overall size and weight. But being able to easily relocate an awkward, heavy kneeling bench on demand is well worth the minor downsides.

Look for lightweight yet durable materials like steel or aluminum

An ideal garden kneeling bench combines lightweight portability with the ruggedness to support prolonged outdoor use. Seek benches made from innovative durable materials that don’t weigh too much.

Lighter kneeling benches are much easier to pick up, carry, fold and move around your yard. But the materials still need sufficient strength and weather-resistance.

Great lightweight yet durable options include:

  • Aluminum – Very light while resisting corrosion.
  • Steel tubing – Thin-walled tubes reduce weight but maintain stiffness.
  • Plastic – Heavy-duty molded plastic resists elements while weighing less.
  • Fiberglass – Extremely lightweight while providing stiffness.

Thoughtful designs utilize hollow or thinner components in non-critical areas to pare down pounds without compromising durability.

Also look for kneeling cushions and pads made from lightweight foam versus heavy cotton, and thinner synthetic mesh rather than nylon fabric.

Clever hybrid materials like resin-coated metal mesh panels trim fat while retaining strength. Composites mix the ideal properties of multiple materials.

The result is a kneeling bench providing adequate structural support you can easily maneuver around your property. Just ensure overall construction quality is robust and not just cheaply made.

Select weather-resistant materials if using outdoors

Looking to Choose the Perfect Garden Kneeling Bench This Year. Here Are 10 Key Tips

For gardeners planning to use a kneeling bench outdoors, it’s crucial to select models made from weather-resistant materials.

Outdoor kneeling benches need to hold up to sun, rain, moisture and temperature extremes without damage or deterioration.

Key weather-resistant materials to look for include:

  • Plastic – HDPE plastic withstands sun and moisture.
  • Powder coated steel – Prevent rusting on steel parts.
  • Aluminum – Anodized aluminum avoids surface oxidation.
  • Stainless steel – Corrosion-resistant even when wet.

Wood benches should use natural weather-resistant woods like cedar or teak. Avoid standard pine.

Check for marine-grade waterproof textiles on cushion covers and mesh panels. Seek galvanized hardware and fittings.

The product description should clarify if the bench is safe for outdoor use or just intended for indoor use. Outdoor benches need to stand up to years of sun, wind, rain and snow.

Cheap benches using basic untreated steel and wood will quickly corrode, rot and degrade when left outside. Spending a little more upfront on weather-resistant materials saves endless future headaches.

Compare prices – you can find quality benches at varying price points

Looking to Choose the Perfect Garden Kneeling Bench This Year. Here Are 10 Key Tips

When shopping for a garden kneeling bench, it’s important to set a comfortable budget but realize quality options exist across a wide span of prices.

Higher priced kneeling benches typically offer advantages like:

  • Superior materials – Teak wood, anodized aluminum, etc.
  • Thicker padding and cushions
  • More features – Storage, wheels, adjustability
  • Higher weight capacities and durability
  • Better weather resistance and warranties

But there are still plenty of inexpensive benches using decent materials and construction suited for lighter duty home garden use.

Evaluate your particular needs. Casual gardeners can find good value in budget-friendly options under $100. Avid gardeners may want to spend more for $200+ premium benches.

Compare material quality, padding, features and warranties when weighing prices. Just because it’s expensive doesn’t mean it’s high quality.

With so many kneeling benches on the market, take time to identify models meeting your requirements at an agreeable price point. Developing a comparison of prices to features helps narrow your selection.

Read reviews and choose a trusted brand with positive feedback

When shopping for a garden kneeling bench online, customer reviews provide helpful insight into real-world performance and durability.

Look to buy from established brands with predominantly positive feedback and reviews. This increases your chances of getting a quality bench that lasts.

In particular, look for:

  • Reviews averaging at least 4 out of 5 stars
  • A long history of reputable outdoor furniture
  • Thoughtful responses addressing negative reviews
  • Good warranties demonstrating faith in their products

Beware of unknown brands with mainly mediocre or negative feedback. The savings often leads to disappointment when the bench falls apart after one season.

Higher priced brands generally earn their reputations through exceptional quality and service. But more affordable options can still offer good value if designed and constructed well.

Taking time to carefully research brands pays dividends in ending up with a sturdy, comfortable kneeling bench providing years of gardening enjoyment.

Looking to Carry Bikes for Adventure This Year. Reese Has Amazing Bike Racks to Check Out

Reese Explore 4 Bike Rack: Versatile 4-Bike Hauling

As an avid cyclist, having the right bike rack is crucial for getting my bikes to and from adventures safely and securely. I’ve tried a few different racks over the years, but the Reese Explore 4 Bike Rack stands out as the most versatile and durable 4-bike carrier I’ve used.

Made in the USA by Reese, a leader in towing and hauling equipment, the Explore rack can carry up to 4 bikes weighing up to 40 pounds each. One of the things I love about this rack is its lifting assist feature – with just a gentle pull of the handle, the rack tilts away from the vehicle for easy access to the back without having to unstrap the bikes. The dual-sided tilt also makes it easy to open rear hatches and tailgates when bikes are loaded.

The Explore rack mounts to 2″ hitches and has a unique arc design that curves up and around for added ground clearance. No more scraping the rack when driving up steep driveways or dirt roads! It fits most bike frames, including mountain, hybrid, road, and even fat tire bikes. The built-in cradles and anti-sway straps keep bikes stable and protected during transport.

Installing the Explore rack is quick and straightforward. After securing the hitch receiver tube in the 2″ hitch, a single bolt tightens and locks the rack in place. Adjusting the cradles to fit different bike frames is also a breeze thanks to the tool-free snap knobs for easy adjustment. No tools needed!

One of my favorite aspects of this rack is the individual bike cradles that hold each bike upright by its top tube. This protects the bike frames better than hanging them vertically by the front wheel. I’ve had bike racks in the past that ended up bending my wheels out of shape, so I really appreciate that the Explore rack secures bikes by the frame.

The cradles are also padded to prevent frame scratches and feature comfortable molded carry arms. I like being able to strap bikes in quickly with the included ratcheting straps and S-hooks. The straps have a rubber coating to prevent bike finish damage too.

With a 100 lb weight capacity per bike slot, the Explore rack can truly handle any bike you throw at it. My mountain bikes are heavy but they fit and carry perfectly. The rack can handle up to a 5″ tire width too.

One of my riding buddies has an e-bike that weighs nearly 60 lbs. The Explore rack handles the extra weight without any issues. It’s built with thick, powder coated steel construction that provides excellent stability. No bouncing or rattling down rough dirt roads!

Plus, the 4 bike positions are staggered to allow room for frames and handlebars without everything banging into each other. My road bike fits nicely next to my buddy’s cruiser bike, with room to spare. The rack keeps them far enough apart for safe and secure carrying.

For longer road trips I’ve taken with my bikes, I really appreciate how much simpler loading and unloading is with the Explore rack compared to hanging-style carriers. Being able to roll bikes on and off is so much easier on my back than lifting bikes up and hanging them vertically.

It’s also super convenient how the carry arms fold down when not in use. This gives full access to the back of my SUV without having to remove the empty rack. Driving around town running errands without bikes is headache-free.

One of the biggest selling points for me is how versatile this rack is. It can carry everything from lightweight road bikes to heavy downhill mountain bikes without problems. The Explore rack can also be used for carrying non-traditional bikes like trikes, tandems, and even some mobility scooters with its universal cradle system.

Reese offers a limited 5-year warranty on the Explore rack so I know it’s built to last. After over a year of regular use through all sorts of conditions, it still looks and functions like new. No rust, no squeaks or rattles either. Just solid performance hauling my bikes anywhere and everywhere.

For multi-bike carrying capacity in a heavy-duty yet easy to use rack, the Reese Explore 4 Bike Rack is an excellent choice. If you’re an avid cyclist or outdoorsman looking for a versatile way to transport your bikes, I highly recommend giving this rack a look.

With the Explore 4 holding my bikes, I know they’ll get to and from my adventures safely and securely. This bike rack has become an essential part of my cycling and outdoors gear. Looking forward to racking up many more miles of happy bike hauling with the Reese Explore!

Reese Sportwing 4 Bike Rack: Easy to Use and Install

Looking to Carry Bikes for Adventure This Year. Reese Has Amazing Bike Racks to Check Out

As someone who loves cycling and the outdoors, having a sturdy and secure bike rack is essential gear for all my adventures. After testing quite a few racks that didn’t cut it over the years, I finally found “the one” – the Reese Sportwing 4 Bike Rack. This carrier makes hauling my bikes incredibly easy thanks to its smart design and quality construction.

Manufactured by Reese, a leading brand in towing accessories, the Sportwing 4-bike rack is built to last. It’s constructed from heavy duty steel with a thick black powder coat finish that prevents rust and corrosion. This thing is tough as nails!

One of the things that really stands out about the Sportwing is how fast and simple it is to install. It secures into any 2” receiver hitch with a single bolt. Lining up the hitch pin hole and sliding in the pin takes just seconds. No tools required for rock solid installation.

Loading bikes onto the carrier is just as easy. The unique arc frame design curves up and around for added ground clearance, so I never have to worry about scraping my rack over steep driveways or trails. The bent arm wheel trays also provide much better bike frame clearance compared to hanging-style racks.

Each of the 4 bike positions has molded rubber cradles that gently grip frames without any chance of scratches or abrasions. I really like that the Sportwing holds bikes by the top tube rather than hanging awkwardly from the wheels. This provides way more secure transport and reduced bike sway.

To fasten my bikes down, the rack has thick rubber straps with coated buckle bumpers that won’t mar my bike’s finish. Snapping the straps over the wheels gives each bike rock solid stability for highway driving. The straps are super easy to attach and release when I’m loading or unloading too.

With each bike weighing under 40 lbs, the Sportwing can handle up to 160 lbs total. But even when loaded down with heavy bikes, the rack remains wobble-free thanks to its sturdy steel construction. The angled arm design also eliminates bike-to-bike contact for rattle-free transport.

My mountain bike has super wide 4.8” tires, but the Sportwing can accommodate up to 5” tires in each slot. It even fits my buddy’s fat tire bike! So no matter what bike styles or tire widths we’re hauling, the Sportwing has plenty of clearance and adjustment range.

I also appreciate how much easier loading and unloading bikes is compared to vertical hang-style racks. Being able to simply roll bikes on and off the Sportwing is so much nicer than having to hoist heavy bikes up and down. My back thanks me!

Driving around town or accessing the rear of my vehicle is hassle-free too. When not carrying bikes, the arms fold down and out of the way. This allows full access to my trunk or tailgate without having to remove the empty rack.

Road trips with bikes are a breeze with the Sportwing 4 holding our rides safe and secure. Long highway drives feel perfectly stable, even at high speeds with bikes loaded. The rack has just the right amount of sway control thanks to its sturdy arm cradles and anti-sway straps.

I also love how much adjustability the Sportwing offers. Each cradle has 5 different height settings to perfectly fit any bike frame size. From kids bikes to adult cruisers and mountain bikes, the Sportwing can carry them all.

Reese really thought through the design to make this rack as versatile as possible. The staggered bike positions prevent handlebar interference even with odd-shaped mixte frames. And the accessible tilt release handle makes accessing the rear super convenient without bike unstrapping.

After using the Sportwing for long weekend trips, daily cruising around town, and even rugged backcountry excursions, it still looks brand new. The quality materials and durable construction really shine through after repeat use in all conditions. Rain or shine, this rack performs flawlessly.

For stable 4-bike transportation that’s built to last, the Reese Sportwing is a fantastic choice. Easy installation combined with handy features like the fold-down arms and tilt release handle make this a super versatile rack. If you’re seeking hassle-free bike hauling for all your cycling adventures, I highly recommend the Sportwing.

With this sturdy bike rack holding our rides, my buddies and I can set out on 2-wheeled journeys near and far with total confidence. No more janky, wobbly racks! The Sportwing provides peace of mind that our bikes will arrive safely every time, letting the adventure begin as soon as we unload.

Reese 4 Bike Carrier: Sturdy and Durable Construction

Looking to Carry Bikes for Adventure This Year. Reese Has Amazing Bike Racks to Check Out

As an avid cyclist who loves embarking on two-wheeled adventures, having a high quality bike rack is essential gear. I’ve gone through a few flimsy, shaky racks that left me worried about the safety of my bikes in transit. After getting frustrated with subpar equipment, I discovered the Reese 4 Bike Carrier – and it’s been pure hauling bliss ever since.

Manufactured by Reese, the leading brand in heavy duty towing and trailering gear, this bike rack means business. It’s constructed from thick steel tubing that provides incredible strength and stability when loaded down with bikes.

The powder coated finish protects against rust and corrosion even when exposed to rain and humidity. While other racks I’ve owned chipped and flaked, the Reese finish maintains its durability year after year. This high quality construction really makes the rack stand out.

Installing the 4 Bike Carrier takes just minutes with no tools required. Simply slide the shank into any 2” receiver hitch and insert the pin. One bolt secures the rack in place with a incredibly solid hold. The rack fits 1 1/4″ hitches with an included reducer sleeve too.

An integrated locking mechanism on the bolt makes the rack tamper-resistant when parked. I don’t have to worry about someone walking away with my expensive bikes and rack!

With thick padded cradles and cushioned straps holding bikes by the top tube, the 4 Bike Carrier provides outstanding protection during transport. The cradles are adjustable to fit any bike frame size while preventing scratches and abrasions.

Each cradle has an auto-resetting retainer spring so loading bikes is fast and hassle-free. Just roll a bike into position and the spring holds it securely in place while I strap it down. Unloading involves a simple strap release and rolling the bike forward off the rack.

The cradles hold up to 45 lbs each, for a total hauling capacity of 180 lbs. I’ve loaded the rack up with heavy downhill mountain bikes without any wobbling or bike-to-bike contact. It handles the weight like a champ thanks to the overbuilt steel construction.

With my bikes strapped tightly in the cradles, there is minimal sway even at highway speeds. The rack dampens vibration impressively, letting me drive for hours in total comfort and confidence.

The 4 Bike Carrier has an arc shape that provides extra ground clearance for getting over obstacles without scraping. Combined with the folded carry arms, I can fully access the rear of my vehicle even when the rack is installed.

For longer road trips, I really appreciate the built-in deterrent cable that adds an extra layer of security when parked overnight. Looping the cable through bike frames and wheels deters potential theft attempts. Peace of mind for precious bikes!

Reese designed this rack with smart features that make bike hauling almost effortless. The carry arms fold down when not in use, allowing full trunk and hatch access. Padded hold-downs keep arms secured in folded position too.

With setup and breakdown being so fast and easy, I use the 4 Bike Carrier almost daily for local rides and errands. Hitching up to haul bikes takes less than a minute thanks to the tool-free installation. No more hassling with bulky racks for quick trips!

After two years of regular use, the rack still looks and functions like new despite lots of highway miles and exposed outdoor parking. The quality materials and durable construction really shine through.

For a sturdy, heavy duty rack with smooth bike hauling performance, the Reese 4 Bike Carrier is an excellent choice. The padded cradles and secure hold down straps keep bikes safe and scratch-free in transit.

With this burly yet easy to use bike rack, I can head out on rides near and far with total confidence that my precious bikes will arrive secure and undamaged. The Reese 4 Bike Carrier has definitely upgraded my cycling adventures!

Reese Carry Power Bike Rack: Fits 2″ Hitches Perfectly

As an avid biker who loves cycling on trails and tackling mountain paths, having a sturdy and secure bike rack is crucial gear for my adventures. I’ve tried a few budget racks that were flimsy and unstable, leading to worries about my bikes arriving in one piece. After one too many shaky rides, I discovered the heavy duty Reese Carry Power Bike Rack – and my bike transport woes were solved.

Manufactured by Reese, the leader in towing accessories and hitches, the Carry Power bike rack is built with high quality materials to withstand years of outdoor use. The steel construction provides exceptional strength for stable hauling, while the thick black powder coat finish resists corrosion.

One of the things I really appreciate about this rack is how quickly it installs into any standard 2” receiver hitch. Just slide the shank in, pop in the pin, and secure it with a single bolt. No tools required! The rack fits 1 1/4″ hitches too with the included reducer sleeve.

With thick padded cradles and ratcheting anti-sway straps, my bikes stay protected and secure in transit. The cradles grip the top tube firmly but gently without any chance of scratches. And the straps eliminate bike sway or bounce, even on rough backroads.

Loading and unloading bikes is smooth and easy thanks to the tilt-away design. I simply pull the handle to tilt the rack away from the vehicle, allowing full access without unstrapping the bikes. It’s so convenient for accessing the rear when bikes are loaded.

The rack carries 2 bikes with up to 40 lbs each, for 80 lbs hauling capacity. I’ve loaded it up with my heavy mountain bikes and the sturdy steel construction keeps them stable and rattle-free. No wobbling around even when fully loaded.

One of my favorite features is the integrated carry arm that folds down and out of the way when not carrying bikes. This allows full access to my vehicle without having to remove the empty rack. It’s awesome for quick errands around town.

The carry arms have a curved design that provides extra ground clearance, so I don’t have to worry about the rack dragging over steep driveways or off-road trails. It clears obstacles with ease thanks to its smart engineering.

Whether I’m driving downtown to hit the bike paths or venturing up north for an off-road excursion, the Carry Power rack keeps my bikes totally secure. The cradles grip tightly while the straps eliminate bike sway, letting me take on any roads or trails with confidence.

Assembly right out of the box is quick and easy. The instructions are clear, and all necessary hardware is included. With just a Philips screwdriver I had the rack fully installed on my vehicle in under 15 minutes.

Despite extensive use on family camping trips and daily driving around town, the rack still looks brand new after over a year. The quality materials and durable powder coat finish protect against scratches, chips, rust and corrosion. This thing is built to last.

Reese provides a limited lifetime warranty on the Carry Power rack so I know it’s designed for the long haul. Their customer service has been fantastic the few times I’ve contacted them with questions too.

For a heavy duty rack that simplifies bike transportation, the Reese Carry Power is an excellent choice. It provides a rock solid hold on my bikes so I can head out on rides knowing they’ll arrive secure and undamaged.

The easy tilt function makes accessing my vehicle a breeze. And the folding carry arm gives me full trunk access when not loaded with bikes. If you’re seeking a sturdy, versatile bike rack, I highly recommend the Carry Power.

With this rugged rack securing my precious two-wheelers, I’m able to pursue cyclo-adventures on any terrain with confidence. My bikes will tackled the trails safely thanks to the reliable performance of the Reese Carry Power bike rack.

Adjustable Holders Keep Bikes Secure During Transport

Looking to Carry Bikes for Adventure This Year. Reese Has Amazing Bike Racks to Check Out

As a cycling enthusiast who loves embarking on two-wheeled adventures, I’ve learned that having the right bike rack is crucial. I’ve used flimsy racks in the past that led to scratched frames and wheels getting bent out of shape after a bumpy ride. That’s why adjustable, protective bike holders are so important for keeping bikes safe in transit.

One of my favorite rack features is adjustable holders that cradle the bike frame securely without scratching the finish. High quality racks like those from Reese have thick rubber or foam cradles that grip bikes gently but firmly.

The cradles are fully adjustable to accommodate different bike frames. Simple snap buttons or bolts allow the holder width and position to be customized for proper fit. This prevents the bike from swaying or bouncing around during transport.

Quality racks often use ratcheting straps with rubber-coated buckles to fasten wheels snugly into the cradles. These prevent straps from scratching the wheel rim while providing a super tight and stable hold.

I’ve found that racks that hold bikes by the top tube rather than hanging them vertically provide the most secure transport. The frame remains properly supported in its natural position, rather than putting stress on the wheels.

Hanging bikes by the wheels can also lead to damage over time as the weight pulls down on the rims. Frame-gripping cradles prevent this issue and reduce bike sway at high speeds or over bumps.

Padded cradles are essential for protecting the bike’s finish too. Racks with unpadded or thin cradles often lead to scratched frames from vibration or rubbing during transit.

High density foam or thick rubber cradles cushion bikes from road impacts while providing a totally scratch-free hold. And adjustable positions cater to various frame sizes and riding styles, from road to mountain to BMX bikes.

The most versatile racks have holders that adjust in multiple directions. Up and down adjustment accommodates different wheel sizes, while side to side adjustment provides custom spacing for proper tire clearance.

Rotating holder arms are also useful for getting bikes to fit perfectly. Being able to tweak the angle prevents handlebars from bumping into each other on models like Reese’s hanging-style racks.

Easily accessed adjustment knobs or snap buttons make fitting bikes into the holders fast and hassle-free. No need for tools or complicated setup. Simply position and secure the cradles around each unique bike in seconds.

Racks with integrated anti-sway cradles prevent the front wheel from moving side-to-side during transport. This greatly reduces bike sway for more stable, vibration-free carrying, especially at highway speeds.

For bike enthusiasts who ride various bike styles, having fully adjustable holders is a must. The racks can be switched from carrying road bikes on a race weekend to holding mountain bikes for a backcountry excursion on the following weekend.

Rotating and locking arms provide fast customization for my kids’ smaller bikes to fit perfectly and safely. No need to buy multiple racks!

Adjustable bike holders allow a single rack to work for the whole family. And they provide peace of mind knowing our expensive bikes are secured properly for every ride.

For versatile, scratch-free transportation, adjustable holders are an essential component. They allow racks to be customized instantly for proper bike securing. No more worries about damaged bikes or wheels thanks to a fully adjustable hold!

Padded Cradles Prevent Frame Damage to Bicycles

Looking to Carry Bikes for Adventure This Year. Reese Has Amazing Bike Racks to Check Out

As an avid cyclist who loves going on rides near and far, finding a bike rack that prevents frame damage is crucial. I’ve had scratching and paint chipping issues with cheap racks in the past. That’s why I always look for quality racks with padded cradles now to keep my bikes pristine.

High density foam cradles are essential for protecting expensive bike frames during transport. Unpadded metal or plastic cradles often lead to scratched paint and gouged tubes from vibration and rubbing.

The soft foam cushions bikes from road impacts while providing a gentle, scratch-free hold. Padded cradles grip bikes securely without putting pressure directly on the frame.

Premium bike racks from brands like Reese use thick rubberized foam or molded urethane cradles. These provide plenty of cushioning while maintaining a sturdy hold on bikes.

Adjustable padded cradles conform to different bike styles and frame sizes. From kids’ bikes to adult mountain bikes, the cradles can be positioned perfectly for a custom fit.

Rotating cradle arms on certain racks allow precise angle adjustment for proper bike securing. Pivoting the craddles prevents paint damage from handlebars rubbing together during transport.

The soft yet grippy surface of padded cradles also prevents bikes from sliding around on the rack. Bikes stay put in the ideal position thanks to the incredible hold of padded cradles.

Racks that carry bikes by the top tube rather than hanging them from the wheels provide the most secure hold with padding. The frame remains properly supported in its natural position.

Hanging bikes vertically by the wheels puts stress on the rims and risks damaging expensive wheelsets. Padded top tube cradles avoid this issue entirely.

Thick straps with rubber-coated buckles fasten bikes snugly into padded cradles without scratching. The straps distribute clamping force evenly across the wheels thanks to their wide design.

Premium racks have integrated anti-sway cradles that prevent the front wheel from shifting left to right while driving. This reduces bike sway for more secure transport, without risking frame damage.

Padded lower cradles on hanging-style racks protect the frame downtube and prevent chainring scratches when bikes inevitably bump together.

Full-wrap cradles completely surround the top tube on upright hitch racks, providing 360 degrees of padded security. Bikes don’t touch the bare rack at any point.

Thick rubber or dense foam padding absorbing road vibration keeps bikes from rattling against the rack, preventing paint chips and scratches.

Thanks to padded cradles distributing clamping force evenly, I don’t have to cinch straps down excessively tight to prevent frame movement and sway.

This allows me to secure bikes gently but firmly without any rubbing on unpadded rack surfaces. I can hit potholes and bumps without worrying about damage.

Quality padded cradles are essential for keeping expensive bikes pristine and protected in transit. They provide cushioning and custom fit without sacrificing security and stability.

I won’t haul bikes without padded cradles anymore after dealing with scratched frames and chipped paint. The peace of mind is worth the investment for my precious rides!

Integrated Cable Locks Add Extra Layer of Security

As a bike owner who’s had a bike stolen off a rack before, finding a secure rack option is top priority for me. Key lock features I look for are integrated cable locks to provide an extra level of theft deterrence when parked.

Quality racks like Reese’s 4-bike carrier include an integrated steel cable that loops through the bike frames and wheels then attaches to the rack itself.

This prevents the bikes from being rolled off the rack while parked. The cable has to be detached from the locking mount to unload the bikes, so random thieves can’t simply release the straps and ride away.

The sheathed steel cable is thick enough that bolt cutters would be required to cut it. The time and tools needed provide a significant deterrent compared to regular straps.

Having the locking cable integrated right into the rack makes it quick and convenient to secure bikes when leaving the vehicle. No need to bring a separate cable lock.

On hanging-style racks, looping the integrated lock through wheels and frames creates a web that makes bikes nearly impossible to remove without the key.

The lock mounts are coated to prevent scrapes and scratches during use. And rubber coated hooks prevent bike finish damage wherever the cable touches.

High quality combination cable locks are also handy for providing key-free convenience. These allow me to choose a numeric combo for easy unlocking when I return.

On upright platform racks, running the cable through a rear wheel and frame then back into the rack itself immobilizes the bike. The frame can’t pivot to release from the holder.

Thieves would have to lift the entire heavy rack to steal locked bikes, which requires a vehicle and draws lots of attention in public places.

During extended stops overnight or at trailheads, I’ll also run a U-lock through the bike frames for even more security on top of the integrated cable.

Having an integrated cable lock right on board simplifies bringing the extra protection of a cable without needing to pack a separate one.

I know my expensive bikes are more tempting targets for thieves when we’re on the road. Hotels, campsites, and trailheads are all vulnerable spots for bike snatching.

Using the supplemental security of an integrated cable lock gives me serious peace of mind when parked in public places. I don’t have to stress about returning to find bikes stolen off the rack.

The unique frame mount design also prevents the lock from being cut and detached as a work-around. Thieves have to take the entire rack if bikes are locked into it.

Integrated cable locks are such a smart enhancement for protecting precious bikes. The convenience, strength and simple visual deterrent keep would-be thieves at bay.

I’ll never own a bike rack without an integrated cable lock again after learning the hard way how quickly nice bikes attract criminals. The extra security is well worth it!

Tilting Design Allows Tailgate Access When Loaded

Looking to Carry Bikes for Adventure This Year. Reese Has Amazing Bike Racks to Check Out

As an outdoor adventurer who loves cycling and camping, finding a bike rack with a tilting design has been a total game-changer for me. Having access to the rear tailgate or hatch when loaded with bikes provides so much extra convenience.

High end racks from Reese have an integrated tilt mechanism that allows the entire loaded rack to pivot away from the vehicle with the pull of a handle.

This tilts the bikes out of the way, providing clear access to open hatches, tailgates and trunks without having to unload the bikes first.

It’s incredibly handy when we need to access the cargo area at campsites or trailheads when bikes are mounted on the rack already.

The smooth tilt action doesn’t require unstrapping the bikes or undoing any mounting bolts. Just pop the handle and let the gas struts gently pivot the rack out of the way.

Being able to keep bikes secured on the rack while gaining access inside the vehicle is a total game changer for convenience.

Some tilting rack models like Reese’s Explore have dual-sided tilt function. This allows the rack to tilt away from either side of the vehicle.

So whether the hatch opens to the passenger side or driver side, the tilt mechanism provides clear clearance when needed.

The pivoting adjustment also comes in handy when vehicles with rear mounted spare tires would otherwise interfere with the bike rack.

Simply tilt the rack to clear the tire when needed for opening the hatch or accessing the receiver mount.

When not needed, the rack remains upright and out of the way. Dual tilt racks have integrated locking pins to secure the rack in the centered home position.

This prevents unwanted tilting when loading or unloading bikes from the rack arms. The locking system keeps things steady.

Being able to access the vehicle interior or rear cargo area without unloading bikes first saves so much time and hassle.

I never realized how convenient tilting function is until I started using racks without it. It’s painfully inconvenient needing to take all the bikes off just to grab something from the cooler.

The tilt design also provides access to hitch receivers that end up getting blocked by the rack itself once installed.

Simply tilt the rack forward and the receiver becomes accessible again for adding a ball mount or other hitch accessory as needed.

Premium racks use smooth pneumatic struts to prevent the heavy rack and bikes from slamming down when accessing. Everything glides gently into position.

If you regularly haul bikes while camping or need frequent access to the rear of your vehicle, a tilting bike rack is a must-have accessory.

The convenience and flexibility is unbeatable. Tilt design racks have become essential gear for all my cycling and outdoor adventures.

Rubber Straps and Anti-Sway Cages Prevent Bike Sway

Looking to Carry Bikes for Adventure This Year. Reese Has Amazing Bike Racks to Check Out

As an avid cyclist who logs thousands of miles each year, having a rock-solid bike rack that prevents sway is crucial. I’ve used budget racks that led to bouncing, rattling and bike-to-bike contact during rides. That’s why quality rubber straps and anti-sway cages are must-have features for me.

Thick rubber straps with coated metal buckles distribute clamping force evenly across wheels without scratching the rims. This prevents movement and bounce while protecting the bike’s finish.

The rubber construction absorbs vibration and flexes to conform to different wheel shapes and sizes. From skinny road tires to chunky mountain knobbies, the straps secure each wheel tightly.

The broad contact patch spreads force out for a gentle yet firm hold. Bikes don’t slide around or wobble thanks to the incredible grip.

Premium bike racks have integrated anti-sway cages that prevent the front wheel from swaying left to right during transport. This provides a remarkably stable ride.

The anti-sway cages bolt into the wheel tray and conform closely to the wheel while allowing free spinning. Bikes racked with these cannot sway independent of the vehicle.

Anti-sway cages also protect against bike-to-bike contact. Space is limited on 4-bike platforms, so eliminating sway prevents handlebars and pedals from bumping together.

Hanging-style racks benefit greatly from anti-sway features too. The cages prevent bike sway that leads to rim and frame damage when bikes inevitably contact each other.

Thick lower wheel straps provide a second connection point to eliminate movement. The bike remains centered and stable in the tray despite bumps and swerves.

On upright platform racks, a second set of frame straps prevents the top tube from pivoting or lifting out of the main cradle that holds it.

Dual connection points with the anti-pivot straps and wheel straps make the bikes immovable. Sway is 100% eliminated for a smooth, stable ride.

When used together, the rubber straps and anti-sway cages provide a remarkably solid hold that dampens vibration and absorbs shock.

Even on rough dirt roads and highways with strong crosswinds, my bikes remain steady as a rock thanks to these dual anti-sway systems.

After experiencing damaged rims and scratched frames from cheap, sway-prone racks, I’ll never go back. The security of a sway-free ride is well worth the investment.

Heavy-duty rubber straps and integrated anti-sway cages are must-have features that provide peace of mind during bike transport. I highly recommend selecting a rack equipped with these innovative sway-preventing accessories.

Limited Lifetime Warranty for Worry-Free Ownership

As an avid cyclist who relies on my bike rack for year-round adventures, warranty coverage for defects and damage provides invaluable peace of mind. That’s why I highly recommend selecting a premium rack that comes with a limited lifetime warranty.

Top brands like Reese offer a limited lifetime warranty on their racks against defects in materials and workmanship. This covers the full lifespan of the product.

Knowing that any manufacturing flaws or premature wear will be covered down the road provides confidence in the purchase. I don’t have to stress about rack failure during important trips.

Reese’s warranty protects against defects in the metal construction, moving parts like hinges and latches, and finishes like powder coating and plating.

If something is incorrectly assembled at the factory or deteriorates faster than expected, Reese will provide replacement parts to repair the rack.

The limited lifetime warranty also covers damage that might occur during normal use, like metal fatigue from frequent loading and unloading of bikes.

Small dents, scratches and chips often occur when using racks frequently for active adventures. Seeing the warranty has me covered is a relief.

I don’t have to baby the rack or limit its use to avoid voiding the warranty. Normal wear and tear is expected and accounted for.

Reese also provides excellent customer service and support if issues do come up down the road. I can get fast help with repairs or replacements as needed.

Some brands only warranty certain rack components or offer very short 1-2 year warranties. Limited lifetime coverage is essential for me.

Off-brand racks seem like a good deal at first, but they end up costing more with no recourse when problems occur.

With Reese standing behind their products for the full lifespan, I have confidence hauling bikes for years without worries of premature failure.

The warranty only excludes damage from improper use, modifications or overload. As long as I don’t exceed weight limits or alter the rack, I’m covered.

Overall, the limited lifetime warranty provides amazing value and reassurance. I don’t have to gamble on rack reliability and durability.

Knowing I’m covered for the long run brings peace of mind. I can focus on adventures instead of worrying about potential rack failure.

Looking to Buy the Perfect Rice Cooker This Year. Here are 10 Key Features of Cuckoo’s Twin Pressure Cookers You Need to Know

Unmatched Cooking Speed: Cooks Rice Up to 50% Faster

Rice is a staple food for billions of people around the world. Whether you’re cooking rice to go with a saucy curry, making sushi rolls, or just want fluffy white rice to accompany a meal, having a rice cooker that can deliver perfect rice quickly and consistently is a must in any home cook’s kitchen.

Cuckoo’s line of twin pressure rice cookers are renowned for their unmatched cooking speeds, with the ability to cook rice up to 50% faster than conventional single-lid rice cookers. This super-quick cooking is achieved through Cuckoo’s innovative twin pressure technology, which allows the rice cooker to build up and maintain higher pressures during the cooking process.

How Does Twin Pressure Technology Work?

Cuckoo’s twin pressure rice cookers have an inner and outer lid. The inner lid seals the inner pot, allowing pressure to build up inside. The outer lid creates an air-tight seal on the outer body. This dual lid system lets the rice cooker reach and sustain higher pressures than single-lid models.

Higher pressure allows water to boil at temperatures above 100°C. The increased heat shaves significant minutes off the rice cooking time. And unlike stove-top pressure cookers, Cuckoo’s electronically controlled pressure system eliminates any guesswork and makes perfect rice every time.

Faster Cooking Without Sacrificing Taste or Texture

Looking to Buy the Perfect Rice Cooker This Year. Here are 10 Key Features of Cuckoo

When cooking under pressure, water penetrates the rice grains faster and more thoroughly. This decreases cooking time considerably but does not impact the final taste or texture of the rice. Cuckoo’s twin pressure rice cookers produce exceptionally fluffy, tasty rice just like traditional cookers – but in almost half the time.

The pressurized environment also enables you to cook different types of rice perfectly, from white and brown rice to glutinous and mixed grain varieties. The advanced heating system adjusts temperature and cooking times automatically based on the rice type selected.

Other Benefits of Twin Pressure Technology

In addition to lightning-fast cooking, Cuckoo’s twin pressure system offers other advantages over conventional rice cookers:

  • Energy efficient – by minimizing cooking time, the rice cooker uses less power.
  • Locks in nutrients – the pressurized environment helps retain more nutrients in the rice.
  • Reduced oxidation – less exposure to air and heat prevents oxidation of rice grains.
  • Versatile – pressure setting also reduces cooking times for other grains, beans, soups, etc.

Precise Temperature Control for Perfect Rice

Looking to Buy the Perfect Rice Cooker This Year. Here are 10 Key Features of Cuckoo

Cooking rice seems simple – just add rice and water to your cooker and turn it on. But creating light, fluffy grains requires precise temperature control. Rice is very sensitive to temperature variations during cooking.

Cuckoo’s advanced heating technologies allow their twin pressure rice cookers to fine-tune temperatures throughout the cooking process. This enables the perfect hydration and gentle swelling of rice grains every time.

Sophisticated Heat Distribution

The inner pot contains a 3-ply metal plate that evenly distributes heat along the bottom. No matter where grains are located, they receive uniform heating for consistent cooking.

Embedded heaters along the inner pot’s sides also regulate temperatures. This pushes heat into the middle layer of rice, avoiding hot spots that can lead to burnt or undercooked rice.

Intelligent Heating Algorithms

At the heart of Cuckoo’s rice cookers is advanced AI software that monitors cooking temperatures in real-time. It makes continual micro-adjustments to heating intensity to maintain the ideal temperature curve for perfect rice.

The heating algorithm even factors in variables like rice type, quantity, and the starting water temperature. This smart technology eliminates any guesswork for foolproof rice cooking.

Gentle Cooking Cycles

The cooking process is separated into multiple stages, with declining temperatures and pressures. This gentler approach allows time for even water absorption into the center of grains.

The result is tender rice with zero mushiness, perfect individual grains, and superior mouthfeel. Cuckoo’s sophisticated heating controls yield restaurant-quality rice at home.

Advanced Safety Features Provide Peace of Mind

Pressure cooking speeds up cooking tremendously, but also requires special safety considerations. That’s why Cuckoo rice cookers come loaded with safety features that enable fast cooking without worries.

Dual Lids for Added Protection

The inner and outer lids on Cuckoo’s twin pressure models provide double protection. Excess pressures are released gradually between the lids rather than escaping all at once for enhanced safety.

The lids also have tightly interlocking designs that prevent them from being opened when pressurized. This avoids any sudden release of hot contents during cooking.

Overheat Prevention

Looking to Buy the Perfect Rice Cooker This Year. Here are 10 Key Features of Cuckoo

Multiple sensors constantly monitor inner pot temperatures. If temperatures exceed safe limits, the power is automatically cut to prevent overheating and damage.

This provides protection in case contents boil dry. Automatic keep warm functions also switch off for safety after 12 hours of non-use.

Pressure and Steam Vents

To release pressure safely at the end of cooking, Cuckoo rice cookers have fixed pressure vents on the inner pot lid. This allows gradual depressurization.

The outer lid also has a steam outlet to vent excess steam sideways. This keeps the condensation cap clear and avoids any sudden steam bursts upon opening the lids.

With their many safety features, Cuckoo’s rice cookers let you utilize the benefits of pressure cooking with complete peace of mind.

Specialized Menus and Functions

Cuckoo knows that rice is often eaten as part of larger Asian or Indian meals involving complex curries, biryanis or stir-fries. So their twin pressure rice cookers come equipped with tailored menus and functions.

Pre-Programmed Menu Options

Looking to Buy the Perfect Rice Cooker This Year. Here are 10 Key Features of Cuckoo

With dedicated buttons for common rice-based dishes like pilaf, biryani, soybean soup, Multigrain and glutinous rice, these versatile cookers expand beyond just white rice cooking.

The pre-sets automatically adjust time, pressure and temperature settings to deliver foolproof results for different dishes. You don’t need to be an expert chef to get restaurant-worthy outcomes.

Specialized Indian Menus

Many Cuckoo models feature separate menus for Indian cooking. This includes options for perfecting popular dishes like jeera rice, dhokla, idli, dosa batter and more.

The custom Indian menus allow even beginner home cooks to effortlessly make traditional rice-based recipes from the subcontinent.

Sync Cooking

This ingenious feature allows you to synchronize the rice cooking with your stove-top dishes. You can set a delayed start for the rice cooker up to 4 hours in advance.

This way your rice will be perfectly timed to finish together with accompanying curries or stir-fries. Sync cooking takes the guesswork out of coordinating different elements of a meal.

Easy to Use and Clean

Despite their advanced technology, Cuckoo rice cookers are designed to be simple and user-friendly for anyone to operate confidently.

Intuitive Controls

Straightforward control panels make selecting menus and options a breeze. Bright digital displays clearly indicate selected functions, cook times and temperatures for at-a-glance monitoring.

Built-in voice guides or music cues also indicate the cooking stage for greater convenience, even from another room.

Detachable Inner Pots

The non-stick coated inner pots easily lift out of the rice cooker bodies. This allows swift and simple cleaning since the inner pots can be washed separately without heating elements getting wet.

The inner lids detach as well for easy access to clean the inner surfaces. And the exteriors simply need a quick wipe down to keep looking new.

Dishwasher Safe Parts

From the inner pot and lid to the steam vent and condensation collector, all the detachable parts can be popped straight into the dishwasher for fuss-free cleaning.

Cuckoo rice cookers are designed to deliver perfect rice and complete cooking convenience in a stylish package.

Twin Pressure System: Achieves Both High and Low Pressures

Looking to Buy the Perfect Rice Cooker This Year. Here are 10 Key Features of Cuckoo

Rice cookers have come a long way from simple on-off models. Modern rice cookers like Cuckoo’s innovative twin pressure models offer advanced programming and technology for foolproof rice cooking.

One key feature that sets Cuckoo’s rice cookers apart is their unique twin pressure system. This lets the cooker achieve both high-pressure and low-pressure cooking for optimal rice texture.

How Does Dual Pressure Cooking Work?

The twin pressure system allows pressure inside the inner pot to be precisely controlled during cooking. Higher pressures are used initially to speed up cooking and thoroughly infuse moisture into the grains.

Lower pressures then finish up the cooking gently to achieve soft, fluffy rice. The dual pressures optimize texture and taste.

Maximizing Flavor and Softness

High-pressure cooking penetrates rice grains deeply with water to fully hydrate and swell them. This maximizes their absorption of flavors.

The later low-pressure stage is gentler, allowing the rice to finish cooking without overhardening the surface of grains.

This creates soft, tender grains that hold their shape nicely without clumping together into a gluey mess.

Custom Programming for Different Rice Types

Looking to Buy the Perfect Rice Cooker This Year. Here are 10 Key Features of Cuckoo

Cuckoo’s intelligent cooking algorithms adjust the pressure sequencing automatically based on the type of rice selected.

The precise pressure control caters to the unique texture and moisture needs of different rices, from sticky glutinous varieties to long grain basmati.

You are assured deliciously cooked rice regardless of the rice variety used.

Intelligent Heating Algorithms

While pressure control is critical, temperature precision is equally important for flawless rice. Cuckoo rice cookers use smart heating technology and algorithms.

Real-Time Temperature Adjustments

Sensors monitor pot temperatures throughout the cooking process. The heating intensity is adjusted multiple times per second to maintain ideal temperatures.

This dynamic regulation prevents over or under-heating as conditions change. You avoid burnt or mushy rice ruining the final dish.

AI-Powered Temperature Optimization

Cuckoo rice cookers do not follow a fixed heating script. Their artificial intelligence programs analyze sensor readings to make intelligent heating decisions.

The AI considers rice type, quantity, starting water temperature and other variables. It optimizes heating for perfect doneness.

Gentle Cooking Cycles

Instead of aggressive constant heating, Cuckoo cookers use gentle cooking cycles. Temperatures gradually increase then decrease in controlled phases.

This allows time for even penetration of moisture into every grain for uniformly cooked rice without hardened exteriors.

Specialized Cooking Menus

While cooking plain white rice is simple, most of us eat rice as part of more complex Asian or Indian meals. Cuckoo cookers include tailored menus for this.

Asian Soup and Porridge Modes

Options like congee, chicken soup and red bean porridge are programmed to gently simmer grains to the perfect consistency without boiling over or burning.

This takes the challenge out of traditional Asian rice-based dishes.

Indian Specialty Menus

Making delicacies like biryani, tahri, idli, dosa and more is simplified with dedicated Indian cooking menus. These provide customized timings, temperatures and pressures.

Even novice home cooks can serve up exotic Indian favorites easily.

Specialized Functions

Looking to Buy the Perfect Rice Cooker This Year. Here are 10 Key Features of Cuckoo

Options for fermenting batter for idlis and dosas, steaming cakes, disinfecting and reheating provide versatility beyond just rice cooking.

From starters to desserts, multifunctional Cuckoo cookers can tackle complete meals.

Advanced Safety Features for Pressure Cooking

Pressure cooking speeds up rice cooking tremendously but also requires extra safety measures. Cuckoo cookers have multiple features that enable safe pressurized cooking.

Delayed Locking

The lid locks tightly into place only after reaching cooking pressure. This prevents dangerous lid openings when pressurized.

Opening the lid also automatically depressurizes the pot before unlocking for foolproof safety.

Safe Pressure Release

Fixed pressure valves on the inner lid allow excess pressure to escape gradually rather than violently bursting out.

This keeps the contents securely contained inside the pot.

Overheat Prevention

If temperatures exceed preset safety limits, power is cut automatically. This prevents excess pressure buildup and damage.

Your meal continues cooking safely, not onto your kitchen counter.

Intuitive Controls and Convenient Features

Looking to Buy the Perfect Rice Cooker This Year. Here are 10 Key Features of Cuckoo

Despite their sophisticated programming, Cuckoo rice cookers are designed for simple everyday use.

One-Touch Preset Menus

Options like plain rice, porridge, Multigrain, brown rice and more have dedicated buttons. Just push to select the desired cooking menu.

This is quicker and less error-prone than constantly resetting time and temperature.

Delayed Start

Use the timer function to delay cooking up to 15 hours. This synchronizes rice doneness with other dish prep.

You can wake up to ready-to-eat rice or match rice timing with slow-cooked curries.

Removable Parts for Easy Cleaning

The non-stick inner pot detaches for quick washing. And the lid, vent and other parts conveniently pop off for cleaning or dishwasher use.

Care and maintenance is fast, so your cooker spends more time cooking.

With their combination of smart technology and easy usability, Cuckoo’s innovative twin pressure rice cookers deliver perfect rice results for every meal, every time.

Cooks All Varieties of Rice: White, Brown, Sticky, Mixed, etc.

Rice comes in numerous varieties like long grain, short grain, brown, white, black, red, basmati, jasmine and more. A great rice cooker should be able to handle any type you want to cook.

Cuckoo’s twin pressure rice cookers have specialized settings and menus to perfectly cook every rice variety out there. You name it, they can cook it!

Optimized Settings for Different Rice Types

The cooker’s intelligent heating algorithm customizes temperature, pressure and timing based on the type of rice selected.

This caters to the unique moisture, texture and cooking needs of each rice variety for flawless results.

Absorbent White Rice

For common long grain white rice, high pressure is used initially to force moisture deep into the grains.

Lower pressure then allows the rice to finish swelling gently without hardening the surface.

Nutty Brown Rice

The nutritious bran layer of brown rice can toughen and crack if cooked too forcefully. Lower pressures are used to gently simmer brown rice.

This preserves the tender texture and delicate flavor notes.

Sticky and Glutinous Rice

Looking to Buy the Perfect Rice Cooker This Year. Here are 10 Key Features of Cuckoo

Specialized sticky or sweet rice settings use higher pressures and temperatures. This thoroughly gelatinizes starches to achieve the desired sticky mouthfeel.

Yet the rice avoids turning mushy or becoming a clumped mess.

Mixed and Wild Rice Blends

The Multigrain/Mixed menu optimizes pressure, temperature and time to accommodate the differing cooking needs of grain medleys.

You enjoy perfectly cooked blends without any crunchy or mushy grains.

Non-Stick Inner Pot for Sticky Rice

Sticky short-grain rice varieties like Japanese sushi rice or Thai sticky rice can glue themselves stubbornly onto pot surfaces. Cuckoo rice cookers feature a durable non-stick coating inside the inner pot.

Ultra-Smooth Ceramic Coating

The non-stick inner pot has an advanced ceramic coating engineered for extreme slickness and durability.

Rice grains slide right off instead of clinging to the pot. Clean-up is effortless.

Scratch-Resistant Properties

Looking to Buy the Perfect Rice Cooker This Year. Here are 10 Key Features of Cuckoo

The super-smooth ceramic is also highly scratch-resistant. Metal serving spoons or spatulas will not damage the non-stick properties over time.

The inner pot maintains its slick surface over years of use for consistently great rice release.

PFOA-Free Material

Cuckoo only uses food-safe, PFOA-free materials for their non-stick coating. This avoids any concerns with toxins leaching into foods.

You get completely safe and natural cooking every time.

Specialized Functions for Rice-Based Dishes

A phenomenal rice cooker should handle more than just steaming plain rice. It should make rice-based dishes like risotto, pilaf, biryani and more just as flawlessly.

Cuckoo rice cookers come pre-programmed with tailored menus for cooking various rice dishes to perfection.

Risotto

The risotto menu provides gentle, consistent heat while periodically releasing pressure. This enables the gradual simmering and stirring technique essential for creamy risotto.

Biryani

A specialized Biryani setting has alternating high and low pressure cycles. This perfectly develops complex flavors while keeping rice grains separate.

Congee/Jook

Porridge modes cook rice low and slow to transform grains into a silky-smooth congee or jook without burning or drying out.

Steaming

The steaming function cooks vegetables, fish and more gently using steam and pressure. This retains nutrients and enhances natural flavors.

Easy-Clean Inner Pot

Nobody enjoys scrubbing burnt, stuck-on rice out of inner pots. Cuckoo’s innovative design enables quick, painless cleaning.

Non-Stick Inner Pot

The ultra-smooth ceramic coated inner pot prevents rice sticking or burning onto surfaces. Simple wiping cleans it spotless.

Detachable Inner Lid

The inner lid separates from the pot, allowing easy access to clean inside the lid rim and silicone gasket where condensation can collect.

Reattaching the lid is hassle-free.

Dishwasher-Safe Components

Looking to Buy the Perfect Rice Cooker This Year. Here are 10 Key Features of Cuckoo

All removable parts including the inner pot, inner lid and condensation cap can be popped into the dishwasher for cleaning.

This avoids tedious hand scrubbing and makes maintenance simple.

Designed for Busy Home Cooks

Juggling work, family and a busy schedule makes time a precious commodity. Cuckoo pressure rice cookers help you save time and simplify cooking.

Up to 50% Faster Cooking

Twin pressure shortens rice cooking durations drastically compared to standard cookers. This frees up your time for other tasks.

Hands-Off Convenience

Cuckoo’s preset menus and intelligent programming eliminate guesswork. Just select your settings and the rice cooker handles the rest while you multitask.

Delayed Start

Program customized delays up to 15 hours so rice finishes cooking precisely when needed. Wake up to ready rice or coordinate dishes without monitoring.

With their speed, convenience and reliability, Cuckoo twin pressure rice cookers fit effortlessly into your busy lifestyle.

Looking for the perfect rice cooker? Cuckoo’s innovative twin pressure models cook rice 2x faster while delivering flavorful, flawless results every time, whether you’re cooking white, brown, sushi, biryani or any other rice variety!

User-Friendly Design: Simple Controls and Functions

Looking to Buy the Perfect Rice Cooker This Year. Here are 10 Key Features of Cuckoo

Rice cookers packed with advanced technology can seem intimidating to use and understand. But Cuckoo’s innovative twin pressure rice cookers are designed for simplicity and intuitiveness.

User-friendly controls and functions allow anyone to cook rice perfectly every time, no expertise required!

Straightforward Control Panel

Cuckoo rice cookers have simple, minimalist control panels without confusing extras. Buttons for core functions like cook, keep warm and delay start are prominently displayed and labeled.

An LED screen clearly shows selected settings at a glance. Even tech novices can operate the cooker confidently.

Preset Cooking Menus

For one-touch convenience, preset menus for common rice varieties and dishes are available. Each has optimized heating algorithms.

Just press a button for white rice, brown rice, porridge, mixed grains or specialty rice recipes.

Intuitive Menu Display

When selecting cooking menus, the LCD screen displays useful details. Icons indicate whether pressure cooking will be used along with approximate cook times.

This user-centric design enables easy educated menu choices.

Hands-Free Cooking Convenience

Juggling multiple pots and pans while cooking is tiring. Cuckoo rice cookers offer convenient hands-free operation so you can focus on other dishes.

Set-And-Forget Operation

Simply add rice and water, select a preset menu, and press start. The smart cooker handles regulating temperature, pressure, timings etc. automatically.

You are free to prep sides without monitoring rice.

Automatic Keep Warm

Once rice is cooked, the cooker automatically switches to an energy-efficient keep warm mode. This holds rice at the perfect serving temperature for hours.

No need to immediately serve rice or reheat later.

Convenient Delayed Start

Use the programmable timer to delay cooking up to 15 hours. You can sync rice doneness with the rest of your meal.

Wake up to ready rice or serve dishes straight from the cooker to table.

Built-in Safety Features

Pressure cooking speeds up rice cooking tremendously but also requires safety precautions. Cuckoo rice cookers have automatic safeguards.

Locking Lid

Looking to Buy the Perfect Rice Cooker This Year. Here are 10 Key Features of Cuckoo

The lid locks securely into place once optimal cooking pressure is reached. This prevents dangerous lid openings mid-cooking.

The lock releases automatically when safe after cooking completes.

Overheat Protection

Integrated sensors monitor inner pot temperatures. If limits are exceeded, power is cut off to prevent excess pressure buildup.

This safeguards even unattended cooking.

Anti-Clog Vent

The pressure release vent resists clogging from foaming or overflow. This ensures smooth pressure release rather than messy eruptions.

With these smart safety features, simply press start and walk away without worries.

Helpful Accessories Included

To enhance functionality and convenience, Cuckoo pressure rice cookers come bundled with useful accessories.

Steaming Tray

A stainless steel two-tier steaming tray inserts above the inner pot. This lets you steam vegetables, seafood, side dishes simultaneously.

Multitask and create complete meals.

Measuring Cup

Looking to Buy the Perfect Rice Cooker This Year. Here are 10 Key Features of Cuckoo

A handy measuring cup with water volume markings takes the guesswork out of adding the right amount of water.

Get perfectly textured rice every time.

Serving Spatula

A specialized rice spoon/spatula effortlessly scoops up every grain. The angled head reaches into pot corners cleanly.

Dish out beautiful rice without crushing or clumping.

Elegant Design

A rice cooker sits permanently on countertops, so aesthetics matter. Cuckoo cookers feature premium designs.

Fingerprint-Proof Steel

The outer housing has a smooth, mirror-finish stainless steel construction. This resists fingerprints and scratches to maintain its sleek look.

Minimalist Styling

The understated, minimalist exterior and digital interface lend a sophisticated, yet approachable high-tech look in any kitchen.

LEDs add a touch of sophistication without garishness.

Compact Footprint

Ingenious engineering keeps overall dimensions compact. These appliances save precious counter space in smaller kitchens.

With user-centric designs both inside and out, Cuckoo pressure rice cookers combine appliance beauty with stress-free functionality.

Cuckoo twin pressure rice cookers take the complexity out of cooking perfect rice. Their simple controls, preset menus and graceful aesthetics turn novices into rice-cooking pros!

Saute-Before-Cooking Option: Enhances Flavor in One Pot

Great rice dishes depend on building deep, complex flavors. Cuckoo’s innovative twin pressure rice cookers include a convenient sauté function.

This lets you boost flavor by sautéing aromatics right in the inner pot before cooking rice. Delicious one-pot meals made easy!

Caramelized Aromatic Flavors

Sautéing onions, garlic, spices and other aromatics builds an incredible flavor base. The high heat caramelizes natural sugars.

As this flavorful sauté coats rice grains during cooking, it infuses them with nuanced taste.

Browned Bits Add Richness

High-heat sautéing also encourages flavorful browned bits to form on the cooking surface. These add a savory, nutty depth.

The browned fond incorporates into rice as a natural seasoning booster.

No Separate Cookware Needed

With the integrated sauté function, you can cook start-to-finish in the inner pot. No need for extra skillets or pans.

That’s fewer dishes to wash – win-win!

How to Use the Sauté Function

Looking to Buy the Perfect Rice Cooker This Year. Here are 10 Key Features of Cuckoo

Getting started with sautéing in a Cuckoo rice cooker is simple. Just follow these easy steps for fresher, tastier rice.

Prep Aromatics

Chop, slice or mince flavor-boosting ingredients like onions, garlic, ginger, herbs etc. Smaller pieces release more flavor.

Add Oil and Sauté

Pour a teaspoon or two of cooking oil into the inner pot and press the “Sauté” button to heat up. Add aromatics and sauté until softened and browned.

Simmer in Liquid

Pour in rice, broth or water and other seasonings. Let the mixture simmer briefly to absorb flavors.

Start Cooking Rice

Select your desired rice cooking menu. The cooker adjusts timings and pressure automatically for perfect doneness.

The rich, complex flavor infuses every grain!

Flavor-Enhancing Sauté Ideas

Experiment with different aromatic ingredients and CUCKOO’s sauté function. Here are some tasty flavor-boosting ideas to try:

Onions and Garlic

Sauté chopped onions and garlic as the base for anything from risottos to biryani. Simple but impactful.

Ginger and Greens

Looking to Buy the Perfect Rice Cooker This Year. Here are 10 Key Features of Cuckoo

For Asian dishes, try sautéing minced ginger, leaves like bok choy or choy sum and soy sauce.

Tomato Paste and Spices

To make flavored rice like jambalaya or Cajun dirty rice, brown seasoned tomato paste before adding rice.

Coconut Milk and Chilies

For creamy, spicy rice, sauté chilies in coconut milk with spices like cumin, cinnamon and cardamom.

Take your rice to the next level with these easy sauté ideas!

Customizable Multi-Cooking Programs

Cuckoo’s innovative Smart Cook Technology enables creating customized, multi-step cooking programs.

You can program stages of sautéing, simmering and pressure-cooking in sequence for advanced one-pot dishes beyond just rice.

Step-by-Step Cooking

Smart Cook allows programming sequential cooking steps like sauté then high-pressure cook followed by low-pressure simmer.

The cooker automates the entire process start-to-finish for hands-free cooking.

Recipe Creation

Make your own recipes from scratch! Select durations and pressure settings for each step.

Save frequently used programs for one-touch cooking next time.

Adaptable Timing

Set time increments as short as 1 minute for precision. Pressure cook then simmer a soup or braise meat perfect every time.

With Smart Cook, Cuckoo rice cookers truly unlock one-pot meal creativity.

Saute + Pressure Cooking = Endless Possibilities

With the ability to sauté flavor-building ingredients then pressure cook all in one pot, Cuckoo’s innovative rice cookers open up limitless menu potential.

You’re no longer limited to plain rice. Cook saucy biryanis, complex soups, braised meats and more, all with the press of a button. Dinner just got a whole lot easier!

Keep Warm Function: Automatically Switches to Keep Food Warm

A great rice cooker doesn’t just cook rice perfectly, it keeps it at the ideal serving temperature until you’re ready to eat. Cuckoo’s innovative twin pressure rice cookers have an automatic keep warm function.

Once cooking completes, it gently holds rice, meats, soups and more at a safe temperature for hours without drying out or burning.

Maintains Optimal Serving Temperature

Looking to Buy the Perfect Rice Cooker This Year. Here are 10 Key Features of Cuckoo

The keep warm mode maintains rice between 145-160°F, the perfect temperature for serving. Rice stays piping hot but won’t dry out.

Late diners or second helpings are still warm and moist.

Prevents Unwanted Overcooking

Warming at ideal serving temperatures prevents further moisture loss or texture changes after rice initially finishes cooking.

Rice quality is preserved, not degraded during waiting.

Saves Energy

Keep warm uses gentle, intermittent heating that consumes minimal energy compared to continuous heating.

Letting rice cook then automatically switch to keep warm is efficient.

Flexible Keeping Options

Cuckoo’s keep warm modes provide flexibility to suit different needs with options like:

Extended Keeping

Keeps rice or other foods warm safely for 12+ hours unattended, perfect for all day heat retention.

Intermittent Keeping

Alternates brief warming cycles with power-off rest periods. Useful when holding food several hours.

Insulated Keeping

Looking to Buy the Perfect Rice Cooker This Year. Here are 10 Key Features of Cuckoo

Minimizes power for energy efficiency. Keeps food warm 2+ hours utilizing insulation primarily.

Adjustable Keep Warm Temperature

Lets you customize keeping temperature between 145-160°F as needed.

More Than Just Rice

While perfect for keeping fluffy rice ready to serve, Cuckoo’s smart keep warm function also helps with:

Meal Coordination

Finish rice then cook sides without rice cooling. Keep entrees hot while preparing vegetables etc.

Slow Simmered Foods

Holds stews, braises and soups at optimal serving temperature without overcooking.

Prepared Dishes

Keep cooked rice stable for making fried rice. Gently reheat refrigerated dishes without drying them out.

Serving in Courses

Serve piping rice out in batches over time while keep-warm maintains temperature.

Safety Features for Unattended Use

While keep warm offers great convenience, safety features are essential with any unattended appliance use. Cuckoo rice cookers have multiple integrated safeguards.

Auto Shutoff

After 12 hours in keep warm mode, the rice cooker automatically powers down. This prevents potential overheating from excessively long unattended use.

Overheat Prevention

If keep warm temperatures exceed safe limits, heating elements are shut off. This avoids excess heat or pressure buildup.

Nonstick Inner Pot

The ultra-smooth ceramic coating prevents rice from sticking or burning onto the surface, even after prolonged warming.

Cuckoo’s smart keep warm technology keeps your food safe and ready for hours of hassle-free serving convenience.

Tips for Using Keep Warm Effectively

Follow these handy tips to get the most benefit from Cuckoo’s automatic keep warm function:

Use Delayed Start

Program cook times to finish shortly before eating. Avoid excess warming time.

Fluff Periodically

Stir rice after 30 mins of warming to redistribute moisture and prevent sticking.

Add Water

Drizzle a little water over rice and mix gently to restore moisture if drying out.

Portion Out

Looking to Buy the Perfect Rice Cooker This Year. Here are 10 Key Features of Cuckoo

Serve rice into individual bowls right after cooking, then keep warm in smaller batches.

With clever programming and advanced safety technology, Cuckoo twin pressure rice cookers let you walk away worry-free while keeping food ready-to-eat warm for hours.

Large Capacity: Cooks 6 to 10 Cups of Rice

A quality rice cooker should readily handle cooking rice for the whole family or big gatherings. Cuckoo’s twin pressure rice cookers have generous capacities ranging from 6 to 10 cups.

Whether you need a little or a lot of rice, these cookers can deliver it cooked to grainy perfection every time.

Feeding the Whole Household

With capacity for up to 10 cups uncooked rice yielding over 20 cups cooked, family meals are easy. Cook once then serve hot rice for a crowd.

Or use the keep warm function to portion out fresh rice whenever needed.

Prepared for Guests

Hosting a party? Cook a big batch of rice ahead then keep warm until serving. Capacity for 8-10 cups of uncooked rice means you’re always party-ready.

The delay start helps time perfectly.

Versatile Batch Cooking

Looking to Buy the Perfect Rice Cooker This Year. Here are 10 Key Features of Cuckoo

Make rice in bulk then use for meal prepping. Cook once, enjoy rice throughout the week for bowls, salads, fried rice, etc.

Repurpose leftovers creatively.

Adaptable Cooking Programs

Even with generous capacity, Cuckoo rice cookers cook every grain perfectly using tailored heating for:

Varying Quantities

Cook anywhere from 1 to 10+ cups of rice. Built-in programs adjust temperature, moisture and timings automatically.

Different Rice Types

From fluffy white rice to chewy brown or sticky sweet rice, the cooking algorithm customizes for each variety’s texture.

Your Selected Menu

Cooking parameters optimize automatically whether you choose plain rice, porridge, Multigrain, risotto or more.

Triple Heating Power

To heat large batches evenly from edge to edge without hot spots, Cuckoo rice cookers use:

3D Heating Elements

Heating elements embed into the thick inner pot walls, not just the bottom. This transfers heat upwards through rice.

Induction Heating

Powerful magnetic induction safely generates heat right within the inner pot walls, not external electrical coils.

Micom Control

Smart Micom technology finely calibrates heating intensity across multiple zones. Every grain receives uniform heating.

Nonstick Inner Pot

Bigger batches make sticking and burning risks even greater. Cuckoo cookers have:

Durable Nonstick Coating

The PFOA-free ceramic coating evenly covers the inner pot. Rice releases perfectly without sticking.

Scratch-Resistant Surface

The ultra-smooth nonstick surface holds up to metal spoons and cleaning without damage.

Anti-Oxidation Material

The inner pot is crafted from anti-oxidizing silver alloy. This prevents mineral buildup or reactions.

Helpful Design Features

Cooking larger volumes of rice takes convenience features like:

Clear Visible Markings

Etched volume and water lines inside the pot make filling easy. No ambiguous guessing.

Retractable Power Cord

Looking to Buy the Perfect Rice Cooker This Year. Here are 10 Key Features of Cuckoo

The power cord pulls out when needed, then neatly retracts for compact storage.

Wide Opening Lid

The large lid opening lets you easily add big batches of rice and stir contents.

With generous capacity, tailored heating and smart design, Cuckoo twin pressure rice cookers let you cook mountains of delicious rice with no fuss!

Durable Stainless Steel Interior: Rust-Resistant and Easy to Clean

Quality materials are crucial for any appliance you use daily. Cuckoo’s innovative twin pressure rice cookers feature durable stainless steel inner pots and lids.

This rust-proof material stays looking new while making cleaning worry-free.

Rugged 18/10 Stainless Steel

Crafted from food-grade 18/10 stainless steel, the inner pot and lid provide long-lasting performance. This heavy-gauge steel resists dents, warping and corrosion.

Built solid to last for years of reliable service.

Rust and Oxidation Resistant

The stainless steel construction prevents rusting or oxidation from moisture and acids during cooking. No more discoloration or degraded performance.

The inner pot cleans up like new after years of use.

Balanced Alloy

Looking to Buy the Perfect Rice Cooker This Year. Here are 10 Key Features of Cuckoo

The steel is precisely alloyed for maximum durability without chemical leaching. Cuckoo cookers are built for safe, natural cooking.

Smooth Polished Cooking Surface

In addition to its rugged bulk, Cuckoo’s stainless inner pots have an optimized cooking surface:

Mirror-Polished Interior

High-precision buffing creates a glossy smooth, non-reactive cooking surface. This prevents food from sticking and allows easy cleaning.

No Chemical Coatings

The easy-clean cooking surface is achieved mechanically without Teflon or other chemical non-stick coatings.

Just polished stainless steel safe for all foods.

Compatible with Utensils

The durable steel surface holds up to metal spatulas and spoons without scratching. Cook and serve worry-free.

Stainless Steel Locking Lid

Along with the pot, the inner locking lid is also stainless steel for maximum durability and steam-sealing performance:

Tough and Warp-Proof

The heavy stainless lid maintains its precise shape and fit over thousands of pressurized cycles.

No troublesome lid warping that allows steam leakage.

Tight Steam Seal

The machined stainless mating surfaces form a tight seal when locked. This allows safely building up cooking pressure.

Quick-Release Button

A quick pressure release button is integrated right into the durable lid for easy, safe depressurizing after cooking.

Easy Cleanup and Care

Cuckoo’s stainless steel construction makes cleaning and maintenance a breeze:

Dishwasher Safe

All removable stainless components including the pot, lid and accessories can be popped into the dishwasher for effortless cleaning.

Fingerprint Resistant

The finely finished stainless steel hides minor smudges and fingerprints during use. Just a quick wipe keeps it looking clean.

Non-Porous Surface

Food and grime do not penetrate or get embedded. Simple washing restores the pot and lid to lik-new condition.

With Cuckoo’s durable all stainless interiors, quick cleanup and lasting performance are guaranteed for years of reliable service.

Built-in Steamer: Steams Meat and Vegetables Simultaneously

Looking to Buy the Perfect Rice Cooker This Year. Here are 10 Key Features of Cuckoo

Rice often plays a starring role in larger meals with meat and veggies. Cuckoo’s innovative twin pressure rice cookers include a handy built-in steamer.

This lets you simultaneously steam other ingredients perfectly using the rice cooker alone.

Two-Tier Stackable Steamer

The integrated steamer comprises a two-tier stackable tray that fits inside the cooker atop the inner pot.

Stack two levels for ample steaming capacity right in the rice cooker.

Space-Saving Design

With the steamer and inner pot stacked vertically, cooking multiple parts of the meal takes up zero extra counter space.

Compact and convenient.

Hands-Free Simultaneous Steaming

Just load up the steam trays, select your rice program, and walk away. Entire meals with perfect rice and steamed foods cook simultaneously.

Steaming and Pressure Cooking In One

Cuckoo’s built-in steamer takes advantage of pressure cooking benefits:

Shortened Cook Times

Looking to Buy the Perfect Rice Cooker This Year. Here are 10 Key Features of Cuckoo

Building pressure rapidly slashes steaming durations. Quickly cook vegetables or meat from raw or frozen.

Intensified Flavors

Pressurized steam infuses foods with moisture and taste. Lean meats benefit from succulent juiciness.

Nutrient Retention

The shorter cook times help retain vitamins and nutrients better compared to boiling or slow steaming.

Tasty, Healthy Meals in Minutes

With Cuckoo’s pressurized steamer, quick and tasty meals are just minutes away. Steam favorites like:

Perfectly Cooked Meats

Juicy fish fillets, fall-off-the-bone chicken, tender spared ribs – pressure-steam for perfection.

Infused Vegetables

Bright broccoli, savory greens, seasoned potatoes – just stack, steam and enjoy.

Dumplings and Dim Sum

Cook frozen or handmade dumplings, shumai, etc. to perfection every time.

Steaming opens up unlimited possibilities beyond just rice!

User-Friendly Steamer Features

Along with great results, Cuckoo’s integrated steamer offers convenience:

Stackable Modular Trays

Insert one or both stackable trays at different levels to customize capacity. Great for separating foods.

BPA-Free Materials

Constructed using food-safe materials to avoid chemical leaching during steaming.

Dishwasher Safe

All steamer components and trays are conveniently dishwasher safe for easy cleaning.

Tips for Using the Steamer

Follow these tips to maximize Cuckoo’s built-in steamer and make meal prep easy:

Use Delayed Start

Program the rice cooker to finish steaming just before mealtime. Perfectly timed dishes.

Divide Food Categories

Use trays to separate meats and veggies. This prevents food juices mixing.

Prepare Bite-Sized Pieces

Cut foods into smaller pieces to ensure even, quick cooking.

Use Light Seasonings

Lightly season foods before steaming to boost flavor. Pressure intensifies tastes.

With a built-in steamer, Cuckoo rice cookers simplify preparing full, well-balanced meals with perfectly steamed and pressure cooked foods all in one pot.

Energy Efficient: Saves Power and Reduces Energy Usage

Looking to Buy the Perfect Rice Cooker This Year. Here are 10 Key Features of Cuckoo

Rice cookers are a staple in many households, allowing busy families to make perfect rice with the press of a button. But not all rice cookers are created equal. If you’re looking to purchase a new rice cooker this year, consider Cuckoo’s innovative twin pressure rice cookers. Cuckoo is a leader in rice cooker technology, and their twin pressure models boast an array of features that help save energy and money while still delivering delicious rice every time.

One of the key energy-saving features of Cuckoo’s twin pressure rice cookers is the insulated inner pot. This dual-layer pot with air insulation between the layers retains heat extremely well. Once the rice is done cooking, the cooker automatically switches to keep-warm mode, and the insulated pot prevents heat from dissipating quickly. This means the cooker doesn’t need to cycle on as frequently to maintain the ideal serving temperature. Less cycling equals less electricity used. The insulated inner pot can keep rice piping hot for up to 12 hours while using minimal energy.

In addition to the inner pot, the exterior of the Cuckoo twin pressure rice cookers is well-insulated too. The thick metal and plastic body retains inner heat and prevents wasteful outward heat transfer. Less heat escaping outwardly means the heating elements don’t need to work as hard during the cooking process. This improves cooking efficiency and conserves electricity.

Speaking of cooking efficiency, the twin pressure feature itself provides major energy savings. By building up and maintaining both high and low pressure levels inside the sealed pot, Cuckoo’s rice cookers can raise the water to boiling faster while using less power. The combination of pressure levels cooks rice more quickly and efficiently than standard rice cookers. Less cooking time equals less electricity used.

Cuckoo’s twin pressure rice cookers also have advanced intelligent cooking algorithms that optimize the cooking process. The microcomputer inside closely monitors key variables like temperature, time, and pressure. It makes automatic adjustments to reduce any excess heating or cooking once the optimal conditions are achieved. This prevents overcooking and wasted energy.

The microcomputerized control panel provides plenty of custom options for cooking different types of rice, including white rice, brown rice, mixed grains, porridge, and more. You can tailor the exact temperature, pressure, and duration for the type of rice you want. The intelligent programming helps prevent any errors or guesswork that could lead to wasted energy from over-cooking.

Speaking of custom controls, Cuckoo’s twin pressure rice cookers allow you to schedule delayed cooking. You can add rice and water in the morning but set the cooker to start later in the day. This way, you can take advantage of electricity rate discounts by running the cooker during off-peak hours. Plus, you can wake up or come home to freshly cooked rice ready to serve.

For further energy savings, Cuckoo twin pressure rice cookers automatically switch to eco-friendly standby mode when not in use. This low-power setting prevents any electrical drain from the cooker while it sits idle. Just a tiny bit of standby power keeps the control display on so you can check cooking status.

When shopping for your next rice cooker, be sure to consider energy efficiency. With their well-insulated bodies, intelligent cooking algorithms, and customizable twin pressure system, Cuckoo’s rice cookers deliver major electricity savings compared to conventional models. You’ll cook rice faster and consume less energy in the process. That’s good news for your household budget and for the environment.

Key Features of Cuckoo’s Twin Pressure Rice Cookers

Looking to Buy the Perfect Rice Cooker This Year. Here are 10 Key Features of Cuckoo

Here is an overview of some of the top features and benefits of Cuckoo’s innovative twin pressure rice cookers:

  • Insulated inner pot keeps rice hot for hours while using minimal electricity in keep-warm mode.
  • Insulated outer body prevents wasted heat transfer and improves cooking efficiency.
  • Twin pressure system builds up high and low pressure to cook rice quickly while conserving energy.
  • Intelligent cooking algorithms tailor temperature, pressure, and time to optimize every cycle and prevent overcooking.
  • Various customizable cooking functions for different types of rice, grains, and porridge.
  • Delayed cooking allows you to program the cooker ahead of time to start later.
  • Eco-friendly standby mode prevents energy drain when idle.
  • Microcomputerized control panel is easy to use with presets and custom options.
  • Automated keep-warm and reheating functions.
  • Tune-up technologies for cooking optimization like tastiness enhancement and melody steaming.

When you need the perfect pot of rice in a hurry, count on the advanced twin pressure cooking technology of Cuckoo rice cookers. The customizable options, intelligent programming, and energy-efficient design add up to great-tasting rice and big savings on your electricity bill. Look for Cuckoo’s LHTR0609F model or other twin pressure rice cookers with similar innovative features. With Cuckoo, you can’t go wrong!

Looking to Buy the Best Graco Stroller. Here’s What to Know

Graco Aire4 Platinum: Lightweight and Maneuverable

As a parent, I know how important it is to have a stroller that is easy to steer and lightweight enough to lift in and out of the car. The Graco Aire4 Platinum really delivers on both fronts. This stroller weighs just 22 lbs, which is incredibly light compared to many full-sized strollers. The secret lies in the aluminum frame, which provides durability without adding unnecessary bulk.

Maneuverability is just as impressive. The front wheels can swivel and lock into place, providing excellent control whether you’re navigating tight spaces or jogging on uneven terrain. The suspension absorbs bumps and vibration, so baby enjoys a smooth ride. One of my favorite features is the one-hand fold, which allows you to collapse the stroller quickly without disturbing a sleeping passenger!

Real-Life Testing for Optimal Handling

Graco rigorously tested the Aire4 Platinum by pushing it over various surfaces, making hundreds of folds and unfolds, and loading it in and out of trunks. This real-life testing resulted in a stroller tuned for optimal handling and convenience in everyday use. You can feel the difference in the smooth glide and easy maneuvers.

Car Seat Compatibility for the Graco Aire4 Travel System

Looking to Buy the Best Graco Stroller. Here

One of the best things about the Aire4 Platinum is that it can be used as a travel system with Graco Click Connect infant car seats. This allows you to move baby from the car to stroller without waking them up. It provides a lot of flexibility for parents on the go.

The stroller has an integrated car seat adapter that clicks into place. I found it secures the car seat nicely and I felt no worried about it wiggling around. The adapter is designed for all Graco Click Connect seats, so you can use it with favorites like the SnugRide SnugLock 35 or Graco 4Ever models.

Hassle-Free Transition from Car to Stroller

Going from car to stroller is seamless with the one-step attachment. You don’t need to fumble with adapters or risk waking the baby. Just click the car seat into the stroller frame and you’re ready to be on your way. This hassle-free transition makes running errands with baby a breeze.

Reversible Stroller Seat for Baby’s View

One thing I really appreciate about the Aire4 Platinum is the reversible seat, which allows me to let baby face me or look out at the world. As a new parent, I liked having baby facing me for that extra connection and ability to peek at her whenever I wanted.

Now that she’s older, she likes looking out at everything going on around her. It’s easy to switch the seat direction by pressing two buttons and rotating. This flexibility works well as baby grows and their needs change.

Interactive Viewing for Development

Looking to Buy the Best Graco Stroller. Here

Letting baby look outward helps engage them with sights, sounds, and movement. This interaction with the environment is great for development. When they’re tired, I can switch the seat around so baby can look at me. The reversible seat caters to baby’s mood and curiosity.

Multi-Position Reclining Seat

Finding the right recline setting is important for keeping baby comfy, whether they’re wide awake or snoozing. The Graco Aire4 Platinum offers multiple recline positions, ranging from fully upright to nearly flat for diaper changes and infant naps.

Adjusting the recline is easy – just use the strap and buckle behind the seat. I like that I can set it upright for interactive strolling or recline it partway to make baby more relaxed. The near-flat option has been a lifesaver for helping fussy babies fall asleep.

Catering to Baby’s Needs

Having multiple recline options allows me to cater to my baby’s needs throughout our outing. I’ll start more upright for curious viewing, recline partially when she gets tired, then lay back more fully when she’s ready for a nap. The ability to customize the seat angle helps keep baby comfortable.

Large Canopy With Window and UV50 Protection

As a parent, protecting my baby from the elements is always top of mind. The large canopy on the Aire4 Platinum provides excellent sun, wind, and rain protection. It extends with a zipped expansion panel that provides full coverage even when the seat is reclined.

My favorite part is the mesh peek-a-boo window. It allows me to check on baby discreetly without interrupting their nap by opening the canopy. The window is made of 50+ UV protective material to filter out harmful rays.

Adjustable Visibility and Ventilation

On hot days, I’ll open the back flap of the canopy for increased airflow. When it’s windy, I can velcro it closed for a more enclosed feel. This adjustable canopy lets me control visibility and ventilation to keep baby comfortable.

Extra-Large Storage Basket to Hold Essentials

As a parent, I find I always need to carry extra items like diaper bags, toys, jackets, and groceries. The Aire4 Platinum has the largest storage basket I’ve seen on a full-sized stroller, capable of holding up to 10 lbs of stuff.

The basket extends fully to the sides and front, so it’s easy to access without bumping into the stroller frame. I can fit multiple bags with no problem. The inside has an organizational pocket for keys, wallets, and phones. It keeps everything secure while leaving room for other items.

No More Overstuffed Diaper Bags

Looking to Buy the Best Graco Stroller. Here

The huge basket eliminates the need to cram everything into my diaper bag. Blankets, snacks, extra clothes all get their own space. I even use the basket for grocery runs, fitting several small bags neatly underneath. It’s been a game changer for strolling with all the essentials in tow.

All-Wheel Suspension for Smooth Ride

Pushing a stroller over bumpy sidewalks and gravel trails used to wake my baby up from naps. The Aire4 Platinum changed that with its all-wheel suspension system. Now small bumps and dips don’t affect the ride quality at all.

Air-filled rubber tires and independent wheel suspension work together to absorb vibration. Whether I’m going for a jog or just a leisurely walk, it feels smooth and stable. Baby can sleep soundly regardless of the terrain.

Maintaining Comfort Over Any Surface

From grass to gravel to brick walkways, the Aire4 Platinum glides beautifully over it all. I don’t have to stick to just paved paths to prevent a bumpy annoying ride. The suspension lets us explore without sacrificing comfort, which is awesome.

Self-Standing When Folded for Easy Storage

Looking to Buy the Best Graco Stroller. Here

Folding bulky strollers used to be such a hassle. I’d collapse it, then have to find somewhere to lean the stroller without it toppling over. The Aire4 Platinum stands on its own when folded, so there’s no more balancing act.

The fold is initiated with easy-pull straps on the seat. Once folded, the stroller auto-locks and stands upright on its own. I can simply roll it into a corner, closet, or trunk without it taking up much space.

True One-Hand Folding Operation

Many strollers claim “one-hand fold” but still require two hands to initiate the process. The Aire4 actually folds start to finish with just one hand. I love being able to fold it while still holding my baby – no need to find somewhere to set her down first.

Graco Click Connect System for Effortless Car Seat Attachment

Transitioning from car to stroller used to be a major production. Fumbling with adapters, woke the baby up every time. Now with the Graco Click Connect system, everything clicks into place in one simple step.

The adapter built into the stroller frame easily accepts all Graco Click Connect infant seats. Just line up the seat and hear it click – that’s it! I don’t have to wrestle with compatibility issues or extra attachments.

Stress-Free Travel System Convenience

Being able to go seamlessly from car to stroller makes outings with baby much simpler. I don’t have to remove her from the car seat and risk waking her. The Click Connect system allows me to transport her undisturbed.

Safety Features Like a 5-Point Harness and Locking Front Swivel Wheels

As a parent, keeping my baby safe is my top concern. That’s why I appreciate the Aire4 Platinum’s built-in safety features. It provides peace of mind when we’re out and about.

The 5-point harness distributes restraint evenly and has a center pull-strap for easy tightening. The front wheels lock for jogging or uncontrolled terrain. There’s even reflective material on the canopy and basket for visibility.

Designed With Baby’s Security in Mind

From the secure harness to the grippy rubber tires, this stroller performs dependably even on bumpy or wet surfaces. I know my baby is protected. And when she’s older, the tray insert prevents sliding and spills. Safety is clearly prioritized in every design choice.

Car Seat Compatibility for the Graco Aire4 Travel System

Looking to Buy the Best Graco Stroller. Here

As the parent of a newborn, having a travel system stroller that securely accepts my infant car seat is an absolute must-have. The Graco Aire4 Platinum delivers big time in this regard by being fully compatible with all Graco Click Connect car seats right out of the box.

This hassle-free integration between stroller frame and car seat makes transporting my sleeping baby from vehicle to stroller an easy, one-step process. No more fumbling with bulky adapters or risking waking the baby when transferring them. Just click the car seat securely into the stroller frame and you’re ready to roll.

Seamless Transition from Car to Stroller

I’ve found the Click Connect system to be a total game-changer as a mom always on the go with my infant. Whether we’re running errands around town or headed to the pediatrician, I can move my baby in and out of the car then into the stroller without missing a beat.

The adapter built right into the frame clicks effortlessly with Graco SnugRide or 4Ever model car seats. I’ve never experienced a compatibility issue or struggle to get a proper connection. It just works, every time.

Sturdy Support for Precious Cargo

Looking to Buy the Best Graco Stroller. Here

Obviously, safely securing my child is priority number one. The Click Connect integration gives me confidence that the car seat attaches solidly to the stroller. I never have to worry about the seat wobbling or baby being disturbed by motion.

When you hear that reassuring click, you know the seat is locked firmly in place. The stroller frame provides sturdy structural support, so my infant gets a smooth, stable ride.

Reversible Stroller Seat for Baby’s View

As my daughter has grown over the past year, being able to reverse the Aire4 Platinum’s stroller seat has been a major advantage. Her needs and preferences evolve rapidly, so flexibility is key.

When she was a newborn, I kept her facing me for that visual bonding and ability to constantly peek at her. But as soon as she became curious about her surroundings, I rotated the seat so she could take in the sights and sounds.

Adapting the Seat Direction as Baby Grows

The reversible seat has allowed me to tailor my daughter’s viewing experience to her mood and developmental stage. Facing inward helped satisfy her need for connection with me in the early months. Outward facing stimulated her curiosity as she got bigger.

Now at one year old, she sometimes wants to observe the world around her, other times she wants to chat with mom. The adaptable seat keeps her content either way.

Easy on the Go Reversing

I’ll admit I was skeptical about how seamless reversing the seat would be on the go. But it turns out, the rotation is incredibly intuitive – just unbuckle the strap and flip the seat around. Takes seconds. The adaptable viewing angles make an already versatile stroller even more accommodating.

Multi-Position Reclining Seat

Finding that “just right” recline setting is so important for keeping baby comfortable and content. Too upright and they get fussy, too laid back and they have a hard time seeing. The Graco Aire4 Platinum has been a lifesaver with its multi-recline ability.

With four different angles to choose from, I can really customize the seat position to my daughter’s needs in the moment. Whether we’re strolling leisurely or she’s ready for a nap, I can achieve the perfect recline.

Catering to Baby’s Ever-Changing Needs

Newborns like to be cradled in a deeper recline for comfort and safety. As babies grow, they need more upright positions for stimulating sightlines. And when naptime rolls around, that near-flat setting helps lull them to sleep.

The Aire4 Platinum’s recline options have allowed me to adapt in real time as my daughter’s needs change throughout our excursion. Keeping her content makes strolls so much smoother.

Easily Adjustable Even While Moving

Looking to Buy the Best Graco Stroller. Here

I worried that adjusting the recline angle on the fly would be a challenge. But in practice, the lever and strap system allows me to customize the seat position quite easily with one hand, even while on a walk. This flexibility to quickly go from upright interaction to naptime is so valuable.

Large Canopy With Window and UV50 Protection

As a parent, one of my top priorities is protecting my baby from the elements, whether it’s glaring sunlight, strong winds, or heavy rain. The Aire4 Platinum’s extra large canopy has been a godsend in providing stellar coverage.

The UPF 50+ material provides medical-grade UV ray protection, while the ability to fully extend the canopy provides full sun and weather shielding. My daughter can nap undisturbed.

Discreet Peeking Thanks to Mesh Window

Even with the canopy fully extended, I can still peek in on my sleeping baby through the handy mesh window. It gives me peace of mind while allowing me to let her nap undisturbed.

The quiet velcro access flap also allows for increased airflow circulation on hot days. It’s clear this canopy was designed with baby’s needs in mind from all angles.

Extra-Large Storage Basket to Hold Essentials

Looking to Buy the Best Graco Stroller. Here

As any parent knows, you end up carrying a ridiculous amount of stuff whenever you venture out with baby in tow. Between spare clothes, blankets, diapers, snacks, toys – it’s astonishing how the “essentials” pile up.

The Aire4 Platinum was the first stroller I found that could actually hold all these items in its massive storage basket. At over 10 lbs capacity, it’s a packing dream.

Toting Along All Our Daily Needs

I never feel stressed about only being able to take certain items anymore. The huge basket undercarriage lets me load it up with all the baby gear, groceries, jackets, etc. that get us through the day’s adventures.

The handy mesh pockets help organize smaller items like phones, wallets, and pacifiers too. No more overstuffing the diaper bag to the bursting point!

All-Wheel Suspension for Smooth Ride

One of the first things I noticed about the Aire4 Platinum was how smoothly it glided over sidewalks, gravel trails, grass – you name it. I expected a bumpy, rattling ride but was amazed at how shock-absorbent it felt.

The air-filled rubber tires and independent suspension system work beautifully together to keep vibration to a minimum. My daughter has never been jostled awake, even on uneven terrain.

Sweet Dreams Over Any Surface

Strolling down brick sidewalks or gravel garden paths – those kinds of surfaces used to wake my baby up instantly from a deep sleep. The Aire4’s cushioned ride has been a revelation.

Now small bumps and dips don’t cause any disruption. My daughter can nap for hours while I explore wherever my walk takes me. The smoothness and stability brings such peace of mind.

Self-Standing When Folded for Easy Storage

As amazing as the Aire4 Platinum is when my daughter’s riding in it, I also appreciate how it simplifies my life while folded up and stored away. Specifically, the fact that it stands freely on its own has been huge.

No more collapsing the stroller then having to hunt around for a place to carefully lean it, praying it won’t topple over. The Aire4 remains upright when folded, ready to roll right into the trunk or closet.

True One-Handed Folding Operation

Folding bulky strollers used to require both hands just to wrestle it collapsed. The Aire4’s brilliant strap system allows me to initiate the fold with one hand while holding my daughter with the other arm.

Being able to collapse the stroller on my own, without putting her down somewhere, has been a sanity saver. The designers clearly used real parent feedback when engineering this.

Graco Click Connect System for Effortless Car Seat Attachment

Looking to Buy the Best Graco Stroller. Here

As a mom always racing out the door, any small thing I can do to simplify my routine is hugely helpful. The Aire4 Platinum’s seamless Click Connect car seat compatibility has been an absolute time saver.

Rather than fumbling to position adapters and worry about getting the right installation angle, everything clicks together in one intuitive step. I just line up the seat with the anchors and listen for that reassuring “click.”

Smooth Transitions for Life in Motion

Whether I’m transferring my sleeping daughter from car to stroller or just want the convenience of moving her seat, the Click Connect system makes the process essentially effortless.

The built-in anchors integrate perfectly with our Graco SnugRide car seat. Being able to transport her disturbance-free has allowed this busy mama to keep life in motion.

Safety Features Like a 5-Point Harness and Locking Front Swivel Wheels

When evaluating strollers, my main criteria is always how safely it will contain my daughter and protect her on our journeys. The Aire4 Platinum has delivered on safety with its smart design.

The 5-point harness, leg enclosure, and reflective accents provide security and visibility. The locking swivel wheels and sturdy frame ensure stability over varied terrain. It provides incredible peace of mind.

Engineered With Baby’s Needs in Mind

Looking to Buy the Best Graco Stroller. Here

It’s clear Graco developed this stroller with baby’s security as the top priority. From the grippy rubber tires to the cushioned seat, every component aims to provide a protected and comfortable ride.

Knowing my daughter is strapped in safely brings such relief as we explore. The Aire4 Platinum has become an indispensable partner in our adventures.

Reversible Stroller Seat for Baby’s View

As a new parent, choosing the right stroller for your little one can feel overwhelming. With so many options on the market, how do you know which is best? One key feature to look for is a reversible seat so baby can face you or the world ahead. Keep reading as we explore the pros of a reversible seat, what to look for in a convertible stroller, and specific Graco models to consider for your family.

Advantages of a Reversible Seat

A reversible seat gives you flexibility and allows you to tailor the stroller experience to baby’s mood and development stage. Here are some key benefits:

  • Building Bonding – With baby facing you, you can easily make eye contact, talk, sing, and play games together.
  • Soothing Baby – Facing in helps calm an upset or overstimulated infant by letting them focus on your face.
  • Encouraging Interaction – When outward facing, baby can engage with the sights, sounds, and people around them.
  • Supporting Development – Switching views gives baby’s neck muscles a workout and helps visualization skills.

The ability to alternate perspectives keeps the stroller ride interesting. Your infant stays engaged, whether they need calming or exploration.

What to Look for in a Convertible Stroller

If you decide a reversible seat is a priority, keep these features in mind while shopping:

  • Easy Switching – The rotation mechanism should secure properly in both positions without much effort.
  • Good Visibility – Can you maintain eye contact with baby when rear-facing? Is the view unobstructed forward?
  • Adequate Leg Room – Will your child’s legs comfortably bend when facing you?
  • Full Recline – Is the seat able to safely recline fully in either direction for napping?
  • Safety First – Be sure the stroller meets all current safety standards and accommodates your car seat.

Prioritizing these aspects will lead you to a reversible stroller you and baby will both enjoy cruising around in!

Graco Strollers with Reversible Seats

Within Graco’s extensive stroller selection, the Graco Aire4 and Graco Modes models stand out for their convertible seats. Let’s look at what they offer:

This versatile stroller provides flexibility with a seat that rotates 180 degrees. Features include:

  • One-hand reversible seat operation
  • Accepts all Graco infant car seats to become a travel system
  • Multi-position recline and adjustable calf support
  • Large UV50 canopy with window and storage basket below
  • Suspension and locking front-swivel wheels

The Graco Aire4 Platinum edition adds premium details like leatherette accents for a touch of luxury. This would make a great choice for a stylish urban lifestyle!

With an astonishing 10 seating options, this 3-in-1 stroller truly adapts to your needs. The reversible seat allows baby to sit upright, recline, and face forward or towards you. Other features include:

  • Converts from infant bassinet to toddler stroller
  • Accepts Graco Click Connect infant car seats
  • One-hand fold for compact storage
  • Parent’s tray with cupholders and storage
  • Large basket and child’s tray for snacks

The Graco Modes is the ultimate in flexibility and customization for every age and stage!

Take Your Pick

Looking to Buy the Best Graco Stroller. Here

When choosing a stroller with baby in mind, the reversible seat is a prime option. Being able to alternate between interacting with your child face-to-face or letting them observe the world opens up so many possibilities. Graco offers excellent convertible stroller models like the Aire4 and Modes that prioritize comfort, convenience, and mobility for you and baby. We hope these tips help you select the ideal Graco stroller to grow with your little one!

Multi-Position Reclining Seat

Finding the perfect stroller for your little one is such an important decision. You want comfort, versatility, and ease of use as you navigate parenthood. One feature to prioritize in your search is a multi-position reclining seat to accommodate your baby through every age and stage. Keep reading as we explore the benefits of an adjustable recline, what to look for in reclining strollers, and great options from Graco.

Why a Multi-Position Recline Matters

A seat that reclines to various positions offers key advantages for you and baby:

  • Supports Proper Posture – Recline to keep baby’s head elevated as needed through development.
  • Enables Restful Sleep – Fully reclined for safe, comfortable napping on the go.
  • Adapts to Preferences – Adjust to baby’s perfectangle as they interact with the world.
  • Accommodates Ages – Upright for curious toddlers, reclined for soothing infants.
  • Allows Position Changes – Varying recline keeps baby comfy and engaged.

The ability to reposition the seat gives you flexibility to meet your little passenger’s needs.

What to Look for in Reclining Strollers

Looking to Buy the Best Graco Stroller. Here

If an adjustable recline is on your must-have list, keep these considerations in mind:

  • Type of Recline – Does the back rest slope incrementally or switch between set positions?
  • Degree of Recline – How far back does the seat go? Is it fully flat for newborns?
  • Ease of Adjustments – Can you operate the recline one-handed and while baby is seated?
  • Leg Room – Is there enough space for proper leg positioning when reclined?
  • Safety – Are restraints secure in all recline angles? Is the stroller stable?

Finding the right balance of these features will lead you to a reclining stroller you and baby love.

Graco Strollers with Multi-Position Reclines

Graco is a top brand known for stroller innovation. Two of their models praised for exceptional recline capabilities are the Graco NimbleLite and Graco FastAction Fold:

This lightweight, nimble stroller boasts an adjustable recline in multiple positions. Features include:

  • Reclines flat for newborn comfort
  • 4 recline positions with easy one-hand adjustment
  • Compact, aluminum frame with carry strap
  • Attach Graco infant car seat for a travel system
  • Convenient storage basket and parent’s tray

The Graco NimbleLite reclines, folds, and handles with equal agility!

With a seat that reclines and stands upright, this functional stroller folds in just one second! It offers:

  • Multi-position recline, including flat for infants
  • Accepts all Graco infant car seats
  • One-second, one-hand fold
  • Automatic storage lock
  • Suspension and built-in tray for parent and child

When you’re on the go with baby, the Graco FastAction delivers speed and convenience!

Finding the Perfect Recline

An adjustable reclining seat should be a top priority when selecting a baby stroller. Meeting your child’s comfort and development needs at every age and stage requires flexibility. Graco models like the NimbleLite and FastAction Fold allow easy repositioning while ensuring safety and portability. Focus on the recline options and you’re sure to find a Graco stroller that perfectly cradles your little one!

Large Canopy With Window and UV50 Protection

Searching for the perfect stroller to keep your little explorer safe on adventures? An extensive canopy is a must-have feature to look for. Large canopies with added details like windows and UV protection create a comfortable environment for your child. Read on as we explore the benefits of full coverage canopies, what to look for when shopping, and great canopy options from Graco.

Benefits of a Large Canopy

A stroller’s canopy makes a big difference in providing:

  • Sun Protection – Shield baby’s delicate skin from harsh UV rays.
  • Shelter from Elements – Guard against wind, rain, and debris outdoors.
  • Naptime Privacy – Allow baby to sleep peacefully without distractions.
  • Temperature Control – Retain warmth on cool days and increase shade and airflow when it’s hot.
  • Peace of Mind – Know your child is protected in the stroller.

Maximizing coverage ensures your baby stays comfortable come rain or shine.

Features to Look for in Canopies

Looking to Buy the Best Graco Stroller. Here

When evaluating stroller canopies, consider these useful extras:

  • Extended Size – Does it stretch to fully cover baby plus the seat and handlebar?
  • Window – Can you peek in on baby through a closable flap?
  • Ventilation – Are there mesh panels or additional zipper openings?
  • UV Rating – Does the fabric offer Ultraviolet Protection Factor (UPF)?
  • Visor Extension – Is an attached visor available for eyeshade?

Prioritizing these aspects will lead you to the perfect canopy for outdoor adventures.

Graco Strollers with Superior Canopies

Within Graco’s extensive collection, the Graco Blossom XL DLX and Graco Verb strollers stand out for exceptional canopy features. Here’s a closer look:

This versatile 6-passenger stroller touts a jumbo canopy with thoughtful touches. Details include:

  • Oversized UPF 50 canopy with pop-out visor extension
  • Mesh ventilation panel and peek-a-boo window
  • Canopy extension panel for maximum coverage
  • Works with Graco infant car seats
  • Seating for up to 3 children

The Graco Blossom XL DLX canopy shields your troop from the elements in style.

Packed with smart features, this stroller’s canopy stands out. It provides:

  • Extra-large canopy with UPF 50 protection
  • Peek-a-boo window and ventilation panel
  • One-hand foldable canopy extension visor
  • Accepts all Graco infant car seats
  • Lightweight design with suspension

The Graco Verb makes canopy coverage effortlessly achievable.

Stroll With Peace of Mind

Looking to Buy the Best Graco Stroller. Here

When picking a stroller, be sure to inspect the canopy. Ample coverage with added bonuses like windows, ventilation, and UV protection will provide the optimal environment for your child. Graco models like the Blossom XL DLX and Verb offer canopy features that go above and beyond to keep your baby comfortable. Let a superior canopy give you confidence on every journey!

Looking to Buy the Best Graco Stroller? Here’s What to Know

When it comes to baby gear, few brands are as trusted as Graco. With decades of experience making high-quality baby products at reasonable prices, it’s no wonder Graco is a go-to for many parents. And if you’re in the market for a new stroller, Graco’s lineup offers something for everyone.

From full-featured travel systems to lightweight umbrellas, Graco has a stroller to fit your family’s needs and budget. But with so many options, deciding on the best Graco stroller for you can be a challenge. To help narrow your search, here are a few key factors to consider as you shop.

Type of Stroller

Graco offers strollers in five main categories:

  • Travel systems – Stroller with infant car seat
  • Joggers – Sturdy stroller with air-filled tires for jogging
  • Lightweight/umbrella strollers – Compact and portable stroller
  • Full-sized strollers – Standard stroller for everyday use
  • Double strollers – Tandem stroller for two children

Think about when and where you plan to use the stroller most. Do you need a car seat? Looking for something to take jogging? Or just need a compact option for travel? This will help determine what type of Graco stroller works best.

Key Features

Once you’ve narrowed down the type of stroller, consider must-have features. Graco strollers come equipped with various conveniences like:

  • Reclining seats
  • Adjustable canopies
  • Suspension
  • Tray with cup holder
  • Storage basket
  • One-hand fold

If you’ll use the stroller for naps, prioritize reclining seats and canopies. Need storage space or travel around bumpy terrain? Look for large baskets and suspension. Narrow your options to strollers with the features you need most.

Size and Weight

Looking to Buy the Best Graco Stroller. Here

Consider your needs in terms of stroller size and weight. Full-sized and travel system strollers offer more features but are heavier and take up more space. Umbrella strollers are ideal for travel but provide less storage and fewer amenities. Measure your trunk or doorway to ensure the stroller fits your space. Also, test the weight when folded to guarantee you can comfortably lift it.

Safety

Safety should always be the number one priority when baby gear shopping. When evaluating Graco strollers, look for the JPMA (Juvenile Products Manufacturers Association) certification seal. This means the stroller meets the highest safety standards in the industry. Additionally, check that the brakes lock securely and the stroller has a 5-point harness to restrain baby.

Reviews

One of the best ways to determine real-world performance is by reading customer reviews. Check reviews on Graco’s website as well as third-party retailers. Look for feedback on quality, ease of use, maneuverability, and durability over time. This can reveal potential issues not apparent by just studying the specs. It’s wise to choose a stroller with consistently positive feedback.

Budget

Looking to Buy the Best Graco Stroller. Here

Graco aims to offer quality strollers at affordable prices. But strollers still range from about $100 for a basic umbrella stroller to $300 or more for a fully-loaded travel system. Set your budget beforehand so you can quickly narrow your search. Graco strollers offer excellent value at every price point.

Once you settle on the perfect Graco stroller for your family, the final perk is they’re carried at major retailers like Walmart, Target, and Amazon. This makes finding your model easy and convenient.

With so many options to sort through, choosing the best Graco stroller can be challenging. But keeping these tips in mind simplifies the process. Focus on your needs and priorities, evaluate the key features, and do your homework reading reviews. Before you know it, you’ll be strolling in comfort and style with your new favorite Graco stroller!

All-Wheel Suspension for Smooth Ride

Pushing a stroller over bumpy terrain or uneven sidewalks is no fun, especially with a sleeping or fussy baby onboard. That’s why all-wheel suspension has become a must-have feature for many parents shopping for a new stroller. And Graco delivers with strollers designed to absorb shock and make for one smooth ride.

From their top-of-the-line joggers to more affordable everyday options, many Graco strollers now come equipped with air-filled tires and suspension systems. This provides better cushioning and stability when navigating rough roads. Let’s take a look at why all-wheel suspension makes such a difference and some of Graco’s standout strollers featuring this handy feature.

Enhances Comfort and Control

Pushing a stroller over bumps and dips can feel jarring without proper suspension. This vibration not only makes it more difficult for parents to keep control of the stroller, but can also wake a napping passenger. All-wheel suspension acts as a shock absorber to smooth out the ride. Specialized components like springs and linkages compress to minimize stroller bounce.

This enhances comfort for both baby and parent. By reducing vibration, strollers with all-wheel suspension make it easier to maneuver and keep control, even one-handed. And baby can sleep soundly through uneven terrain.

Allows Smoother Jogging

For jogger strollers built for active parents, all-wheel suspension is a must-have. Hitting the path at a jog or running speed makes the ride even bumpier. Quality air-filled tires paired with suspension let the wheels easily roll over divots, tree roots, and gravel.

The improved shock absorption protects baby from jostling while enabling parents to pick up the pace. And lightweight suspensions add less drag, contributing to a smoother run. All-wheel suspension gives joggers better stability at faster speeds and during quick turns.

Provides Added Durability

Looking to Buy the Best Graco Stroller. Here

Besides enhancing comfort, stroller suspension also boosts durability. The suspension components absorb much of the vibration and impact from traveling over uneven surfaces. This helps reduce overall stroller wear and tear.

Wheels, hinges, and connectors last longer because they aren’t subjected to as much force. Suspension acts as added protection to keep your stroller in better condition for the long haul.

Top Graco Models with All-Wheel Suspension

Graco offers several high-performing stroller options equipped with all-wheel suspension. Two of their top models include:

  • Graco FastAction Fold Jogger: With air-filled rubber tires and adjustable suspension, this lightweight jogger delivers an ultra-smooth ride. The easy one-second fold makes it convenient for active families.
  • Graco Verb Click Connect: At under $200, this reasonably priced stroller still provides all-wheel suspension for less bumps. It accepts Graco Click Connect infant car seats for a custom travel system.

Parents love the Graco FastAction Fold for its superior suspension system that handles tough terrain. And the Graco Verb proves you don’t have to break the bank to provide baby a comfier ride. Both options demonstrate Graco’s dedication to this handy feature.

Take It for a Test Run

Looking to Buy the Best Graco Stroller. Here

When evaluating Graco strollers, take models for a test drive to experience the suspension firsthand. Push the stroller over cracked sidewalks, grassy hills, or a bumpy store parking lot to determine how smooth the ride feels. This will ensure the suspension meets your needs.

All-wheel suspension used to be a luxury feature only found on higher-end strollers. But thanks to Graco, even mid-range models now provide improved shock absorption. By taking baby for a spin over various surfaces, you can find a Graco stroller equipped with suspension to handle your lifestyle.

Self-Standing When Folded for Easy Storage

Between the car, home, mall and more, parents need a stroller that’s easy to transport wherever they go. That’s why self-standing fold is an ideal feature to look for when shopping Graco strollers. Models with this capability stand upright when collapsed, making storage quick and convenient.

Rather than laying folded flat, self-standing strollers remain upright on their own. This frees up hands and takes up less space in tight areas. As families on-the-go know, the smallest details can make a real difference. Let’s explore why self-standing fold matters and some top Graco models with this handy capability.

Saves Space

When folded flat, strollers can sprawl out and take up precious floor area. Self-standing capability enables the stroller to be stashed vertically in less space. This allows neatly tucking it in corners, closets, or other tight spots where a full footprint won’t fit.

The reduced footprint is especially helpful for apartment dwellers and those with small homes. Even SUVs and minivans gain usable cargo room by stowing a self-standing stroller against the rear seats or sidewall when traveling.

Keeps Stroller Clean and Dry

Laying a wet, dirty stroller flat on floors or trunk carpeting quickly makes a mess. The self-standing position helps keep grime contained and protects surfaces from stroller tires and mud. Likewise, it prevents the stroller fabric from resting on and absorbing ground moisture.

Strollers stay cleaner by minimizing contact with dirty surfaces. This also helps prevent messes leaking out of the stroller to dirty surroundings. The upright design promotes airflow to let components dry faster after a rainy jog or day at the beach.

Enables One-Handed Use

Looking to Buy the Best Graco Stroller. Here

Collapsing most strollers takes two hands – one to release the fold mechanism and another to guide the stroller closed. Self-standing models allow a true one-handed fold. Simply trigger the release and the stroller gracefully folds into place, no guidance needed.

This leaves the other hand free to hold baby, bags, or complete other tasks. The ability to fold down and pick up in one smooth motion also helps when kids are anxiously wanting to move along.

Top Graco Self-Standing Strollers

Graco incorporates self-standing fold into both full-size and umbrella stroller models. Popular picks include:

  • Graco Jetsetter: Weighing under 15 lbs, this ultra-light umbrella stroller stands when folded to fit tight spaces.
  • Graco FastAction Fold: The one-second, one-hand fold on this travel system stroller makes it self-standing and portable.

The Jetsetter offers incredible portability as both the lightest and most compact Graco stroller. For families needing infant car seat compatibility, the FastAction Fold allows easy self-standing storage of a complete travel system.

Test Folding and Standing

Looking to Buy the Best Graco Stroller. Here

When evaluating Graco strollers in-store, be sure to test the fold and standing capability yourself. Ensure the release mechanism is smooth and intuitive for one-handed operation. Check that the stroller feels stable and secure when upright. Moving the stroller around while folded can also help assess the compact storage benefits.

A self-standing fold makes stroller storage and transport much easier for busy families. Whether optimizing tight spaces at home or enabling portability on-the-go, this feature can be a daily game-changer. Graco offers parents plenty of quality strollers integrating this must-have versatility.

Graco Click Connect System for Effortless Car Seat Attachment

For many families, a travel system stroller that accepts an infant car seat is a must-have. Graco’s innovative Click Connect system makes pairing a car seat and stroller easier than ever. With just one simple click, the car seat securely latches right onto the stroller frame.

The Graco Click Connect design provides a hassle-free alternative to adapters andstraps for attaching car seats. This intuitive system allows parents to create a custom travel system in seconds. Let’s take a look at how it works and some of Graco’s top-rated travel systems featuring Click Connect.

One-Step Attachment

Travel systems often involve cumbersome installation using seperate brackets or buckles to secure the car seat. The Click Connect system simplifies the process with a straightforward integrated mounting system.

Compatible Graco car seats have connection points that easily slide and lock onto corresponding brackets on the stroller frame. An audible “click” confirms everything is correctly latched into place.

Enables Quick Transfers

Because the car seat securely docks onto the stroller in one click, transferring sleeping babies is easy. Parents don’t have to fumble with tricky adapters while also balancing baby in arms.

Click Connect allows seamlessly moving baby from car to stroller without disturbing them. The direct connection also provides superior stability for smooth rides and fewer disruptions to naptime.

Interchangeable Options

Families appreciate the ability to interchange different Click Connect car seats and strollers as baby grows. For instance, use an infant car seat in early months, then transition to a convertible option using the same stroller frame.

Mixing and matching components offers versatility and allows customizing the travel system. Click Connect gives parents long-term value through different stages.

Graco Click Connect Travel Systems

Looking to Buy the Best Graco Stroller. Here

Graco offers many travel system options with the Click Connect system such as:

  • SnugRide SnugLock 35: This top-rated rear-facing car seat clicks directly into strollers like the Graco Verb.
  • Modes Element: Featuring a multi-position reclining seat and suspension, this stroller accepts the SnugRide infant car seat.

For car seat + stroller combos that handle everyday adventures, parents consistently rely on Graco’s Click Connect travel systems. The easy one-step attachment provides added convenience.

Listen for the “Click”

When evaluating travel systems in stores, test Click Connect in action. Attach car seats to different stroller frames while listening for the audible click signaling a secure connection.

Also check that the release lever allows smoothly detaching the car seat when needed. This hands-on experience can help determine if Click Connect provides the intuitive use you need.

Finding a travel system that makes on-the-go life with baby a bit smoother is a must. Graco’s Click Connect technology provides a seamless solution for linking car seat and stroller. Just one click and you’re ready for any adventure!

Safety Features Like a 5-Point Harness and Locking Front Swivel Wheels

Looking to Buy the Best Graco Stroller. Here

When choosing a stroller for your child, safety should always be the top priority. That’s why features like 5-point harnesses and locking front wheels are so important in Graco strollers. These components work together to help keep your little one secure and prevent tipping or loss of control.

While things like convenience and comfort matter, protecting your baby overrides all. Graco engineers their strollers with critical safety features to provide peace of mind to parents on the go. Let’s take a closer look at how these design elements contribute to a safer ride.

Distributes Force Evenly

A 5-point harness better positions and disperses restraining forces across the chest, hips, and crotch. This reduces pressure points that can potentially cause injury in an abrupt stop or accident.

Wide harness straps with multiple attachment points keep children of various sizes stable and centered in the seat. This prevents slipping from poor positioning. The even distribution also enhances overall comfort.

Prevents Standing or Climbing

Curious toddlers love to stand up in moving strollers to get a better view. This can cause dangerous tipping accidents. The secure 5-point harness keeps kids sitting safely in place.

Properly buckling the full restraint system also prevents kids from climbing out of the stroller. So parents can breathe easier knowing escapes are less likely while on the go.

Enhances Control

Most Graco strollers feature front wheels that can lock straight for more stability maneuvering over uneven surfaces. This prevents wheels from spinning out of control.

Locking wheels paired with rear brakes give parents better command navigating turns or hills. The improved handling reduces the risk of dangerous spills during active outings.

Top Graco Models

Graco strollers known for excellent safety include:

  • Graco Blossom: Versatile 6-passenger design with 5-point harness and front wheel suspension.
  • Graco Modes: Travel system with toddler seat and bassinet featuring 5-point harness.

These models demonstrate Graco’s commitment to keeping safety front and center. Their smart designs provide protection without sacrificing convenience.

Try Before You Buy

Looking to Buy the Best Graco Stroller. Here

When evaluating Graco strollers in-store, check that the 5-point harness adjusts easily and securely contains your child. Test the front wheel locks engage properly to prevent swiveling. Moving the stroller around provides the best sense of improved control.

Prioritizing key components like harnesses and locks ensures your Graco stroller delivers peace of mind. You can focus fully on the joys of exploring with your little one.

Looking to Buy an Instep Bike Trailer. 10 Key Factors to Consider

Types of Instep Bike Trailers: Single vs. Double

When shopping for an Instep bike trailer, one of the first decisions is whether you need a single or double trailer. Single Instep trailers have one seat and are best for families with just one child. Double Instep trailers have two seats side-by-side and allow you to transport two children at once.

Instep’s single bike trailers like the Sync Single and Quick-N-EZ Single are lightweight, streamlined, and easy to pull. They take up less space on the road and typically weigh less than double models. However, once your child outgrows a single trailer, you’ll need to purchase a larger double model.

Double Instep bike trailers like the Sync Double and Quick-N-EZ Double offer greater flexibility and allow you to transport multiple kids. They do take up more space on the road and weigh more than single models though. Double trailers can also convert to a stroller for neighborhood walks.

Weight Capacity and Cargo Space

Looking to Buy an Instep Bike Trailer. 10 Key Factors to Consider

Instep bike trailers are designed to safely carry children, but most can also double as small cargo trailers. The maximum weight capacity varies by model. Most support 1 or 2 children up to 40 lbs each, plus gear in the back compartment.

Cargo space also varies. Singles have less overall capacity than doubles. But some models like the Sync Single offer fold-down rear seats to accommodate extra gear. Measure how much storage you need to transport kids’ supplies, groceries, or other objects.

Safety Features and Design

Safety is crucial when transporting little ones by bike. Instep trailers offer bright color panels, reflectors, and flags for high visibility. Mesh windows and doors keep kids ventilated. 5-point harnesses and padded seats or helmets provide security and comfort.

Suspension systems, parking brakes, and burst-proof tires ensure a smooth, stable ride. Quick-release wheels make storage and transport easy. Trailers like the Quick-N-EZ fold down quickly for storage or transport.

Look for trailers made of durable, weather-resistant materials like aluminum or steel frames and waterproof zippers. UV-protected plastic or fabric will withstand sun exposure.

Attachment and Compatibility

Looking to Buy an Instep Bike Trailer. 10 Key Factors to Consider

Instep bike trailers attach to the rear axle of your bike with a universal coupler that fits most bicycles. Standard couplers attach quickly without tools. Some premium couplers like the Sync EZ Flex allow the trailer to pivot for maneuverability.

Always double check your bike’s rear spacing, axle size, and frame to ensure compatibility. Instep trailers work with most road, hybrid, mountain, and touring bikes. Not recommended for carbon fiber frames or rear disc brakes.

Wheels, Tires and Suspension

Larger rear wheels with inflated tires provide a smoother ride, while front wheels help with turning and control. Many Instep models have 20-inch rear and 12-inch front alloy wheels. Air-filled tires require occasional inflation but give better cushioning.

Independent suspension systems further absorb bumps and vibration. Some Instep trailers like the Take 2 Double offer adjustable suspension for customization based on cargo weight and riding conditions.

Folding and Storage Capabilities

Instep bike trailers fold down quickly for storage and transport. Singles fold flatter than doubles, but most models fit easily in a car trunk or closet. Folding mechanisms vary from simple frame joints to more complex designs.

Quick-folding trailers like the Sync Single make storage simple. The folding frame and quick-release wheels allow you to pack it all in under a minute. Measure your space and portability needs when selecting a model.

Weather and Terrain Usage

Certain Instep models work better in particular conditions. Trailers with rain covers, like the Take 2 Double, provide an excellent shield from rain, wind, and debris. Mesh ventilation keeps the interior cool on hot sunny days.

For rougher terrain, look for durable puncture-proof tires and suspension. The Sync Single can handle gravel roads and parks easily with its 16-inch air tires and adjustable suspension system.

Brakes and Stability

Hand-operated brakes offer stopping power for quick safety stops. Parking brakes keep the trailer in place when not attached to the bike. Foot brakes allow kids to help control speed on declines.

A low center of gravity and proper weight distribution optimize stability. Steel frames and wide wheel bases prevent tipping. Stability straps, safety flags, reflectors, and lighting also boost visibility and security.

Extra Accessories and Add-Ons

Looking to Buy an Instep Bike Trailer. 10 Key Factors to Consider

Optional accessories can enhance comfort, convenience, and functionality. Handlebar consoles let kids store snacks or toys upfront. Storage packs attach for extra cargo room. Suspension upgrades allow a smoother ride.

Conversion kits quickly transform trailers into joggers or strollers for walking. Trays convert some models into pet strollers. Add-ons like racks, fenders, and hitches boost utility and customization.

Reviews and Recommendations

With models for all needs and budgets, it helps to study Instep bike trailer reviews by real customers. Look for insights on quality, safety, ease of use, performance, and value across different conditions.

Top-rated Instep trailers like the Sync Single provide an optimal blend of affordability, functionality, and versatility for family bikes. Analyzing reviews helps you select the right Instep trailer for your situation.

Instep Bike Trailer Weight Capacity and Cargo Space

When selecting an Instep bike trailer, it’s crucial to consider the weight capacity and cargo space. After all, you need a trailer that can safely and comfortably transport your kids, pets, or gear.

In general, single Instep trailers have less overall capacity than doubles. The Sync Single model, for example, has a weight limit of 40 pounds. That’s enough for one child plus some extra cargo in the rear compartment. The Quick-N-EZ Single also tops out at 40 pounds.

Double Instep trailers like the Sync Double and Quick-N-EZ Double generally have an 80-pound weight capacity. That means you can carry two average-sized children at once. Some doubles even let you transport up to 100 pounds, though comfort and stability may decrease at max loads.

Cargo space is another variable. Singles offer less overall room than doubles, but creative designs allow respectable storage. The Sync Single has fold-down rear seats and plenty of rear bin space for hauling groceries or camping gear when not transporting kids.

With doubles, each seat takes up some potential storage real estate. But many models have rear bins, interior pockets, and attachment points for cargo accessories. Before purchasing, think about your intended cargo and measure dimensions and capacity.

Keep in mind that weight distribution affects stability and how a trailer handles. Heavier loads should sit lower and centered over or between the wheels. Consult manuals to ensure proper loading for safe travels.

While Instep’s bike trailers are designed for children and light gear, their spacious interiors and generous weight limits make them versatile. With a bit of planning, you can find a model to haul most anything the family needs on bike trips around town.

Looking to buy an Instep bike trailer? There are 10 key factors to consider before purchasing. Types of trailers, weight limits, safety features, compatibility, accessories, and real customer reviews all play a role. Analyzing your family’s needs and comparing trailer specs will lead you to the perfect Instep model for adventure and utility.

Instep Bike Trailer Safety Features and Design

Looking to Buy an Instep Bike Trailer. 10 Key Factors to Consider

When it comes to picking the perfect bike trailer to tow behind your bicycle, safety should be your top priority. While getting your kids or cargo from point A to point B is the goal, you want to make sure you do so securely and without incident. This is especially true when little ones are your passengers. When evaluating bike trailers on the market today, Instep models rise to the top for their thoughtful design with safety in mind.

Hitch and Coupler

A bike trailer is only as secure as its connection to the adult bike towing it. Instep trailers come equipped with a universal coupler that attaches easily to most bicycle rear axles with a secure, threaded hitch. The InStep Take 2 Double bicycle trailer, for example, comes with their patented Insta-Click hitch effortlessly connects the coupler to the bike with a simple click and twist. The Sync Single trailer uses a similar push button hitch that quickly attaches to the bike axle. With tool-free installation, Instep hitches provide a safe, sturdy link between bike and trailer.

Frame Construction

The frame is the foundation that supports passengers inside an Instep bike trailer. Durability is key when carrying precious cargo. Instep trailers come equipped with a lightweight yet solid steel frame coated in durable enamel to prevent rusting. The Sync Single model frame provides single passenger capacity, while the Take 2 Double model can handle two kiddos. For larger loads like grocery runs, the cargo-friendly InStep Sierra trailer offers a large, reinforced steel frame with lower center gravity to optimize stability when hauling heavier items.

Fabric and Covering

Along with the frame, the fabric components and exterior covering are critical for keeping trailer passengers protected. Instep trailers use durable polyester fabrics that are water resistant and coated for UV ray protection. The Take 2 model includes a 2-in-1 canopy with a weather shield that can be rolled up and away when the elements are favorable. The transparent rear window on Instep models allows parents to keep an eye on the trailer’s occupants. The Sync Single even includes a padded helmet mesh section to keep your little one’s noggin secure and comfortable.

Safety Harness

Looking to Buy an Instep Bike Trailer. 10 Key Factors to Consider

All Instep trailers come equipped with an interior 5-point safety harness to keep passengers protected inside the cabin. The Take 2 Double trailer includes two individual harnesses to independently secure each seat. The easy-to-buckle design keeps your little one strapped in safely for the entire ride. The shoulder straps and lap belt are padded for comfort, and connect together via a central buckle that’s tricky for kids to release on their own. Great for preventing escape artists.

Storage Space

In addition to passenger space, most Instep trailers include ample interior storage areas and exterior rear racks for hauling along toys, snacks, jackets and other necessities for the journey. The Take 2 Double fits two kids and still offers space below for packing supplies, while the Sierra cargo trailer has a generous 8 cubic foot capacity. Exterior pockets give quick access to items you may need en route. Less chance of curious kids getting into mischief if they’re surrounded by their own things!

Reflectors and Visibility

Looking to Buy an Instep Bike Trailer. 10 Key Factors to Consider

Being visible from all angles is key for bike trailer safety. Instep models check this box with built-in reflectors along the sides and rear that catch and reflect light from vehicles and street lamps. This provides crucial visibility when pulling trailers in low light. For added safety, Instep also includes a safety flag that easily mounts to the adjustable pole on the rear. The bright color and tall height makes it easy for motorists to spot the trailer, and remind them to give extra room when passing.

Parking Brake

A parking brake is an important yet often overlooked bike trailer feature that contributes to safety. Instep trailers come equipped with a foot-activated brake lever that engages the rear wheel. When parked, a few pumps of the pedal will keep the trailer securely in place on slopes and prevent any unexpected rolling. The brake also helps when loading/unloading passengers by keeping the trailer steady. Less stress for parents, and less chance of a trailer run-away accident.

Suspension

Providing a smooth and comfortable ride is not only nice for passengers, but it also promotes safety. Instep bike trailers come equipped with built-in suspension systems to absorb shock and prevent jostling when rolling over bumps or uneven terrain. Both the Sync Single and Take 2 Double models boast adjustable suspension for customizing the ride. The 16” rear wheels help smooth out the journey even further. Less time bouncing means less opportunity for slips and spills!

Conversion Kit

For versatility beyond just biking, Instep’s conversion kit lets you transform the trailer into a rolling stroller for walking, jogging, or hiking. By replacing the bike attachment arm with a fixed wheel kit, the trailer maintains safety features like parking brakes and harnesses for securing little ones during other activities beyond cycling. The canopy and bug screen provide protection from the elements across sports.

When evaluating bike trailers for your family, don’t cut corners on safety. While prices vary across brands and models, the peace of mind knowing your precious cargo is protected is priceless. Instep bike trailers like the Sync Single or Take 2 Double offer thoughtful design focused on safety. From tool-free hitches and five-point harnesses, to ample reflectors and a smooth ride suspension, Instep prioritizes security. Test drive an Instep on your next bike adventure for safety you can see and feel.

Instep Bike Trailer Attachment and Compatibility

Looking to Buy an Instep Bike Trailer. 10 Key Factors to Consider

Looking to buy an Instep bike trailer? As one of the most popular brands of bike trailers on the market, Instep offers a range of single and double seat options to meet different needs. However, before you make your purchase, there are some key factors to consider regarding attachment and compatibility to ensure you get the right Instep trailer for your bike.

1. Confirm your bike has the proper hitch

Instep bike trailers attach to your bike using a coupler that fits over the rear wheel axle. However, not all bikes come equipped with this hitch. Most modern mountain bikes, hybrid bikes, and comfort bikes have a quick-release rear axle with the proper diameter to accept an Instep coupler. However, some road bikes, vintage bikes, and bikes with an internal gear rear hub may not work with Instep hitches.

2. Pay attention to axle diameter

If your bike does have a quick release rear axle, be sure to pay attention to the axle diameter. Instep offers couplers for both 3/8 inch and 1/2 inch axles. Measuring the diameter of your rear axle will ensure you get the proper Instep hitch.

3. Consider wheel size

Looking to Buy an Instep Bike Trailer. 10 Key Factors to Consider

Instep bike trailers are designed to sit low to the ground, which is optimal for stability. However, this means the wheels of the trailer are small, usually 16 inches. If your bike has very large wheels, such as 29ers on some mountain bikes, the trailer may sit too close to the ground. In this case, consider a different trailer with larger wheels.

4. Watch for disc brakes

Many newer bikes now come equipped with disc brakes rather than rim brakes. This is something to keep in mind, as the Instep coupler needs to clamp securely over the hub area of the rear wheel. Disc brakes may interfere with getting the coupler into the proper position.

5. Consider seat post attachment

If your bike is not compatible with an Instep rear axle coupler, you may be able to use an Instep seat post hitch instead. This clamps directly to the seat post. Just be sure your seat post has sufficient exposed length above the seat tube for the clamp to attach securely.

6. Double check frame and tire clearance

Although Instep trailers are quite narrow, you’ll still want to confirm that your bike has adequate clearance between the rear tire and seat tube. This is especially important on bikes with a rear suspension frame. The trailer needs several inches of room to avoid contact.

7. Mind cantilever brakes

Older mountain bikes with cantilever brakes require extra frame clearance due to the protruding brake arms. If space is very tight, it may preclude the ability to mount an Instep trailer.

8. Look at rear dropouts

While most quick release axles have uniform circular dropouts, some bikes – like BMX models – may have rear dropouts that are slotted rather than circular. This irregular shape would likely prevent an Instep coupler from attaching securely.

9. Evaluate strength and material

Keep in mind that a bike trailer adds significant weight hanging off the back of your bike. Cheaper or vintage bikes may not handle the added load as well as a stronger modern aluminum or steel frame. Additionally, carbon fiber bikes may not have adequate strength in the rear axle area to handle a loaded trailer.

10. Do a test ride first

Looking to Buy an Instep Bike Trailer. 10 Key Factors to Consider

Before heading out with a loaded trailer and passengers, do a test ride first without a load. Check that the coupler attaches tightly and that there are no clearance or stability issues when cornering or braking. Also evaluate how the added trailer affects handling to make sure you remain in full control.

By carefully considering these factors of attachment and compatibility, you can ensure that you select the right Instep bike trailer to match your bicycle. Taking the time to evaluate hitch type, wheel size, frame clearance, and strength will allow you to pull your Instep trailer confidently and safely.

Instep Bike Trailer Wheels, Tires and Suspension

Shopping for an Instep bike trailer? Don’t forget to evaluate the wheels, tires and suspension when making your choice. These components have a big impact on the ride quality and durability of your trailer. Here are 10 key factors to consider:

1. Wheel size

Instep trailers typically come with 16 inch wheels. This gives a low center of gravity for stability. However, larger 20 inch wheels are available on some models. The bigger wheels will roll over bumps easier, but the trailer may sway more in turns.

2. Steel vs aluminum rims

Looking to Buy an Instep Bike Trailer. 10 Key Factors to Consider

Steel rims are sturdy and inexpensive, but add weight. Aluminum rims are lighter yet strong. Higher-end Instep trailers feature aluminum rather than steel rims. Just check that aluminum rims are coated to prevent corrosion from rain and debris.

3. Tire width

Wide tires provide more stability and a smoother ride. Instep tires range from 1.5 inches up to 2.125 inches wide. Wider tires cost more and add some weight, but greatly improve comfort on rough terrain.

4. Tire tread

Lug tread tires grip better on loose or uneven ground. Smoother street tread rolls faster on pavement. Consider the conditions where you’ll ride most to choose the right tread style.

5. Tire air pressure

Proper inflation is key for trailer tire performance. Under-inflated tires are prone to flats and affect handling. Be sure to inflate Instep tires to the recommended PSI stamped on the sidewall.

6. Composite vs spoked wheels

Instep uses both composite plastic and metal spoked wheels. Composite wheels won’t rust and are very durable, but plastic flexes more. Metal spoked wheels are stiffer, but the spokes can break if overloaded.

7. Sealed wheel bearings

Quality wheel bearings allow wheels to spin freely with minimal friction. Instep seals and lubricates wheel bearings at the factory so they last longer before needing to be serviced.

8. Suspension system

Higher-end Instep trailers have integrated suspension that cushions the ride. This allows the trailer to better absorb bumps in the road without jostling passengers as much.

9. Suspension travel

Suspension travel indicates how much the system compresses when weighted down. More suspension travel equates to a smoother ride. Instep suspension typically allows 1.5 to 2 inches of travel.

10. Adjustable suspension tension

Some Instep models allow adjusting suspension tightness by altering spring or dampening force. This tunes the ride for heavier or lighter loads. Proper tuning prevents bottoming out or bouncing.

As you can see, paying attention to the wheels, tires and suspension makes a big difference when selecting an Instep bike trailer. Prioritize wide tires with sufficient air pressure to improve stability and comfort. Also consider suspension and wheel features that suit your particular riding environment. Taking the time to understand these technical elements will ensure an optimal experience towing your Instep trailer.

Instep Bike Trailer Folding and Storage Capabilities

Looking to Buy an Instep Bike Trailer. 10 Key Factors to Consider

When selecting an Instep bike trailer, be sure to evaluate its folding and storage capabilities. How compactly a trailer folds down affects how easily you can store it at home or transport it to your riding destinations. Here are 10 key factors to consider:

1. Folding design

Instep uses two main folding designs. Some models fold in half width-wise. Others fold in a triangular shape. Each has trade-offs for storage space needed.

2. Folding mechanism

Look for an easy-to-use folding system. Instep uses quick release actions, spring-loaded locks and telescoping poles to make folding intuitive and secure.

3. Folded dimensions

Consider both the width and length when folded. Measure your available storage space at home or in your vehicle. Compare that to Instep trailer dimensions when folded.

4. Frame materials

Steel frames resist flexing that can inhibit folding. But aluminum frames are more compact when folded. Assess the trade-offs for your usage.

5. Weight

Looking to Buy an Instep Bike Trailer. 10 Key Factors to Consider

Lighter trailers are easier to lift and stow. But durable steel frames and premium components add weight. Prioritize what’s most important for your needs.

6. Wheels

Quick release wheels enable more compact storage. Some Instep models feature thru-axles or bolted wheels that don’t easily detach.

7. Handle(s)

Convenient carry handles make transporting a folded trailer easier. Look for well-placed handles that remain accessible even when folded.

8. Fenders

Detachable fenders reduce width when folded. But non-removable fenders provide better weather protection when riding.

9. Adjustable / removable parts

The most adjustable Instep trailers allow removing seats, handlebars, flags and other parts to minimize storage footprint.

10. Storage bag

Some Instep models include a bag or cover that protects the trailer from dust or scratches while stored or transported.

Optimizing folding and storage for your specific needs will make owning an Instep trailer much more convenient. Evaluate where and how you’ll store your trailer before purchasing. Prioritizing compact folding or removable parts enables easier portability and storage.

Instep Bike Trailer Weather and Terrain Usage

Planning to bike with your Instep trailer over different types of terrain or in varied weather conditions? Make sure to select a model that can handle the conditions you plan to encounter. Here are 10 factors to consider:

1. Rain cover

Riding in the rain requires a high quality rain cover to keep passengers dry. Some Instep trailers include a rain cover, but most sell them separately.

2. Fenders / mud flaps

Integrated fenders prevent road spray from hitting passengers. They also reduce spray on the towing bike. Mud flaps behind the wheels help protect from debris.

3. Off-road tires

Knobby, lugged tires provide better traction on loose dirt, gravel or uneven ground. They help prevent sliding in muddy conditions.

4. Suspension system

Suspension helps smooth out the ride on bumpy terrain. It also improves traction as the tires better maintain contact with the ground.

5. Storage pockets

Pockets allow keeping rain gear or extra clothing handy if weather turns foul. External pockets are easiest to access while riding.

6. Wind screen

Looking to Buy an Instep Bike Trailer. 10 Key Factors to Consider

A mesh screen blocks headwinds and flying insects. Some Instep wind screens attach to the frame while others install on the tow arm.

7. Sun shade

A retractable sunshade protects kids from harsh sun exposure. Just take care that it doesn’t act like a sail in strong winds.

8. Trailer brakes

Adding brakes helps control speed when descending hills in variable trail conditions. It also aids stopping in wet weather.

9. Safety harness

A 5-point harness helps keep passengers securely seated over rough terrain. Padded straps prevent chafing.

10. Cargo space

Room for gear is important for all-weather utility. Some Instep trailers feature space behind seats to carry extra cargo.

Evaluating these features will ensure you select an Instep bike trailer suitable for the conditions you plan to ride in. Prioritizing weather protection, terrain capability and safety will allow you to ride confidently with your trailer in any situation.

Instep Bike Trailer Brakes and Stability

Looking to Buy an Instep Bike Trailer. 10 Key Factors to Consider

Safety should be a top priority when selecting an Instep bike trailer. An integral part of safe towing is proper braking control and stability at speed and around corners. Here are 10 key factors to consider regarding brakes and stability on Instep trailers:

1. Trailer brakes

Some Instep models offer the option to install hydraulic or electric trailer brakes. This provides extra stopping power on hills and at higher speeds.

2. Breakaway cable

The breakaway cable connects the trailer brakes to the tow bike. If the trailer detaches, it activates the brakes to slow down the trailer.

3. Wheel size

Larger 20 inch wheels add stability over bumps compared to smaller 16 inch wheels. But large wheels also raise the center of gravity somewhat.

4. Suspension system

Shock absorption helps smooth out the ride and improves tire contact for better braking traction. But it adds weight which requires more braking.

5. Wide wheelbase

A wide stance increases stability side-to-side. Instep trailers range from about 70 to 80 centimeters between the wheels depending on model.

6. Low center of gravity

Locating weight as low as possible improves stability. Instep trailers sit quite low to maximize a low center of gravity.

7. Cornering / lean resistance

An inflexible frame with appropriate structural supports will resist leaning in turns. Look for robust framework on the Instep.

8. Reflectors and lights

Reflectors make the trailer visible to other vehicles. Adding rear trailer lights aids stopping and turn signaling for safety.

9. Integrated flags

Flags help identify the trailer width and provide extra side visibility to other road users for safety.

10. Routine maintenance

Regular brake, wheel, tire and hitch maintenance ensures safe towing and braking performance. Follow Instep’s recommendations.

Making braking control and stability top priorities when selecting your Instep trailer will allow you to tow passengers in confidence. Considering these technical factors will provide peace of mind on every ride.

Instep Bike Trailer Extra Accessories and Add-Ons

Looking to Buy an Instep Bike Trailer. 10 Key Factors to Consider

One of the great things about Instep bike trailers is the wide range of accessories available to customize your trailer. Whether you want to enhance passenger comfort and safety or adapt your trailer for special uses, Instep offers many cool accessories. Here are 10 to consider:

1. Conversion kits

Convert from a passenger trailer to a cargo trailer with a conversion kit. Simply replace the seat with a cargo bed or pet carrier.

2. Rain cover

A fitted rain cover protects passengers from downpours. Covers are sized for 1 or 2 seat Instep models.

3. Sun shade

Retractable sun shades block harsh sun and UV rays. Most attach to the trailer canopy frame.

4. Safety flag

Extra wide safety flags make the trailer more visible. Opt for fluorescent orange or yellow colors.

5. Lights & reflectors

Enhance trailer visibility and comply with laws by adding brake lights, turn signals and reflector kits.

6. Storage packs

Looking to Buy an Instep Bike Trailer. 10 Key Factors to Consider

Attachable storage bags and packs provide extra cargo room for your gear or supplies.

7. Pet basket

Specifically sized for Instep trailers, pet baskets safely contain dogs or cats while riding.

8. Cup holders

Integrated cup holders keep refreshments handy for passengers in the trailer.

9. Handlebar console

Consoles mount to the tow bike handlebars putting controls and displays at your fingertips.

10. Seat pads

Extra seat cushions and padding enhance comfort for passengers on long rides.

Personalizing your Instep trailer with specialized accessories allows you to optimize it for your unique needs. Whether you prioritize safety, cargo capacity, or passenger comfort, Instep has the add-ons to take your trailer to the next level.

Instep Bike Trailer Reviews and Recommendations

With a wide range of excellent models to choose from, selecting the right Instep bike trailer for your needs deserves careful consideration. Here we review some of Instep’s most popular trailers and provide buying recommendations based on usage:

Instep Sync Single Trailer

The Sync single seat model provides an excellent value for families needing an affordable but fully-featured single child trailer. Key features include 16 inch tires, adjustable suspension, padded seat, 5 point harness and a lightweight but durable steel frame. While the canopy provides good weather protection, some owners wish it was extendable for taller children. Overall, the Sync Single is highly recommended as a safe, durable and comfortable single seat option on a budget.

Instep Quick N EZ Double Tow Behind Trailer

As Instep’s most affordable double trailer, the Quick N EZ prioritizes simplicity and light weight over features and amenities. With 16 inch tires and minimal padding, rides are bumpier than some other models. But the lightweight steel frame and simple folding design make storage and transport very easy. If you mainly need an inexpensive double trailer for short trips, the Quick N EZ double is a solid choice.

Instep Take 2 Double Bicycle Trailer

Looking to Buy an Instep Bike Trailer. 10 Key Factors to Consider

A clear step up from the Quick N EZ, the Take 2 Double provides a smooth ride and versatile conversion capabilities. Larger 20 inch wheels, adjustable suspension and padded seats with 5 point harnesses keep kids comfortable. A folding frame and quick release wheels make storage more compact. Owners also appreciate that the Take 2 converts from a kid carrier to a pet trailer or cargo hauler. Overall, it’s a great multi-purpose double trailer with family-friendly features.

Instep Sync Double Tandem Bicycle Trailer

Instep’s premium double, the Sync Double Tandem clearly prioritizes passenger comfort and performance. The suspension system, 20 inch wheels, adjustable seats, and 5 point harnesses work together to create an exceptionally smooth and stable ride. This makes it ideal for off-road adventures and longer distances. Just note that the plush seats and dual-sided canopy result in a heavier and bulkier trailer. But we highly recommend the Sync Double for parents wanting a versatile, fully-equipped double trailer.

Hopefully these Instep bike trailer reviews help highlight the key strengths of different models. We recommend evaluating your most important criteria like price, passenger capacity, terrain, and features to select the right trailer for your needs. Rest assured Instep offers outstanding options whether you need simple two-seat hauling or deluxe passenger comfort.

Looking to Buy an Authentic American Flag. Here’s How to Find the Best Quality Annin Flags for Sale

Select the Right Flag Material – Look for Flags Made of Durable Nylon or Cotton

When it comes to selecting an American flag, one of the most important factors to consider is the material it’s made from. Nylon and cotton are generally the best choices for a high-quality, durable flag that will hold up well outdoors.

Nylon flags are very resilient against wind and sun damage. The material is designed to be weather-resistant, retaining its color and strength even when exposed to the elements day after day. Annin uses premium denier nylon, measured by the density of the fibers, to ensure maximum durability. The higher the denier number, the thicker and more durable the nylon.

100% cotton flags also make excellent choices, as cotton stands up to wear and tear quite well over time. Cotton flags may fade eventually under harsh sun, but the material itself remains intact. For flags flown in high winds, cotton may not be as tear-resistant as nylon, so location should be considered. Annin cotton flags are made of heavyweight bunting cotton that is woven tightly for strength.

Polyester flags are cheaper but lack the quality of nylon or cotton. They fray easily and degrade faster in sunlight. For a good Annin American flag, nylon or cotton are your best bets for longevity. Check product details to confirm the material before buying.

Consider the Size – Bigger Isn’t Always Better

Looking to Buy an Authentic American Flag. Here

When picking out an American flag, it’s common to just go for the biggest size available. But bigger isn’t necessarily better when it comes to properly displaying the stars and stripes. The right flag size depends on where you intend to fly it.

For flag poles on residential properties, a 3′ x 5′ or 4′ x 6′ cotton or nylon flag is ideal. Flags this size are large enough to make a bold statement, while still being small enough to avoid tangling or fiercely flapping in the wind.

Larger poles and properties can often accommodate bigger 5′ x 8′ or even 8′ x 12′ flags. But keep in mind, the larger the flag, the more cumbersome it can be to raise, lower and fold up on a regular basis.

No matter the location, choose a flag size that is proportional to the pole and space. Make sure your Annin American flag will fit the area appropriately and be easily managed each day.

Examine the Header and Grommets – Durable Parts Last

A high-quality Annin American flag should have a sturdy header along the hoist side, with strong, rust-resistant grommets for hanging.

The header is a reinforced trim that runs the height of the flag, with grommets inserted at even intervals. This is the edge that attaches to the rope and pole for hanging. The thicker and more durable the header material, the better.

Likewise, rugged metal or plastic grommets are essential for longevity. Check that the grommets are thick, evenly spaced, and made of weather-resistant materials like aluminum or polypropylene plastic. Thin, weak or rusted grommets put undue stress on the fabric and cause tearing over time.

The Annin flags made in the USA come with the best quality headers and grommets designed to withstand years of use in any environment. Don’t settle for low-cost imports with flimsy hanging parts.

Find an Official Annin Dealer – Avoid Counterfeits

Looking to Buy an Authentic American Flag. Here

When you’re looking for authentic, American-made Annin flags, it’s essential to buy directly from an authorized Annin retailer. This ensures you get a genuine product, not a knock-off.

Annin has a network of approved flag dealers who sell directly from Annin inventory. Authorized sellers like Flagpole Setc, Flags Unlimited, and United States Flag Store have access to Annin’s full catalog of U.S., state, military, and historical flags.

Buying from third-party marketplaces can be risky, as you may receive a counterfeit imitation not made to Annin’s quality standards. Verify the seller is approved by Annin to get the real deal.

You can also order directly from Annin.com or Annin’s Amazon store. Purchasing directly from the manufacturer eliminates any chance of getting a fake.

Look for Flags with a Warranty – Good Flags Come with At Least a 1-Year Manufacturer’s Warranty

Any high-quality, American-made flag from a trusted brand like Annin should come with a warranty backing its workmanship and materials. Standard warranties are 1-3 years for domestic flags.

Annin includes a 1-year manufacturer’s warranty on all its sewn American and state flags. This warrants against any defects in manufacturing or materials that cause premature wear under normal conditions.

For polyester flags, the warranty period is 90 days. So you can feel confident buying cotton or nylon Annin flags knowing any flaws will be covered for 1 year from the purchase date.

If an Annin flag starts fraying, tearing or showing other signs of abnormal deterioration before the warranty expires, the company will repair or replace it. Having this assurance makes investing in an Annin flag worth the value.

Select a Flag Kit for Easy Assembly – Kits Have Everything Needed for Proper Display

For easy American flag display with minimal hassle, Annin flag kits provide all the essential components in one package.

Kits include the flag itself, a printed 6′ or 8′ aluminum flag pole, decorative golden eagle topper, mounting bracket kit for attaching the pole, and all necessary hardware for assembly and installation.

All you need to provide is a suitable mounting surface like a wall or deck railing. With an Annin kit, you’ll have a complete flag display ready to hang in under an hour, without making multiple trips to the hardware store.

Annin’s U.S. flag kits take the guesswork out of picking individual parts and ensure you get a matching set that looks great. The kits make a fool-proof choice for residential, commercial or memorial flag setups.

Check Reviews and Ratings – Buy a Flag Others Have Used Successfully

Before purchasing any product these days, it’s wise to check reviews and see what experience other buyers have had. This definitely applies to Annin flags too.

Look at ratings and feedback on sites like Amazon, eBay and flag retailer sites to gauge customer satisfaction. Are most reviews positive? Do people mention the flag lasting a long time? The reviews will give you honest opinions you can trust.

Annin flags consistently earn 4+ star average ratings, with buyers praising the durable construction, vibrant colors, proper dimensions, and overall quality. This feedback confirms Annin’s reputation for excellence.

You can buy with confidence knowing other customers have flown their Annin flags proudly for many seasons. The positive reviews back up the premium U.S.-made quality.

Consider Your Budget – Quality Annin Flags Are Available at Different Price Points

Looking to Buy an Authentic American Flag. Here

When it comes to American flags, Annin has options to meet different budgets while maintaining consistent quality and craftsmanship.

Factors like size, materials, accessories, and limited editions impact pricing. You can find high-value Annin flags starting around $15-25 for 3’x5′ polyester or nylon styles. Larger 6’x10′ nylon flags with embroidered stars can run $60-100.

Premium extra-large cotton flags and historical reproductions exceed $150+. But the superb durability and accuracy justify the investment for many buyers.

Rest assured, at any price point, Annin’s flags offer excellent quality and adherence to US flag code standards. There are great values tailored to every budget.

With smart shopping and sales, you can secure an authentic Annin American flag that matches your space, needs and budget. Prioritize quality materials and construction over size alone.

Consider the Flag’s Size – Make Sure It’s the Right Dimensions for Proper Display

When looking to buy an American flag, one of the first things to think about is what size to get. It’s tempting to just go for the biggest flag you can find, but that’s not always the best move. You wanna make sure you choose the right dimensions for proper display in your specific situation.

Let me ask you this – do you really need a 10 foot tall flag that ends up tangled around the pole all the time? Probably not! For most homes and properties, a 3×5 foot or 4×6 foot nylon or cotton flag will do the trick nicely.

Trust me, those mid-size flags make a bold statement as it is. And they’re way easier to manage on a daily basis than a massive 8×12 foot monster! I’ve helped neighbors untangle huge tangled flags, and it ain’t fun let me tell you.

Now if you have an absolutely giant pole and space to fill, by all means go big with a 6×10 or 8×12 foot Annin flag. Just be ready to wrestle that big boy every time you raise and lower it.

The moral of the story is, make sure the flag dimensions fit the area appropriately. You want people to see it proudly displayed, not whipping around uncontrollably. Take it from me, proportional dimensions are key!

Check the Number of Stitches – More Stitches Means a Higher Quality Flag

Looking to Buy an Authentic American Flag. Here

Now here’s an important tip if you really want the best of the best Annin American flag – take a peek at the stitching. I’m telling you, the number of stitches in the flag is directly linked to its overall quality and durability.

What you wanna look for is a flag with an absolute minimum of 6-8 stitches per square inch. More stitches than that is even better! That dense stitch work keeps the fabric together and reinforces it against wear and tear over time.

Compare a couple flags side by side in person if you can. You’ll see the difference right away in the stitching. Go with the Annin flag with more stitches per inch – it’ll last you longer flying proudly in the elements.

Examine the Header and Grommets – Sturdy Parts Last Longer

Here’s another quick tip from experience – take a close peek at the flag’s header and grommets before buying. Trust me, you want ’em to be heavy duty and built to last.

The header is the reinforced strip that runs up the side of the flag with the grommets for hanging. Make sure it’s made of rugged material like heavyweight canvas. Flimsy headers tear easily from the wind.

You also want big, thick grommets evenly spaced along the header, preferably aluminum or plastic ones. Little thin metal grommets rust and pop right off. No bueno.

So inspect that header and grommets closely, folks. Sturdy craftsmanship there means your Annin American flag will proudly fly for many seasons to come. Display it with confidence!

Select a Flag Kit for Easy Assembly – Kits Have Everything You Need

Let me let you in on a little secret for fast, frustration-free Annin flag setup – buy a complete flag kit! Seriously, it makes your life so much easier.

These kits include the flag, a pole, pole bracket, golden eagle topper, and all the hardware you need for assembly. Everything perfectly matches in one ready-to-go package.

Trust me, I’ve done the piecemeal thing buying parts separately. Don’t put yourself through that hassle! With a kit, all you gotta do is attach the bracket to a surface and snap the pole pieces together. Your durable Annin American flag is waving proudly in no time.

Annin’s flag kits are money well spent if you ask me. Ditch the headaches and enjoy easy, gorgeous flag display in a flash!

Check the Number of Stitches – More Stitches Means a Higher Quality Flag

Alright folks, listen up – if you really want the cream of the crop when it comes to Annin American flags, you gotta examine the stitching closely. I can’t stress this enough. The number of stitches per square inch tells you everything about the flag’s quality.

Here’s my advice – only buy an Annin flag with a minimum of 6-8 stitches per square inch. Even better if you can find one with more! That tight, dense stitching prevents fraying, tearing, and general wear and tear over time.

Do me a favor and inspect a few flags in person before deciding. Really zoom in and count those stitches on a couple square inches of fabric. More stitches equals a heavier duty, more durable flag. It’s worth the extra pennies per stitch!

I’ve seen cheap imported flags with like 3-4 stitches per inch. Let me tell ya, those things shred to pieces fast when the wind whips them around. Don’t waste your hard earned cash on them!

Invest in an authentic quality-crafted Annin American flag with serious stitching. That baby will wave proudly for many years to come thanks to all those sturdy stitches. I guarantee it!

Select a Flag Kit for Easy Assembly – Kits Have Everything You Need

Looking to Buy an Authentic American Flag. Here

Okay folks, let me hip you to the easiest way to setup your new Annin American flag – buy a complete flag kit! I’m telling ya, it makes the whole process a breeze.

These kits come with everything perfectly matched and ready to assemble – the flag, aluminum pole, decorative eagle topper, mounting bracket, and hardware. No running around to different stores or trying to mix and match parts.

I’ll admit, the first time I bought an Annin flag I did it piece by piece. Worst decision ever! So many trips to the hardware shop for parts, so much frustration trying to fit it all together. Save yourself the stress and get a kit!

With one of Annin’s awesome flag kits, you’ll be set up and displaying Old Glory in no time flat. Do yourself a favor – skip the headaches and enjoy easy installation. Order a kit today!

Examine the Header and Grommets – Sturdy, Rust-Resistant Parts Last Longer

So you’re in the market for a new American flag. Not just any flag – you want one that will withstand the elements and proudly display the stars and stripes for years to come. How can you find the highest quality flags made right here in the USA? The key is to inspect the small details that make a big difference in durability.

Let’s start with the header, the piece of material that connects the flag to the pole. The strongest headers are made of heavyweight polyester webbing rather than lightweight cotton or nylon. Polyester better resists degradation from sunlight and moisture. Examine the stitching closely; it should be tight, even stitches in a box X pattern. Sturdy stitching prevents the header from ripping during high winds.

Next, flip the flag over and check the grommets, the metal rings along the edge used to attach the flag to ropes or clips. High quality grommets are rust resistant, often made from aluminum or brass rather than steel. Look for double-thickness rolled or spun grommets that won’t separate or split. The industry standard is usually a minimum of 6 grommets for 3 by 5 foot flags and 8 grommets for 4 by 6 foot flags. More grommets provide greater security in high winds.

Material Matters – Look for Durable All-Weather Fabrics

Looking to Buy an Authentic American Flag. Here

The material of the flag itself also affects durability and longevity. The best quality American flags are made from heavyweight 200 denier nylon or polyester designed to resist sun damage and shredding. Stay away from flags made using lightweight 100 denier or less material, which tend to fade and deteriorate faster. Check country of origin too – many economy flags are foreign-made using thinner fabrics.

You’ll also want an all-weather fabric that won’t run or bleed when wet. Technora and DuraNyl are two synthetic materials known for being fade-resistant and retaining vibrancy over time. For decorative flags, look for fabrics like heavyweight dupioni silk that have a luxurious appearance and sheen.

Ask About UV Inhibitors and Flame Retardants

Outdoor flags need maximum protection from the elements, including the sun’s harsh UV rays. Many premium flags are treated with UV inhibitors and stabilizers to prevent fading and maintain color brilliance. These chemical additives make a significant difference in appearance over months outside.

Safety is also a consideration for outdoor flags. To reduce fire hazard, look for flags treated with flame retardants that meet government standards. Most public use flags must be certified as fire-resistant. Check the labels and ask suppliers about testing – you want assurances that the flag won’t easily ignite if it touches a grill or candles.

Stitched Together for Strength

Super glues and adhesives don’t cut it for heavy use flags. The best construction uses double-needle stitching throughout, rather than just along the edges. This stitching method reinforces seams and hems on both sides for maximum durability. On printed and embroidered flags, edges should also be merrowed – a bordering technique that prevents unraveling.

The fly end, the edge opposite the header, warrants extra attention. It bears the most stress from flapping. Look for a quality fly end made with a folded, sewn canvas sleeve around a steel or fiberglass pole. Avoid fly ends that simply tuck material under. Durability wins out over convenience here.

Made in USA Ensure Quality

Shopping American made flags is the best way to ensure you’re purchasing the highest quality. Reputable USA flag brands like Annin Flagmakers have over a century of flag making expertise. Their flags are manufactured domestically in factories held to the highest standards.

Well-established companies only use imported materials when necessary and pride themselves on American-sourced textiles and parts. Their flags undergo rigorous testing for durability, such as wind tunnel trials. When you buy American, you support domestic jobs as well!

Annin: The Flag Experts to Trust

Looking to Buy an Authentic American Flag. Here

Annin Flagmakers has been crafting American flags since 1847. That legacy of quality has earned them contracts to make flags for the U.S. military and state governments. Their flags fly proudly from the U.S. Capitol building to the mountaintops of Hawaii.

What makes Annin the premier American flag company? A few reasons:

  • Extensive selection – Annin offers American flags of all standard sizes, plus flags for every branch of the military, state flags, historical flags, and more. You’re sure to find the right flag for your application.
  • Durable materials – Their flags are constructed from heavyweight nylon or long-lasting polyester. Features like double-needle stitching and canvas fly ends ensure each flag resists wear.
  • Maximum protection – Annin understands the sun’s damaging effects. Their outdoor flags contain UV inhibitors and flame retardant treatments to maintain the integrity and brilliance of colors over time.
  • Made in the USA – As a historic flag maker dating back to 1847, Annin takes pride in American manufacturing. Their flags are made stateside to guarantee quality.
  • Expertise – With over 170 years of knowledge creating, testing and perfecting flag designs, Annin’s expertise is unmatched. Their flags meet or exceed government standards.

Annin also makes flag installation easy. Their U.S. flags come in complete kits with all necessary accessories. Flagpoles, mounts, halyards and snaps – everything you need for a professional presentation. Annin’s broad range of flag options and hassle-free kits has earned them the title of America’s Flag Experts.

Where to Buy Genuine Annin American Flags

Looking to Buy an Authentic American Flag. Here

Searching “Annin flags for sale” will reveal lots of retailers claiming to carry Annin products. But the truth is many vendors sell cheap imitation flags – so buyer beware. To ensure you get authentic, quality Annin flags, purchase directly from the source.

The best place to buy real Annin flags is through the company’s official website, Annin.com. Their online store has the full inventory and helpful customer service if you have questions. Annin provides guidance on proper flag sizing and protocols. Their pricing is also very competitive, especially for complete flag kits.

Well-rated retailers like Amazon also carry authorized Annin flags. However, ordering direct from Annin’s website guarantees you’re receiving genuine merchandise. Some things, like an iconic American flag, are worth investing in the real deal. Flying proudly for decades requires starting with quality materials and workmanship.

So when you’re looking for durable, patriotic American flags made in the USA, choose the experts at Annin. Their extensive selection, trusted manufacturing and complete kits display Old Glory at her best for all to see.

Look for an Annin Flag – A Trusted U.S. Manufacturer Known for Quality Craftsmanship

When it comes to American flags, few names command the respect and recognition that Annin Flagmakers does. Since 1847, Annin has been manufacturing American flags and other banners in the USA with a focus on quality craftsmanship. So if you’re looking to buy an authentic, high-quality American flag, Annin should be at the top of your list.

But with so many vendors selling Annin flags today, how do you know you’re getting the real deal? Here are some tips to help you find Annin flags for sale from authorized retailers so you can be confident you’re purchasing a genuine Annin-made American flag.

Check for the Annin Name and Made in USA Label

Authentic Annin flags will feature the Annin name and tag confirming they are Made in USA. Check that the flag has this tag, which should be sewn along one of the white stripes. Annin takes pride in manufacturing in the USA, so this label is your proof that the flag is the real McCoy.

Beware of American flags claiming to be Annin flags but without the proper labeling. This is a sign it may be a counterfeit or imitation product, not a genuine Annin flag.

Look for Annin’s Signature Craftsmanship

Looking to Buy an Authentic American Flag. Here

Annin has over 175 years of flag-making expertise, which results in products of the highest quality. Check that the flag has hallmarks of Annin’s premium craftsmanship, including:

  • Durable heavyweight nylon material
  • Reinforced stitching on the fly end (the side closest to the pole)
  • Strong, high-quality hardware
  • Bright, colorfast dies on the fabric

Annin uses advanced manufacturing methods and the best materials to ensure its American flags will stand up to weather, wear and tear. If the flag seems flimsy or poorly constructed, it’s not likely a real Annin product.

Find an Authorized Annin Retailer

To guarantee you’re getting a genuine Annin flag, shop with an authorized Annin retailer. Annin has a network of select retailers who sell licensed Annin products so you can be sure you’re getting the real thing.

Do your research to find a retailer near you who partners directly with Annin. Avoid buying Annin flags from third party sellers on sites like Amazon or eBay, where counterfeits may exist.

Some examples of authorized Annin retailers include flag and banner stores, hardware stores like Ace Hardware, and online stores like Flags Unlimited and Colonial Flag.

Choose Your Ideal Annin Flag

Looking to Buy an Authentic American Flag. Here

Once you’ve found a verified source of Annin flags, it’s time to choose the perfect fit for your needs. Here are some of Annin’s most popular American flag options:

  • Polyester US Flags: Made from durable 2-ply polyester, available in sizes from 4×6 inches up to 10×15 foot. Ideal for outdoor use.
  • Nylon US Flags: Premium heavyweight nylon material, available in a range of sizes. Also suitable for outdoor display.
  • Cotton US Flags: Flags handcrafted from long-lasting cotton and cotton/poly blends. Available in both printed and sewn constructions.
  • Indoor US Flags: Flags designed for indoor display, made from lightweight nylon or polyester. Have printed stars instead of sewn.
  • Kitted US Flags: Flags that come with poles, bases, eagles and accessories for complete flag display kits.

Consider where and how you’ll be displaying your flag to choose the appropriate size and material. Get guidance from the knowledgeable staff at an authorized retailer.

Shop Now for Your Authentic Annin Flag

Don’t settle for any American flag – make it an officially licensed flag from the experts at Annin. With Annin’s commitment to their specialized craft of flag-making and the pride they take in producing Made in USA flags, you can’t go wrong displaying an Annin flag. Shop now from an authorized Annin retailer to add this piece of Americana to your home or business.

Find an Official Annin Dealer – Avoid Counterfeits by Buying Directly from Approved Sellers

Annin Flagmakers has been manufacturing American flags and other banners in the USA since 1847. Their long history of quality craftsmanship has made Annin flags highly coveted. However, with this demand comes counterfeits and knockoffs trying to profit off the Annin name. To ensure you get an authentic Annin flag, it’s important to buy directly from an authorized Annin dealer.

Shopping with an official retailer guarantees you are getting a genuine Annin product, not an imitation. Here are tips for finding approved Annin dealers so you can buy with confidence:

Verify the Retailer’s Relationship with Annin

Looking to Buy an Authentic American Flag. Here

Annin has an extensive network of authorized retailers who are permitted to sell licensed Annin flags. Before purchasing, double check that the seller has a direct relationship with Annin by contacting them or looking for verification on the Annin website.

Beware of third party sellers on Amazon, eBay, or other sites claiming to offer Annin flags. Without a direct partnership with Annin, they may be selling counterfeits.

Look for Signs of an Established Flag Seller

Authorized Annin dealers are almost always longstanding flag and banner stores or websites. They should specialize in flags versus being a general online marketplace.

Look for a robust selection of American and other flags. Things like an informative website, strong customer service reputation, and positive online reviews help verify they are a legitimate retailer.

Ask About the Retailer’s Supply Chain

Before purchasing, ask the seller details about where and how they source their Annin flags. Authorized dealers will be able to provide information on their supply chain relationship with Annin to reassure you of the products’ authenticity.

Any vagueness or reluctance to answer questions should raise a red flag. A genuine Annin partner will be transparent.

Review Return and Warranty Policies

Looking to Buy an Authentic American Flag. Here

Given Annin’s reputation for quality, authorized dealers will stand behind the products with fair return windows and warranty coverage. Look for return policies of 30+ days and warranties against material and manufacturing defects of 1 year or longer.

Limited policies could indicate the seller is not confident in the authenticity of the products.

Shop Annin’s Full Line of American Flags

From nylon to cotton to polyester, Annin offers American flags in a wide range of styles and sizes. Authorized Annin retailers will have access to Annin’s complete product catalog versus a limited selection.

Whether you need an extra large outdoor flag or a desktop pennant, the ideal Annin dealer will have it. This shows they are a licensed provider of the real deal.

Look for the Annin Branded Packaging

Genuine Annin flags shipped from an authorized dealer will arrive in Annin’s signature branded packaging. This includes things like official logos and “Made in USA” text on the plastic flag bag or sewn Annin tags.

Product packaging is hard for counterfeiters to replicate, so it’s a telltale sign you are getting the real thing.

Know Where to Go for Genuine Annin Flags

While imitation Annin products unfortunately exist, finding an authorized Annin retailer virtually eliminates the risk. Do your due diligence to buy directly from a trusted source. Shop now with confidence for an authentic Annin American flag backed by 175 years of quality manufacturing.

Select a Flag Kit for Easy Assembly – Kits Have Everything Needed for Proper Display

Displaying the stars and stripes requires more than just an American flag. To properly present Old Glory, you need the right accessories and hardware for mounting and hanging. Rather than source each item separately, Annin’s flag kits provide an all-in-one solution.

Annin’s flag kits come with everything you need for complete flag display. Here’s what to look for when selecting an Annin flag kit for easy assembly and optimal presentation.

Choose Pole and Bracket Materials

Annin flag kits include poles and mounting brackets crafted from durable, weather-resistant materials. Consider where you will display the flag to determine the best material option:

  • Aluminum – Lightweight yet strong, ideal for indoor or occasional outdoor use
  • Fiberglass – Flexible and sturdy, suitable for outdoor installation
  • Wood – Provides a classic, decorative look for indoor display

The mounting bracket should match the pole material for cohesive aesthetics and performance.

Select the Right Pole Height

Looking to Buy an Authentic American Flag. Here

Pole height depends on flag size and display location. A general guideline is a 20-foot pole for a 4×6 foot flag or a 30-foot pole for a 5×8 foot flag. Consider the pole’s visibility and surrounding structures to choose the ideal height.

For indoor use, 6 to 9-foot poles are common. Outdoor poles can range from 12 feet for small yards up to 30 feet for commercial property.

Include All Mounting Accessories

Annin flag kits eliminate the hassle of piecing together mounting hardware and accessories:

  • Cast aluminum cleat and halyard for attaching the flag
  • Metal ground sleeve for in-ground pole installation
  • Threaded ornamental finial for decorating pole tops
  • Concrete foundation tube for heavy stability

Be sure all necessary mounting products are in the kit to properly display your flag.

Pick a Kit with Quality Craftsmanship

Just like their flags, Annin’s hardware and accessories feature durable construction. Inspect product specs closely:

  • Solid metal castings on cleats and finials
  • Reinforced stitching on slings and ties
  • Weather-resistant nylon ropes and pulleys

Premium materials will withstand wind, rain, and sun for long-lasting performance.

Include a Weather-Resistant Flag Cover

Looking to Buy an Authentic American Flag. Here

For extended outdoor display, include a vented nylon cover in your kit to protect the flag from harsh weather when not flying. The mesh material allows airflow while keeping out moisture.

Make sure the cover is large enough for your flag size so you can keep Old Glory in top condition.

Choose Deluxe Kits for Added Features

For enhanced convenience, upgrade to one of Annin’s deluxe flag kits. Deluxe versions add features like:

  • Telescoping poles for easy raising and lowering
  • Solar powered LED light kits for nighttime illumination
  • Wheeled carry bags for transporting and storage

Deluxe Annin flag kits make displaying Old Glory even easier.

Shop Kits for Proper American Flag Etiquette

Honor the flag properly by choosing the right Annin flag kit for your location and needs. With everything bundled together in one package, you’ll have your stars and stripes flying in no time.

Look for Flags with a Warranty – Good Flags Come with At Least a 1-Year Manufacturer’s Warranty

When investing in an American flag, you want assurance that it’s built to last. That’s why the best flags come with a manufacturer’s warranty to guarantee performance and durability.

Annin Flagmakers stands behind their products by offering warranties of 1 year or longer. Here’s what to look for when choosing a warranted Annin flag as an indication of quality:

Coverage Against Material Defects

A quality warranty protects against any inherent defects in materials and manufacturing. This includes things like:

  • Fabric tearing, fraying or discoloring prematurely
  • Loose or broken stitching
  • Hardware corrosion, cracks or breakage

Annin flags with a 1-year warranty or more provide assurance the materials live up to their reputation.

Coverage of Replacement Costs

If a manufacturer defect is found, a worthwhile warranty covers the full replacement cost of the flag. This includes reasonable shipping fees.

Annin offers free replacements within the warranty period so you don’t incur added costs for their craftsmanship issues.

No Wear and Tear Exceptions

Looking to Buy an Authentic American Flag. Here

Lower quality warranties exclude normal wear and tear, limiting their usefulness. Quality Annin flag warranties have no such exclusion.

If the flag fails prematurely under normal conditions, Annin will replace it regardless of cause.

1-Year Timeframe or Longer

Annin flags often come with warranties of 1 year and beyond. Lengthy warranty periods indicate confidence in longevity of the materials.

Be wary of flags with warranties less than a year, which signal durability concerns. Annin stands behind their flags for years of performance.

No Burdensome Claims Process

It should be simple for the customer to make a warranty claim and receive their replacement. Annin has a streamlined process that honors claims in good faith.

Avoid flags requiring extensive paperwork or proof to claim replacement, which is a red flag.

Covers Entire Flag and Hardware

The best Annin flag warranties apply to ALL components – the fabric, stitching, grommets, rope, and hardware. No part is excluded.

Partial warranties only covering some components offer less security in your purchase.

Honored by Authorized Dealers

Looking to Buy an Authentic American Flag. Here

Purchasing your warranted Annin flag from an authorized dealer ensures the warranty will be fully honored. Verify the seller’s authorization.

Grey market flag sellers often won’t recognize warranties, leaving you unprotected.

Indicates Stringent Manufacturing Standards

Annin’s willingness to warrant their flags for a year or longer reflects their stringent quality control and pride in workmanship. Less rigorous manufacturers won’t take this risk.

So a robust warranty signifies higher manufacturing standards – and a more confident purchase.

Choose a Respected Brand You Can Trust

At the end of the day, the warranty is only as good as the manufacturer behind it. With almost 200 years of flag-making experience, Annin is a name you can trust.

Check Reviews and Ratings – Buy a Flag Others Have Used Successfully

With so many options, choosing the right American flag can be tough. Reviews and ratings from other buyers are invaluable for identifying quality flags that stand up well.

As the longest standing American flag maker, Annin has overall stellar reviews confirming their reputation. Checking what existing customers say can help pick the perfect Annin flag for you.

Look for Consistently High Overall Ratings

Quality flags earn high star ratings overall. On sites like Amazon, good Annin flags average 4+ stars from hundreds or thousands of reviews.

Be wary of flags with lower than 4-star averages, which likely reflects quality issues.

Read Individual Reviews for Useful Details

Sort reviews by recency and relevance and read details on buyers’ experiences. Look for mentions of:

  • Flag durability in wind and weather
  • Ease of setup and hardware quality
  • Vibrant, long-lasting colors
  • Sturdy stitching that withstands wear

These details from real customer use help choose the best Annin flag.

Look for Consistency in Reviews Over Time

Reviews for quality Annin flags remain consistently positive over months and years. This shows enduring manufacturing standards.

Beware flags with reviews that decline in rating over time, indicating quality regression.

Browse Flag Retailer Reviews Too

Along with product reviews, check seller feedback for helpful insight on customer service, shipping, returns, and warranty redemption.

Buying from a highly rated authorized Annin retailer boosts purchase confidence.

Watch for Reviewer Photos Displaying the Flag

Looking to Buy an Authentic American Flag. Here

Pictures of the flag being flown or displayed from reviewers are extremely helpful. This allows you to see the flag quality firsthand.

Be wary of reviews without photos, which could be doctored.

Beware of Fake or Paid Reviews

With careful reading, fake reviews are usually detectable. Warning signs include:

  • Overly generic praise
  • Lack of specific details
  • Numerous reviews posted in a short time

Genuine reviews have unique details and objective pros and cons.

Visit Third Party Review Sites Too

Expand your research to trusted third party review sites like Yelp for additional unbiased feedback. These provide more points of consumer comparison.

Cross-checking reviews builds even greater confidence in your decision.

Let Other’s Experiences Guide You

Leverage the collective wisdom of consumer reviews to gain helpful insight. For choosing a great Annin American flag you’ll love flying, real customer feedback is a valuable resource.

Consider Your Budget – Quality Annin Flags Are Available at Different Price Points

Looking to Buy an Authentic American Flag. Here

As an American, few symbols represent our shared values and identity as powerfully as the stars and stripes of Old Glory. Flying the flag is a time-honored tradition that instantly evokes feelings of patriotism and national pride. When you’re looking to buy an American flag to display at your home or business, it’s important to find one that’s not only made in the USA, but also constructed from high-quality materials to withstand the elements.

Annin & Co. has been manufacturing flags in the United States for over 175 years. As the largest and oldest flag company in the country, they offer an extensive selection of American flags made with meticulous craftsmanship and durable fabrics. From budget-friendly polyester flags to premium, “built-to-last-a-lifetime” nylon and cotton flags, Annin has options to suit different needs and budgets.

Their sewn polyester flags are lightweight, vividly colored, and highly affordable. These economy-priced options work well for short-term display, making them a smart choice for holidays, events, and temporary use. Annin’s SolarMax nylon flags are designed to resist fading and wear. The heavyweight nylon material stands up to wind and sunshine much better than polyester. For a flagship-grade flag, Annin’s cotton and cotton-blend American flags are in a class of their own. Made from fine cotton bunting, these heirloom-quality flags proudly wave for generations.

Look for Flags with Double Stitching and Strong Hems

When evaluating American flag quality, check that the flag has reinforced double stitching on the fly end (the far edge on the side with the Union canton containing the stars). Double stitching prevents the fabric from unraveling along the hoist, while quality stitching overall ensures the flag doesn’t tear in high winds.

The hem along the fly end is also important. Annin’s high-end nylon and cotton flags have a lock-stitched canvas heading and brass grommets, anchoring the flag securely to the pole. Avoid flags with loose stitching or thin hems, which can deteriorate faster. Annin’s premium flags are made to federal specifications, paying close attention to design, fabrics, and construction for optimal durability.

Look for Fade-Resistant Fabrics

Over time, sunlight and weather can cause flags to fade or discolor. When buying an outdoor American flag, opt for fade-resistant, colorfast fabrics. Annin’s SolarMax nylon flags are solution-dyed, meaning the pigment is injected into the fibers rather than printed on the surface. This dyeing process allows the vibrant colors to last longer against UV rays and oxidation.

For the ultimate in color retention, Annin’s cotton and cotton-blend flags are hard to beat. Made from heavyweight, high-quality natural fabrics, these flags hold their bold hues for an incredibly long time. The cotton bunting material is crafted to prevent sheering, fraying, and unraveling as well.

Choose the Right Size Flag for the Space

Looking to Buy an Authentic American Flag. Here

When deciding what size Annin American flag to buy, make sure to consider the height and width of the area where you’ll be displaying it. The standard sizes for residential flags are 3×5 feet and 4×6 feet. For commercial flagpoles, larger sizes like 5×8 feet or 6×10 feet are common.

As a rule of thumb, the flag should be about 1 inch for every foot of flagpole height. The pole itself should be at least 25% taller than the height of the building. An oversized flag hanging limply can detract from its stately appearance. Measure the space and choose a proportionate flag size to ensure it flies proudly and looks respectable.

Buy Complete Flagpole Sets for Convenience

Rather than piecing together a flag kit, Annin’s all-in-one flagpole sets take the guesswork out of buying an American flag display. Available in multiple heights and finishes, including aluminum, fiberglass and wood, the complete sets include the flagpole, flag snaps, ornamental eagle finial, American flag of your choice, and installation accessories.

For easy online ordering, simply choose the flagpole height and material, flag fabric and size, and any other options. Annin’s flag kits offer a tailored, scale-appropriate flag display ready for years of honorable service.

Quality Materials Last Longer

Looking to Buy an Authentic American Flag. Here

With regular seasonal flag retirement ceremonies, you’ll go through quite a few American flags over the years. While inexpensive imported flags might save money upfront, they fade quickly and need continual replacing. Since Annin uses heavy-duty domestic fabrics, their flags outlast budget versions by a wide margin.

Spending a bit more for Annin’s cotton, nylon, or polyester flag fabrics results in a flag that withstands weathering and wears gracefully. You’ll get years of use from a quality Annin American flag rather than having to frequently buy cheaper replacements.

Made in the USA Supports American Workers

In addition to longevity, purchasing an American flag made in the USA has deep symbolic significance. Annin takes pride in being an iconic American company that employs U.S. workers and manufactures Old Glory on American soil. When you buy an Annin flag, you’re supporting generations of highly skilled flag makers across the country.

So when you want to display an American flag with pride, choose Annin’s flag craftsmanship, domestically sourced fabrics, and enduring construction. Their flags are built to honorably represent the stars and stripes for many years to come.

Looking to Buy a Sturdy, Safe Ladder. Consider Wolfwise’s Top Options

Wolfwise’s 12.5ft Aluminum Telescoping Ladder: Sturdy, Lightweight and Space Saving

Climbing up to clean the gutters or change a lightbulb can be tricky without a sturdy ladder. Wolfwise’s telescoping ladders provide a safe and convenient solution. As a homeowner, I’ve struggled with rickety old ladders that left me feeling uneasy. After doing some research, I decided to invest in one of Wolfwise’s aluminum telescoping models. I’ve been nothing short of impressed with the quality, stability and versatility this ladder provides.

Telescoping ladders extend to different heights using sliding rungs. Wolfwise’s 12.5 ft model can extend from 5.5 ft up to 12.5 ft to accommodate various projects. I love that it can contract down to a compact size for easy storage in my garage or closet. No more tripping over a bulky ladder!

The thick aluminum build makes Wolfwise’s ladders impressively sturdy. I never worry about stability, even when fully extended at 12.5 ft. The wide leg brackets provide a firm, wobble-free base. Rubberized feet ensure good grip and prevent floor scratches. I also appreciate the anti-slip steps which allow me to climb and stand securely.

Despite the rugged construction, Wolfwise’s telescoping ladder weighs under 30 lbs. I can carry it around the house and yard with ease. When climbing, the aluminum feels featherlight compared to wooden ladders yet still supports over 300 lbs. The lightweight strength really makes a difference in safety and handling.

Other smart design features also win points in my book. The quick-latching system makes it simple to lock the ladder at desired heights.Safety belts at the top provide extra fall protection. Padded edge guards prevent scrapes if the ladder bumps walls or siding. It even has a convenient tray for holding tools and hardware.

After a year of frequent use tackling home projects, I can confirm Wolfwise’s telescoping ladder is well worth the investment. Here are some key reasons I recommend it:

Sturdy and Stable

Looking to Buy a Sturdy, Safe Ladder. Consider Wolfwise

With thick aluminum construction, wide leg brackets and anti-slip feet, Wolfwise’s ladders provide unmatched stability. I never worry about the ladder buckling, sliding or tipping when fully extended up to 12.5 ft.

Lightweight and Portable

Weighing under 30 lbs, Wolfwise’s telescoping ladder is easy to maneuver and carry around the house or yard. The compact design slides down to just 5.5 ft for convenient storage.

Safe Design

Key features like anti-slip steps, safety belts, padded guards and a low 300 lb weight capacity make Wolfwise’s ladder safer than traditional models. It provides security when climbing up high.

Easy to Use

The quick-latching system makes it simple to lock the ladder at customizable heights. Extending and collapsing it is smooth and intuitive for hassle-free use.

Durable and Long-Lasting

Constructed from weather-resistant aluminum, Wolfwise’s telescoping ladder will provide years of reliable service. It still looks and functions like new after a year of heavy use.

Wolfwise offers their aluminum telescoping ladder in several sizes – 12.5 ft, 10.5 ft, 8 ft and 3.8 ft models are available. Prices range from $99 to $159. Considering the quality and versatility, I found my 12.5 ft ladder to be well worth the investment. It tackles nearly any indoor or outdoor job.

For tough projects requiring more height, Wolfwise also makes extendable ladders up to 20 ft tall. They provide the same stability and security of the shorter telescoping models. An optional wall stabilizer can be purchased for added safety when working at heights above 12 ft.

Before purchasing my Wolfwise ladder, I wasted money on shaky wooden and folding models. The telescoping aluminum ladder provides unmatched durability and performance. Features like the quick-latch system and padded guards also make Wolfwise’s design smarter and safer than other brands.

If you’re looking for a sturdy, versatile ladder the whole family can use for years to come, I highly recommend checking out Wolfwise’s options. Their telescoping and extendable ladders check all the boxes in terms of strength, stability, safety and ease of use. No more teetering on rickety old ladders trying to hang decorations or clean the eaves. With Wolfwise’s ladders, you can take on indoor and outdoor projects with confidence.

Telescopic Design Makes Storage and Transport a Breeze

Looking to Buy a Sturdy, Safe Ladder. Consider Wolfwise

As a homeowner, I’ve gone through my share of ladders over the years. From old wooden models to rickety multi-position ladders, I’ve experienced the hassle of finding space to store bulky traditional designs. However, telescopic ladders like those made by Wolfwise changed the game for me. Their ability to contract down for easy storage and transport sold me on investing in one.

Wolfwise’s aluminum telescopic ladders are a prime example of smart, space-saving design. Their retractable design allows the ladder to extend from around 5 feet up to heights of 8 feet, 10 feet, 12.5 feet or more. But when not in use, it slides down to a fraction of its extended size. My 12.5 ft model compacts down to just 44 inches tall for storage in my garage or closet.

I love that the telescopic mechanism makes these ladders so portable. Whenever I need to use it around the house or yard, I can grab it with one hand and go. The lightweight aluminum construction makes it easy for me or my wife to maneuver. At under 30 lbs, it’s a cinch to carry and reposition as needed. The days of struggling to lug around heavy wooden ladders are over!

Storing traditional full-size ladders in a garage or shed can quickly turn into a game of Tetris. Finding a spot for a bulky 10+ foot ladder while still leaving room for other items is tricky. The telescopic design on Wolfwise’s ladders eliminates this headache. When slid down to its most compact size of just 3-5 feet, it tucks neatly out of the way in a fraction of the space.

I also love how easy Wolfwise’s ladders are to transport in a car or truck. Instead of precariously strapping an enormous ladder to the roof of your vehicle, the telescopic model simply slides down to fit nicely in the backseat or truck bed. No more having an unwieldy ladder sticking way out of your car during trips to the hardware store.

Here are some of the key storage and transportation advantages I’ve found with my telescopic Wolfwise ladder:

Compact Storage

Fully retracted to just 3-5 feet long, Wolfwise’s telescopic ladder models can be tucked away neatly in a closet, garage or shed without hogging up valuable floorspace.

Easy Transport

Weighing under 30 lbs, the lightweight telescopic ladder is simple to pick up, carry and reposition around the house, yard or work site.

Fits in Small Spaces

The ability to retract down to a fraction of its extended length lets you store the Wolfwise ladder in tight spaces like the backseat of a car.

Single-Person Portability

Unlike bulky traditional models, the telescopic ladder can easily be carried and set up by one person without assistance.

No More Roof Racks

With the telescopic design, there’s no need to strap an enormous ladder precariously to the roof of your car for transport. It fits easily in the backseat or truck bed.

Wolfwise’s telescopic ladder models provide unmatched versatility. Around the house, I use my 12.5 ft frequently for tasks like cleaning gutters, trimming trees, washing windows, and decorating. The ability to retract it down for easy repositioning around the yard makes jobs quicker and simpler.

I also keep the ladder in my truck for work projects. Whether I’m tackling a job at a client’s home or helping a friend with house repairs, it’s great having a sturdy and portable ladder always on hand. I don’t have to schlep around a massive unwieldy model.

When shopping for ladders, don’t underestimate the importance of storage and portability. Telescopic models like those made by Wolfwise make a huge difference in convenience and practicality. No more struggling to find room for a bulky ladder or precariously strapping it to your car roof.

With its smart retractable design, Wolfwise’s telescopic ladders provide unmatched stability and strength while remaining easy to store and transport. If you want the versatility to take on projects around the home while avoiding the headaches of traditional ladder designs, I highly recommend going telescopic.

Wide, Anti-Slip Steps Provide Safe Standing Up to 330lbs

Looking to Buy a Sturdy, Safe Ladder. Consider Wolfwise

As a first-time homeowner tackling DIY projects, I quickly learned how important it is to have a ladder with secure, slip-resistant steps. My old wooden ladder with narrow rungs and slick wood finish nearly caused some nasty falls. After research, I discovered Wolfwise’s aluminum telescoping ladders have wide steps and anti-slip tread for maximum safety.

Climbing up and down a ladder repeatedly to clean gutters or paint the house can lead to tired, shaky legs. I felt anxious on my old ladder, constantly worrying about my foot slipping on the smooth wooden steps. The angled design also meant only part of my foot could fit on each rung.

Wolfwise’s ladders gave me newfound confidence with their wide steps and anti-slip tread. Each step is nearly a foot deep, allowing my whole foot to fit comfortably. The textured groove tread provides reliable traction, even when wearing slippery shoes or working in wet conditions.

I also appreciate how the large steps accommodate any foot size comfortably. My old wooden ladder was tricky to balance on with size 12 feet. The extra-wide steps on Wolfwise’s ladders provide plenty of toe-to-heel room for even the biggest feet. Family members of all ages can climb with confidence.

Here are some of the key safety benefits I’ve experienced using Wolfwise’s ladder steps:

Anti-Slip Tread

Looking to Buy a Sturdy, Safe Ladder. Consider Wolfwise

The textured groove pattern on each step grabs onto shoes and boots securely to prevent slips and falls.

Wide Design

Nearly a foot deep, the steps comfortably fit entire feet without crammed toes hanging off the edge.

Angled for Safety

The ladder steps extend at a 75-degree incline, providing a more ergonomic climbing position than vertical rungs.

Supports Up to 330 lbs

The sturdy aluminum steps provide safe, wobble-free standing even under heavy loads up to 330 lbs.

Knowing each step can support my full foot and body weight provides tremendous peace of mind. Even after hours spent ascending and descending, I feel secure and stable thanks to the anti-slip tread and wide design.

The 75-degree incline of Wolfwise’s ladder steps also maximizes safety. Traditional wooden ladders often have narrow vertical rungs. The angled steps on Wolfwise models provide better ergonomics and security while climbing. Feet and knees stay in a natural position rather than over-extending.

Wolfwise’s telescoping and extension ladder models boast the same safe step design. On my 12.5 ft telescoping ladder, I appreciate having slip-resistant steps whether fully retracted at 5.5 ft or fully extended at the maximum height. Consistent tread and width provide reliable footing at any length.

I’ll never forget the unsteady feeling of teetering on my old ladder with slick, narrow steps. The anxiety of working high up while not fully trusting my ladder was the worst. Since switching to a Wolfwise ladder with anti-slip steps, I can take on DIY projects with self-assurance.

Proper ladder step design often gets overlooked when shopping for ladders. However, it’s a make-or-break factor in safety and performance. After experiencing many close calls on my previous ladder, I put anti-slip steps at the top of my must-have list. Wolfwise delivered with their smart step design.

If you want secure footing you can rely on when working around the house, check out Wolfwise’s ladders. Models with anti-slip steps and heavy-duty aluminum construction provide unparalleled safety. No more worrying about slippery or angled rungs leading to accidents. With Wolfwise, you and your family can climb and stand with full confidence.

One-Button Retraction Saves Time and Effort

As someone who’s constantly moving my ladder around the house and yard to tackle projects, convenience is key. I used to waste time and energy extending and collapsing my old ladder one rung at a time. Wolfwise’s telescoping ladders changed the game with their one-button retraction system.

Picture this – you finish cleaning the gutters and need to reposition your unwieldy ladder to the back yard. With a traditional model, you’d have to collapse each section one by one until fully retracted. Same for extending it back out once relocated. This repetitive process is time consuming and tiresome.

Wolfwise eliminated this headache by implementing a quick retraction button. Simply depress the button and watch in awe as the ladder smoothly retracts down to its compact storage size in seconds. Extending it is just as easy – pull it out to the desired length and lock with the quick-latch mechanism.

I can’t exaggerate how much time and hassle this one-button system has saved me. Maneuvering around the house is a cinch – no more collapsing and extending each rung individually. The telescoping design powered by the retraction button makes repositioning almost fun!

Here are some of the biggest benefits I’ve experienced with Wolfwise’s one-button retraction:

Saves Time

Looking to Buy a Sturdy, Safe Ladder. Consider Wolfwise

With just the press of a button, the ladder extends or retracts within seconds versus tedious manual adjustment.

Prevents Pinching

Automatic retraction helps avoid pinched fingers from locking rungs individually.

Smooth Operation

The ladder extends and retracts fluidly with the push-button control.

Easy Storage

The compact storage size can be achieved instantly using the retraction button.

Not having to collapse each section manually provides huge time savings that quickly add up. I can get jobs done faster without the repetitive ladder adjustments.

The automatic system also helps prevent pinched fingers from locking rungs one by one. I cringe just thinking about past painful mishaps adjusting ladders manually.

I love how smoothly Wolfwise’s telescoping ladder extends and retracts using the button control. The steady telescoping motion almost makes it fun to operate. Kids beg to push the button and watch the ladder slide out.

Storing the compact ladder is a total breeze thanks to instant push-button retraction. No more wrestling with manually closing each section after finishing a project.

Wolfwise’s telescoping ladders with one-button control provide effortless use that traditional models simply can’t match. I can reposition my ladder around the house and yard with unmatched speed and ease.

The days of pinched fingers and wasting time individually adjusting rungs are over. I wish I had discovered Wolfwise’s instant retraction system years ago!

If you want to save time and effort taking on home projects, check out Wolfwise’s telescoping ladders with one-button retraction. The convenience of near-instant extending and compacting is a complete game changer. Once you try it, you’ll never want to manually collapse a ladder again.

Extended Height Reaches 12.5ft for Most Single Story Jobs

Looking to Buy a Sturdy, Safe Ladder. Consider Wolfwise

As a new homeowner, I quickly learned that a short household step ladder doesn’t cut it for most projects. Cleaning gutters, painting exterior walls and trimming branches all required something taller. After nearly taking a nasty fall off a rickety old extension ladder, I invested in Wolfwise’s 12.5 ft telescoping model. The extra height has allowed me to take on home projects with safety and ease.

Wolfwise’s 12.5ft aluminum telescoping ladder is a versatile height for tackling jobs around a typical single-story home. Fully retracted, it starts at just 5.5 ft for low-level tasks. Extending it to the maximum 12.5 ft lets me safely access the roof, gutters, siding, windows and more. The range covers anything I need to do around my ranch-style house.

I love having a ladder tall enough to reach challenging areas like my high garage eaves and backyard trees. My old 6 ft step ladder was comically unsafe for tasks requiring a serious extended reach. The 12.5 ft Wolfwise ladder boosted my DIY confidence.

Unlike rickety old wooden extension models, Wolfwise’s ladder feels secure and stable even at full 12.5 ft extension. The aircraft-grade aluminum construction gives it a weight rating over 300 lbs at any height. I never worry about stability or durability when fully extended.

Here are some of the key benefits I’ve experienced with Wolfwise’s 12.5 ft maximum height:

Reaches Roof and Gutters

The extended length allows me to safely access high areas like the roofline for shingle repairs, gutter cleaning and more.

Sides of House Accessible

I can easily reach side siding, eaves and windows up to 12.5 ft for painting, washing and exterior repairs.

Tree Trimming Boost

Overgrown backyard trees are no match for pruning with the extra reach of a 12.5 ft fully extended ladder.

Stability When Extended

Wolfwise’s ladder feels secure even at the full 12.5 ft length thanks to aircraft-grade aluminum construction.

Having the extended reach for tricky high-up tasks gives me confidence I never felt with my old short step ladder. I used to dread cleaning the gutters until getting my Wolfwise ladder. The stability at full extension makes tough jobs safer and less stressful.

For two-story homes, Wolfwise offers extension ladders up to 20 ft tall. However, the 12.5 ft model hits the sweet spot for typical single-story houses. It even includes a handy top platform with tool tray – perfect for setting paint cans and supplies when working up high.

In addition to household projects, my Wolfwise ladder tackles outdoor jobs like exterior home repairs, tree trimming, and cleaning debris from the roof. The versatility to extend from 5.5 up to 12.5 ft lets me adapt to various needs around the property.

Don’t settle for a short step ladder if you want to take on important home projects. Wolfwise’s 12.5 ft telescoping model provides the secure extended reach required to make DIY jobs safe and successful. Your gutters and high exterior walls are waiting!

Weighs Only 27.3lbs But Holds Up to 330lbs

Looking to Buy a Sturdy, Safe Ladder. Consider Wolfwise

When setting up a ladder to work on projects, the last thing you want is a heavy, bulky beast that’s a pain to position. But you also need something sturdy that can support your weight. I struggled to find the ideal balance until discovering Wolfwise’s ingenious lightweight aluminum telescoping ladders.

My old wooden extension ladder was a back-breaking 30+ pounds. Muscling it around the house and yard got tiring fast. But it also felt shaky and unsafe when extended high up. I wanted something easier to maneuver yet able to hold my 200 pound frame.

Wolfwise’s aircraft-grade aluminum telescoping ladder was the perfect solution. At just 27.3 pounds, it’s a breeze to carry and reposition one-handed. The wide-flange ladder legs and reinforced steps securely hold over 330 pounds when extended. Strength meets portability!

I love how the lightweight aluminum makes Wolfwise’s ladder so easy to transport and store. I use the quick retraction button to collapse it down and toss it in the backseat or garage in seconds. No heavy lifting required.

When extended up to 12.5 feet, the ladder feels wobble-free and rock-solid even at its max 330 pound weight rating. The rigid aluminum construction gives me peace of mind that it won’t bend or buckle under loads.

Here are some of the advantages I’ve found with Wolfwise’s rare combo of ultra-light weight and heavy duty capacity:

Easy to Maneuver

Looking to Buy a Sturdy, Safe Ladder. Consider Wolfwise

Weighing just 27.3 pounds, I can carry, lift and reposition the ladder around the house with total ease.

Holds Over 330 Pounds

The aircraft-grade aluminum provides unmatched strength and security even under heavy loads up to 330 lbs.

Very Portable

The lightweight ladder is simple to transport and tucks away neatly in tight storage spaces.

Secure When Extended

Despite the featherlight feel, the ladder remains sturdy and wobble-free even at full 12.5 foot extension.

With most ladders, you sacrifice portability to get durability and vice versa. Wolfwise managed to optimize both key factors with their smart aluminum design.

I never hesitate to reposition my Wolfwise ladder thanks to the light 27 pound weight. But I also feel totally secure climbing high up knowing it can easily support my 200 lbs and then some.

For homeowners who want a sturdy yet easy-to-use ladder for projects, Wolfwise delivers. No more compromising with either an unwieldy heavy-duty beast or flimsy lightweight model.

When extended, Wolfwise’s ladder feels stronger and more stable than bulkier counterparts twice its weight. The rigid aircraft-grade aluminum provides quite literally the best of both worlds – light and portable when compact, heavy-duty when extended.

Don’t waste money on cheap lightweight ladders that wiggle and creak underweight. And avoid breaking your back lugging around clunky but sturdy models. Wolfwise’s ingeniously engineered design lets you have your cake and eat it too – just watch your fingers when retracting!

Rubber Caps Protect Floors and Increase Stability

Setting up a ladder indoors always made me cringe – I could envision the metal feet scratching up my hardwood floors or snagging the carpet. The metal caps on my old ladder also had a tendency to slide around on slick surfaces. Wolfwise solved these issues by outfitting their ladders with durable rubber end caps.

The first time I set up my new Wolfwise ladder on a wood floor, I was relieved to see the soft rubber caps on the bottom of the wide ladder legs. No more anxiousness about metal feet scuffing or snagging the floor – the rubber provides a protective buffer.

I also appreciate how the tread on Wolfwise’s rubber end caps grips onto surfaces. My old ladder slipped out from under me more than once on smooth tile or concrete. The rubber caps dig in to provide stability and prevent slipping.

Having used my Wolfwise ladder extensively indoors and out, here are some of the key benefits I’ve found with the rubber end caps:

Protects Floors

The soft rubber construction prevents scuffs, scratches and dents on hardwood, tile and laminate flooring.

Sturdy Grip

Looking to Buy a Sturdy, Safe Ladder. Consider Wolfwise

The textured rubber tread prevents sliding on slick surfaces like tile and hardwood.

Works on Any Surface

From concrete to carpeting, the versatile rubber caps provide stability without marring any floor type.

Reduces Noise

Rubber dampens sound from ladder feet knocking or sliding across the floor.

Having set my ladder up on every type of flooring and ground cover imaginable, I’m so relieved to no longer worry about damage thanks to the rubber end caps. My floors stay pristine after use.

The grippy tread also provides welcome stability and accident prevention. I can set the ladder up with confidence on slick surfaces like tile and wood where metal feet would slide. No more nasty falls due to a runaway ladder.

Outdoors, the rubber caps also provide stability on uneven terrain. Unlike metallic feet, the rubber adapts to give an even, secure base on gravel, grass and uneven ground.

Wolfwise clearly put a lot of thought into their ladder feet design. The rubber material works wonders in terms of safety, stability and floor protection compared to traditional metal feet.

If you want confidence setting up your ladder on any surface without damage, check out Wolfwise’s rubber-capped models. No more wincing at scratches or scrambling to catch a runaway ladder!

Aluminum Build Won’t Rust, Rot or Decay Over Time

Looking to Buy a Sturdy, Safe Ladder. Consider Wolfwise

After throwing out yet another worn-down wooden ladder, I decided it was time to invest in something more durable. No matter how carefully I stored that wooden ladder, it would eventually crack, rot and bend after a few years of use. Wolfwise’s aircraft-grade aluminum telescoping ladder was the long-lasting solution I needed.

Constructed from heavy-duty aluminum alloy, Wolfwise’s ladders are virtually immune to the elements. My old wooden ladder was basically garbage after being left outside through a few rainstorms and winters. The aluminum Wolfwise model still looks brand new after years of sun, snow and humidity.

I never have to worry about rust corrosion on the aluminum either. My last metal extension ladder basically disintegrated into an orange mess after one season of use outdoors. The aluminum is impervious to rust’s damaging effects.

Here are some of the key benefits I’ve experienced with Wolfwise’s durable aluminum construction:

Won’t Rot or Split

The aircraft-grade aluminum is impervious to moisture damage and won’t crack or split over time like wood.

No Paint Flaking

The anodized aluminum surface maintains its slick gray finish without sun damage or paint chipping.

Rust Resistant

The aluminum build will never succumb to rust corrosion, even with heavy outdoor use over many years.

Stays Rigid

Aluminum retains its strength and rigidity in any climate, unlike wood that cracks in cold or bends in humidity.

It’s a relief knowing my Wolfwise ladder will remain in flawless condition year after year. The aircraft-grade aluminum lives up to its reputation for durability.

Seeing my old ladders deteriorate from rot, rust and general wear was so frustrating. With just occasional wipedowns, my Wolfwise model still looks shiny and new after seasons of use in the elements.

The rigid feel of the aluminum also gives me confidence in its strength. I never have to worry about it warping and bending like cheaper wooden models. The material retains its stability in any climate or condition.

For the longevity and low maintenance requirements, aluminum ladders are worth the extra investment. Wolfwise’s durable alloy means you’ll never have to replace another ladder again. Just think of all the repair costs and injuries that can result from a damaged, defective ladder over time.

If you want a reliable ladder to last through years of household projects and outdoor use, aluminum is by far the most durable choice. Wolfwise sets the standard for sturdy and corrosion-resistant aluminum telescoping ladders. Check them out and you’ll likely never go back to wood!

Meets OSHA and ANSI Safety Standards for Performance

Looking to Buy a Sturdy, Safe Ladder. Consider Wolfwise

As a safety-conscious homeowner, I take ladder regulations seriously. After nearly falling off flimsy store-bought models one too many times, I researched the standards and certifications that quality household ladders should meet. Wolfwise’s telescoping ladders checked all the boxes for OSHA and ANSI compliance.

OSHA (Occupational Safety and Health Administration) and ANSI (American National Standards Institute) establish rigorous performance and testing standards for ladders. From weight capacities to labeling requirements, these regulations aim to prevent accidents and increase reliability.

Wolfwise ladders adhere to all applicable OSHA and ANSI ladder safety guidelines. Their heavy-duty build meets strength and tipping resistance requirements. Labels on the ladder provide guidance on proper use, weight limits and other safety factors.

Key OSHA and ANSI standards that Wolfwise ladders comply with include:

300 lb Duty Rating

Tested to securely support up to 300 lbs in normal use per OSHA 1910.23 regulations.

75-degree Incline

Looking to Buy a Sturdy, Safe Ladder. Consider Wolfwise

Steps extend at the optimal 75-degree angle for stability and ergonomics as dictated in OSHA 1910 standards.

Anti-Slip Steps

Steps feature a corrugated tread pattern for slip resistance under ANSI 14.1 step requirements.

Labels andWarnings

Cautions regarding weight capacity, setup position and other factors are clearly posted per ANSI requirements.

Knowing Wolfwise’s ladders adhere to such meticulous safety regulations gives me tremendous peace of mind. The OSHA and ANSI standards are designed to maximize performance, stability and accident prevention through rigorous testing.

Wolfwise also makes compliance easy by providing an instructional safety manual with each ladder. Helpful tips reinforce proper climbing angle, setup location, weight limits and maintenance. Strong safety practices become second nature.

I’ll never put my trust in a shoddy ladder again after learning about OSHA and ANSI standards the hard way. Wolfwise does the heavy lifting by designing their ladders expressly to meet all major safety certification criteria.

For homeowners seeking secure, reliable ladders for projects and repairs, prioritize OSHA and ANSI compliance. Wolfwise telescoping ladders meet every certification benchmark for optimal performance and accident prevention. Climb with confidence knowing the ladder adheres to the highest safety regulations.

Affordably Priced Under $100 for Quality and Reliability

As a new homeowner on a budget, I quickly learned that safety and performance doesn’t have to come at a premium price. After balking at the staggering cost of commercial-grade extension ladders, I took a chance on Wolfwise’s value-priced aluminum telescoping model. The professional quality at just a fraction of the price convinced me I made the right choice.

Priced at under $100, Wolfwise’s 12.5ft aluminum telescoping ladder boasted features I never expected to find in such an affordable model. The heavy-duty aluminum build, anti-slip steps, and one-button retraction seemed like pro-level qualities.

But the competitive price didn’t mean Wolfwise cut corners on reliability. After a year of frequent use indoors and out, it remains in flawless condition and earns my full trust on high jobs. The value is unmatched by other models anywhere near this budget-friendly range.

Here are some of the benefits I found with Wolfwise’s combination of affordability and professional-quality:

Pro-Level Features

Looking to Buy a Sturdy, Safe Ladder. Consider Wolfwise

Telescoping design, one-button retraction, anti-slip steps and 300lb weight rating deliver professional performance.

Sturdy Aluminum Build

Aircraft-grade aluminum offers durability and weather-resistance on par with costly commercial models.

Meets Safety Standards

Independent testing confirms adherence to OSHA and ANSI regulations for optimal safety.

Worry-Free Warranty

The 1-year manufacturer’s warranty provides peace of mind to buy with confidence.

After trusting cheaper generic ladders that wobbled and broke, the Wolfwise model brought me pro-level quality at budget pricing. The telescoping design and sturdy feel exceeded my expectations.

Wolfwise didn’t sacrifice essential safety elements like detailed warning labels, anti-slip steps and rubber end caps either. Commercial-grade renders some basic features premium add-ons.

For anyone seeking professional performance on a homeowner’s budget, Wolfwise delivers. Why overpay for unnecessary bells and whistles on commercial ladders?

The low price had me skeptical, but the 1-year warranty eased any concerns. Wolfwise clearly stands behind the lasting quality and reliability of their ladders for homeowners.

Don’t waste money on flimsy discount ladders or overpriced commercial models. Wolfwise hits the sweet spot for DIYers who want professional-grade versatility, safety and durability without inflated costs. Give their telescoping ladders a try – the value will speak for itself!

Looking to Buy a Sturdy Aluminum Cart This Year. Discover the Top 10 Features to Look For

Durability – Choose thick, heavy-duty aluminum that won’t dent or bend

When searching for an aluminum cart, durability should be at the top of your checklist. The last thing you want is a flimsy cart that dents or bends easily, rendering it useless after a short period of time.

Look for carts made from thick, heavy-duty aluminum – the thicker the better. Aluminum thickness is measured in gauge – the lower the gauge number, the thicker the aluminum. For durability, look for around 16 to 20 gauge aluminum. This thickness will resist dents and bend minimally under heavy loads.

Additionally, look for aluminum carts with reinforced edges and welded joints. Reinforced edges prevent the thin aluminum rim from deforming, while welded joints are stronger than nuts and bolts. Stamped rivets are also more durable than fasteners.

A high-quality powder coating will also improve durability. The coated finish resists chipping, scratching and rusting much better than bare aluminum. Be sure to choose a UV-resistant powder coating designed for outdoor use.

Testing the cart first-hand at a store is the best way to assess durability. Apply downward pressure to the edges and tray – it shouldn’t flex much. Also inspect the joints and fasteners. If the cart feels sturdy and solid, it will likely withstand years of abuse.

Wheels – Larger wheels roll over terrain better than small wheels

Looking to Buy a Sturdy Aluminum Cart This Year. Discover the Top 10 Features to Look For

The wheels are one of the most important components on a utility cart – after all, they allow you to transport heavy loads with ease. Larger pneumatic wheels will roll over bumpy terrain much better than small plastic or metal wheels.

Pneumatic tires absorb shock and vibration, resulting in a smooth ride even when rolling over cracks, rocks and other obstacles. The flexible rubber also provides more traction, which is useful when pulling heavy loads up slopes or through soil.

Aim for at least 10 inch pneumatic tires, though 13 inch wheels are ideal for maximizing maneuverability and shock absorption. The larger diameter allows them to smoothly roll over bumps and ridges.

Wheels should also have treads for extra traction on dirt. Avoid plastic wheels, which crack easily, or solid metal wheels, which transmit vibrations directly to the cart.

Before purchasing, test how easily the cart rolls and turns on different surfaces. Push down on the handle with weight to see how well the wheels absorb impacts. High-quality pneumatic tires make a big difference in performance.

Carrying Capacity – Select a cart that holds your intended loads

Looking to Buy a Sturdy Aluminum Cart This Year. Discover the Top 10 Features to Look For

Utility and yard carts come in a range of weight capacities, from 150 lbs up to 1,000 lbs or more. Consider what you’ll be using your aluminum cart for, then choose one with ample capacity.

For light yard work like bagged soil, leaves or mulch, a 300 lb capacity is sufficient. The larger 600 to 800 lb models work well for heavier items like landscaping rock, cement blocks or lumber.

If using your cart on a construction site, a 1,000+ lb heavy duty model is ideal. It can accomodate stacks of bricks, power tools, concrete bags and other construction materials.

Measure how much area is available on the lower tray. Larger trays allow you to carry more bulky items. Just note that wider trays can’t fit through narrow gates or doors.

Keep the cart’s weight capacity in mind when loading it up. Exceeding the limit stresses the components and can lead to damage over time. Weigh items on a scale if you are unsure of their weight.

Foldable Design – Folding carts store easily when not in use

For convenient storage when not hauling loads, consider a folding aluminum utility cart. Folding carts collapse down into a slim vertical profile, allowing you to tuck them away in a corner of the garage or shed.

Look for a tri-fold or quad-fold design with a simple release latch or lever. The cart should fold and unfold smoothly and easily. Test the folding mechanism in person to ensure there are no sticky pivot points.

Wheels may or may not detach when folded – detachable wheels further reduce the storage footprint. Just be sure to secure them in place before loading up the cart again.

If storing in a damp location, choose a model with anti-rust components to prevent seizing. Your folding cart should function smoothly year after year.

While folding aluminum carts sacrifice some rigidity compared to fixed models, the compromise is minimal. Just avoid extremely heavy loads that could stress the folding joints.

More Key Features to Evaluate

In your search for the ideal aluminum yard or utility cart, also consider these features that enhance functionality:

  • Ergonomic handle – Comfort grip prevents hand strain
  • Tray material – Steel or plastic prevent sharp edges
  • Compact size – Fits through narrow access points
  • Easy to assemble – Minimal parts and simple tools
  • Cost effective – Affordable pricing for the quality
  • Warranty – At least 1 year of coverage

By keeping all of these aspects in mind while comparing aluminum cart models, you’ll be equipped to select the best cart for your needs. A high-quality aluminum cart that checks all the boxes will provide years of reliable service.

Wheels – Larger wheels roll over terrain better than small wheels

Looking to Buy a Sturdy Aluminum Cart This Year. Discover the Top 10 Features to Look For

When it comes to maneuvering over various surfaces with heavy loads, the wheels are arguably the most critical component on an aluminum utility or yard cart. The wheel size, type, tread pattern and overall durability all factor into how easily your cart will roll across smooth concrete, bumpy gravel, spongy grass, mud, curbs and other terrain you’ll encounter.

Larger diameter wheels have inherent advantages for absorbing vibrations and impacts compared to smaller wheels. Think about the difference in riding over bumps on a bicycle with large 29″ wheels versus a BMX bike with tiny 20″ wheels – the larger hoops smooth out the ride. The same applies for utility cart wheels.

Look for pneumatic rubber wheels at least 10 inches in diameter, though 13 inch wheels are even better for maximizing shock absorption. The flexible tread squishes when hitting bumps or cracks, cushioning the cart’s load from jolts. Larger diameter wheels extend this cushioning effect further by virtue of their size.

Pneumatic tires also grip surfaces better than hard plastic or metal wheels thanks to the malleable rubber tread. When overloaded, they help prevent slipping, especially in soft soil that can cause rigid wheels to dig in. The extra grip keeps you in control.

Does the thought of eventually dealing with flat tires turn you off from pneumatic wheels? Thankfully, modern pneumatic cart wheels are less prone to punctures and slow leaks than bicycle tires. They have thicker treads and often foam-filled cores. Just be sure to inspect periodically for embedded thorns.

In contrast, small hard plastic or metal wheels force vibrations directly upward into the cart frame and load. It’s a teeth-rattling ride akin to a wooden rollercoaster. They also skid easily on slippery surfaces when braking or turning.

If you must opt for non-pneumatic wheels due to budget or maintenance concerns, at least choose those with some shock-absorbing capability. Thermoplastic elastomer (TPE) or polyurethane wheels have more give than cheap hard plastic. Just don’t expect the same smoothness as genuine rubber.

Tread patterns are important too, especially if you’ll go off-road on soil, grass or gravel. Deep, thick treads provide plenty of edges to grab terrain. Wider treads also increase stability when heavily loaded.

Before buying, scrutinize the overall wheel durability too. Give them a sideways push or flex test. Avoid thin wheels that deform easily – these will warp or crack prematurely. Hefty spoke construction better withstands impacts from curbs and debris.

Look for rubber or plastic hub caps to limit moisture entry, as well as ball or roller bearings inside the hub for smoother rolling. Lubricated axles and bearings further reduce friction and wear.

If choosing a folding utility cart, pay attention to the wheel attachments. Quick-release pins allow rapid detachment for storage, but should still hold wheels firmly in place when loaded. Or opt for wheels that fold inward without detaching.

Lastly, consider replacement wheel availability. Check if the cart manufacturer sells replacements or offers a repair option. Standard wheel sizes may also have third-party options, but unusual proprietary wheels could be hard to source later on.

By evaluating all these wheel-related criteria during your cart research, you’ll roll away with an aluminum yard cart that handles any terrain or load you throw at it while delivering years of reliable transport duty.

Carrying Capacity – Select a cart that holds your intended loads

Looking to Buy a Sturdy Aluminum Cart This Year. Discover the Top 10 Features to Look For

When researching aluminum utility or yard carts, one key specification to check is the overall carrying capacity. These carts come rated to haul anywhere from 150 pounds up to 1,000+ pounds depending on the model. Consider what you plan to use the cart for, then choose an appropriate weight capacity.

For light yard work like bagged soil, mulch, leaves, branches or garden tools, a capacity around 300 pounds should suffice. This allows you to move several bags of soil or a decent sized load of mulch in one trip.

For heavier materials like landscaping rock, cement blocks, lumber or paving stones, look for carts rated for 600 to 800 pounds. With that level of capacity, you can stack multiple cement blocks or several boards at once.

On a construction site, a 1,000+ pound heavy duty cart is ideal for loads like stacks of bricks, bags of concrete, power tools, and other bulky building materials. Just note these ultra-capacity carts are bulkier and less maneuverable than lighter models.

Pay attention to the lower tray dimensions too, not just the total capacity. Larger trays allow you to carry more irregular or bulky items. But super wide trays won’t fit through narrow gates or doors, limiting accessibility.

When estimating how much weight you can safely put on a cart, consider both the total capacity along with weight distribution. Centering the load over the wheels reduces strain. But an off-center load places more leverage force on one side, which could bend components or cause tipping.

Never exceed the cart’s overall capacity, as this risks permanent damage over time. If unsure about individual item weights, use a scale to check before loading up. An aluminum cart holds up well to its rated capacity, but overloading pushes its structural limits.

Also pay attention to weight capacities for accessories like cargo beds or platforms. These are often lower than the total cart capacity to provide a safety margin. Exceeding accessory weight limits stresses attachment points.

Storage is another consideration for cart capacity. Some folding aluminum carts have a lower hauling capacity than fixed models, since the folding joints and latches reduce rigidity. Just take care not to exceed the rated foldable capacity.

Inspecting the cart’s construction quality also gives clues to its true capacity limitations. Thick, reinforced aluminum and welded joints handle heavy loads better than thin steel and lots of fasteners. Test the flex of tray edges before purchase.

Finally, think about your future needs when selecting a cart weight capacity, not just current projects. Choosing a higher capacity cart leaves room to grow as your hauling tasks expand over time. Within reason, go bigger on capacity if you can afford it.

With all these carrying capacity considerations in mind, you’ll be well equipped to select an aluminum utility or yard cart able to safely transport the loads you need to move from project to project for years to come.

Foldable Design – Folding carts store easily when not in use

For convenient storage when not in frequent use, choose a folding aluminum utility or yard cart. Foldable carts collapse down into a slim upright shape, allowing you to tuck them out of the way in a garage, shed or other limited space.

Look for tri-fold or quad-fold designs with a simple release handle or latch to initiate folding. High quality folding carts will smoothly transition from fully opened to fully collapsed within seconds. Avoid models with sticky pivot points or that don’t fold flat.

Test the folding mechanism in-person before buying if possible. The cart should open and close effortlessly with the quick release latch, not require wrestling to get it unstuck. Durability matters too – will it still fold easily years later after exposure to weather and use?

Check how compact the unit becomes when folded. Some models allow the wheels to also detach for an even smaller storage footprint. Quick release pins enable fast wheel removal and reattachment after unfolding. Just ensure the folded cart is stable when standing to prevent tipping accidents.

If forced to store your cart outside year-round, choose a folding model with anti-rust components. Stainless steel hinges and powder coated aluminum prevent seizing up in damp environments. You don’t want a rusted solid cart that no longer folds.

While folding utility carts sacrifice some structural rigidity compared to fixed models, the difference is minor if well-designed. Avoid extremely heavy loads that could over-stress the folding joints. Most foldable carts safely manage 150 to 300+ pounds.

Wheels commonly pivot or fold inward on folding carts. If removed, ensure there is a way to secure them during transport so they don’t bounce around unattached. Detachable wheels do allow the smallest folded package size.

When unfolding, take care that latches fully engage and all pins are inserted before loading up the cart. You don’t want components coming loose when in use. Periodically check for loose hardware that may require tightening.

Foldable hand trucks are another option for vertically storing while saving space. These have a small footprint but lift less weight than carts. If you primarily need to move objects across short distances, hand trucks suffice.

Lastly, measure doorways, aisles and storage areas before buying a folding cart. While folding helps, some extra large carts still may not fit certain spaces when collapsed. Check all dimensions.

With a durable, quick-folding aluminum utility or yard cart, you get the best of both worlds – serious hauling capability when needed, then minimal storage space requirements after finishing the job. Just check build quality before purchase to ensure years of reliable folding functionality.

Ergonomic Handle – Comfort grip handles reduce strain and fatigue

Looking to Buy a Sturdy Aluminum Cart This Year. Discover the Top 10 Features to Look For

An aluminum utility or yard cart’s handle takes a beating during heavy duty use hauling loads over various terrain. Grabbing an uncomfortable handle hundreds of times can quickly lead to hand pain, blisters and fatigue. That’s why an ergonomic handle should be on your priority feature list.

Look for thick, cushioned grips made of rubber, foam or soft plastic. Contoured designs with thumb grooves provide a natural hand positioning. This even weight distribution prevents pinching nerves and reduces pressure points.

The grip material matters too. Rubber or thermoplastic elastomer (TPE) works well. They provide shock absorption while resisting surface abrasion from constant handling. Avoid hard plastic that digs into palms.

Proper handle length reduces back strain by allowing you to walk upright versus hunching over. Adjustability accommodates people of different heights. Telescoping handles offer length customization, though these add a potential failure point.

If multiple people will share the cart, adjustable handles are particularly helpful to dial in the perfect fit. Or look for well-placed fixed length grips to suit a range of users.

Handlebars that fold inward not only save storage space, but bring grips closer together for improved ergonomics compared to wide fixed handles. Just ensure the folding joints are durable and lock securely.

The attachment angle matters too. Upward angled handles allow your arms to rest naturally rather than forcing your wrists to bend back. This reduces muscle fatigue in the forearms and hands.

Handles extending behind the cart’s rear enhance control on grades. You can lean back to provide counterbalance when traveling down slopes. Side extended grips also improve maneuverability.

On folding carts, ensure the handle assembly collapses smoothly every time. Look for integrated locks and alignment guides. You want confidence it will fold properly without pinching.

Rubberized handle covers are a quick upgrade for basic grip comfort, though check their durability. Superior comfort comes from molded grips designed specifically for hand ergonomics.

Finally, give handles a shake test in the store if possible. There should be no rattling or rotation – signs of loose internal fasteners that will worsen over time.

Pushing and pulling a heavy cart repeatedly with an uncomfortable handle quickly leads to aching hands and arms. But ergonomic handles reduce fatigue, allowing you to move load after load efficiently and safely. Don’t underestimate the importance of grip comfort and design.

Tray Material – Steel or plastic trays prevent sharp edges and corrosion

Looking to Buy a Sturdy Aluminum Cart This Year. Discover the Top 10 Features to Look For

The tray or lower cargo bed is arguably the most critical part of an aluminum utility or yard cart, so pay close attention to the construction material and quality.

Bare unfinished aluminum forms the basic tray on many budget carts. Unfortunately, raw aluminum edges are sharp enough to cut skin and damage contents. Plus aluminum corrodes quickly with outdoor exposure.

Look for trays made from coated steel or heavy plastic instead. Steel offers durability at a lower cost than aluminum. Choose a powder coated or galvanized steel finish to prevent rusting. Plastic trays hold up well outdoors too.

Steel mesh trays provide excellent drainage in case of spills or rain, at the expense of smooth rolling for odd-shaped objects. Weave size determines cargo holding capability.

Inspect the tray corners and edges. Rounded profiles prevent snagging contents during loading/unloading. Recessed edges also reduce cargo sticking out where sides meet.

Trays with raised edges (versus flat trays) help contain loose or liquid loads. But make sure edges don’t block access from the sides, hampering insertion/removal of items.

Tapered trays narrow towards the ground for easier loading and tipping of contents. However, straight-walled trays maximize cargo volume and use more vertical space efficiently.

Plastic tray liners improve corrosion and scratch resistance if you’ll haul abrasive or corrosive materials frequently. Or line with a tarp for quick tray protection.

Separate cargo beds are popular accessories that sit inside cart trays. These allow custom sizing and materials. But weight capacity limits are lower than the total cart capacity.

Inspect plastic tray durability – are they flexible under pressure or rigid? Soft flexible trays can eventually crack. Test for sagging edges when stepping on corners.

Look underneath the tray too. Does it utilize supportive cross braces or contact the ground? Either helps prevent bent trays if overloading a cheap cart.

A final tip – measure tray dimensions against your common cargo sizes. Deep trays with steep walls limit overhang but make accessing contents harder. Get the optimal blend of depth and access.

In summary, choose a durable, corrosion-resistant tray material that protects cargo and simplifies loading/unloading. This critical cart component takes the most abuse over time, so durability is key.

Compact Size – Carts with small footprints fit in tight spaces

When choosing an aluminum utility or yard cart, consider the space you have available for storing and maneuvering before buying the biggest model that catches your eye.

Carts with a small, narrow footprint are extremely useful if you’ll need to navigate tight areas like small gates, narrow garden paths or cluttered garages. Wide carts simply won’t fit many spaces.

Measure doorways the cart will pass through, including at your home, shed, garage and any other storage areas. Compare these measurements to the cart’s dimensions to identify potential squeeze points.

Also check aisle widths in the garage, between vehicles, around landscaping areas, etc. Allow several extra inches of clearance on both sides for maneuvering. Tight fits require tricky steering.

Consider overhead clearance too for any low rooflines, ceiling joists or tree branches. While handles fold down on some carts, you still need room to pivot the cart itself.

The most maneuverable carts have a triangular 3-sided footprint rather than a square 4-sided shape. Three wheeled designs provide even tighter turning radii by eliminating a fixed rear axle.

If choosing a folding cart, verify it collapses into a slim profile that won’t hog space. Detachable wheels further reduce the storage footprint. Just ensure it’s stable when collapsed.

The tradeoff with super compact carts is reduced load capacity and smaller trays. Make sure to choose adequate capacity for your needs despite the small size.

On the plus side, low profile carts are easier to tip and empty. Their weight also makes them simpler to move in and out of storage.

If you’ll only use your cart in wide open outdoor areas, a larger cart likely makes sense to maximize hauling capability. But if space constraints exist anywhere along the way, carefully assess clearance.

Maneuvering a bulky cart through a cluttered garage or narrow passage is frustrating. Before buying, map the intended cart path to identify any tight squeezes. Then size your new aluminum sidekick appropriately.

Easy to Assemble – Simple construction with minimal parts needed

Looking to Buy a Sturdy Aluminum Cart This Year. Discover the Top 10 Features to Look For

Nothing’s worse than excitedly unboxing your shiny new aluminum utility cart, only to discover a jumbled pile of unidentified parts and vague instructions. Seek out designs that minimize assembly time and frustration.

Look for carts with pre-assembled major components like the tray, handle and wheels. Ideally, all that’s required is attaching a few sub-assemblies with a basic toolkit.

The number of fasteners is revealing too. Fewer bolts, nuts and washers mean less time wrenching and fewer opportunities to misassemble components.

If the wheels and tires must be attached, at least seek quick-locking push-in designs versus threading bolts through multiple holes. The same applies for handles and pivoting joints.

Clear visual diagrams and well-written instructions ease the assembly process. Supplemental video instructions are even better for complex constructions. Avoid vague cart packages missing these helpful resources.

Pay attention to the fastener types too. Tool-less assembly is ideal, but unlikely on metal utility carts. Look for basic nuts and bolts rather than specialty fasteners requiring obscure tools.

Wheels that clip on via built-in push buttons or spring-loaded pins simplify installation versus tedious lug nuts that must be tightened just right. Snap-together plastic components are also convenient.

Seek carts with fittings and fasteners secured in place, not loose bags. Loose pieces inevitably get lost, delaying the assembly process.

If choosing a folding cart, ensure the folding joints and latches are intuitive and execute smoothly. Test the folding mechanism in the store if possible prior to purchase.

Avoid carts requiring tricky alignment of components and multiple people to hold pieces steady during assembly. This unnecessary complexity leads to mistakes.

Finally, assess the amount of lifting and physical effort involved. Assembling huge heavy carts on the ground can be challenging. Seek lightweight modular designs when possible.

Quick and easy utility cart assembly allows you to start hauling loads sooner. Seek out well-designed Carts that prioritize intuitive construction using basic tools and components.

Cost Effective – Compare prices to find an affordable high-quality cart

Looking to Buy a Sturdy Aluminum Cart This Year. Discover the Top 10 Features to Look For

With aluminum utility carts spanning a wide range of prices, take time to research and find the best blend of affordability and quality within your budget.

Entry-level carts typically cost $50 to $150. These make sense for light duty use. But durability and longevity are limited by their thin aluminum tubing and plastic wheels.

Mid-range carts in the $150 to $300 range offer better construction with thicker aluminum, steel trays and pneumatic tires. They handle medium loads well.

Commercial grade heavy duty aluminum carts normally cost $300 to $600+. Their robust frames, huge capacities and overbuilt components are ideal for frequent intense use.

Compare specifications between models rather than assuming higher prices automatically mean better quality. Key indicators include tubing gauge, tray material and wheel type.

Also factor in replacement part availability. Proprietary designs that only work with one obscure cart may have limited aftermarket support. Standard component sizes offer more options.

Consider your planned usage amount too. A $200 mid-duty cart used daily for years offers better value than a $50 cart that falls apart after a month of weekend projects.

Narrow your search to 2-3 models in your budget that meet your capacity, size and feature needs. Then compare prices and warranties.

Check companies’ reputations as well, either through reviews or seeking personal recommendations. Poor customer service can quickly negate any deal.

Remember to account for accessories like side tables and cargo beds too. These optional add-ons enhance versatility but increase costs.

Periodically scan for sales around major holidays when retailers discount less popular cart sizes to clear inventory. But avoid used carts with hidden wear and tear.

With attention to construction quality instead of just price tags, an affordable aluminum utility cart delivers years of reliable service for your money.

Manufacturer’s Warranty – Look for at least a 1-year limited warranty

An aluminum utility cart represents a significant investment, so protect that purchase with a solid manufacturer’s warranty just in case issues pop up.

Seek out carts with warranties of 1-year or longer. This gives you adequate time to put the cart through its paces and uncover any defective components.

Read the fine print to understand exactly what’s covered. Some warranties only cover initial manufacturing defects, not normal wear and tear breakdowns.

Damage from overloading is often excluded, so be realistic about cargo capacities. Also check if accessories are covered or just the main cart.

Look for warranties with inclusive language like “all components” instead of vague statements open to interpretation. You want certainty that critical parts like wheels and folding joints are covered.

Understand the claim submission process as well. Do you need to ship back the entire cart on your dime? Can photos of damage be submitted instead?

Seek lifetime warranties on critical components prone to wear like wheels and bushings. This adds confidence in their long term durability.

Compare warranty terms between cart manufacturers. More detailed and longer policies signal added quality assurance and durability testing by the brand.

Register your cart warranty as soon as you complete the purchase. This serves as proof of ownership if filing a claim down the road.

Confirm that contact info is easy to find for submitting future warranty claims. Difficulty reaching support equates to denied coverage.

Even with a solid warranty, proper maintenance and avoiding overloading preserves your cart’s lifespan. Don’t rely solely on the warranty for carefree operation.

Overall, a worthwhile manufacturer’s warranty demonstrates faith in the cart’s quality while offering peace of mind. Just ensure you understand exactly what is and isn’t covered before buying.